Act 4, Part I: Castle Fairloch, Lords' District, Hocarum Desert, Dire Crossing:
The Fall of Aielund
To Dream, perchance to sleep...
All shall fall in glorious death! - Ironlord.

Fort Highmarch (Interior)
I awaken from another Ironlord nightmare to find myself in my chambers at Fort Highmarch. According to my journal, for two years since the victory against the Ironlord I have commanded Fort Highmarch. We were all stunned to learn that King Seamus decided to keep the Armor of the Ironlord for himself, following in the footsteps of his ancestor, Alaric (the 200 year-old man who fell out of the minogon exoskeleton at the siege, and the founder and first ruler of Aielund). In addition, apparently we're still at war with Tusone (despite my efforts in Trinity) and the King has now managed to offend the Athkalatrans with regard to a territorial dispute. Is the suit making him careless, or is it manipulating him in some insidious manner? Anyway, let's see what Criosa has to report regarding her demented father...
Ah, at last. Come, speak with me my friend. - Criosa.
Criosa is flanked by her pompous aide, Nigel. Ugh, not this outlandish fop again...
The short of it: Criosa and I hatch a plan to convince the Council of Lords to remove the deranged King Seamus from power. I must travel to Fairloch and confront the Council ASAP.
Fort Highmarch is basically locked down, you can neither head through the north gate nor south drawbridge, meaning you can't access the regions in those directions. Access to the vamps is also denied and there's no sign of the Baron and Saffron. Celebrith has returned to Acadia, but the inn and three main merchants are still open for business.

Before leaving, I settle a trivial dispute between Lady Deirdre and Mister Wainwright (+800, +1500 EXP).

I'll be traveling to Fairloch by means of Criosa's "fine looking conveyance" (- DM). Meh, I think I deserve my own and gold-gilded, but this'll have to do...

Lord's District: Fairloch
I arrive at the Lord's District in Fairloch where a protesting rabble have turned up to jeer at me.
Look at you, strutting around in your fancy clothes. You're walking on the backs of decent hard-working folk like us!
My cousin is in the army and I haven't heard from him in a year. Please, just tell me if he's still alive!
Don't you people have enough money? Lower our taxes!
The bank foreclosed on my bloody house. Where am I supposed to live now?
- various understandably disgruntled commoners.
Best you keep moving madam, this could turn ugly at any moment. - City Watchman.

I discipline a City Watchman en route to the House of Lords (+800 EXP).

House of Lords (ground level)
Terrible fracas outside. Most unseemly. Not like the old days, you could count on mobs of people to conduct themselves in a more dignified fashion! - Councilor.
This used to be the Senate Building, where we had the showdown with the Shadow Monks and Sen. Johnson. A few councilors linger in the halls, and trivial treasure can be looted in the various receptacles.
House of Lords (first level)
In this chamber sixteen councilors are in session led by Lord Covington, the House Speaker.

What is the likelihood these Lords will turn against their King who dissolved the senate and appointed them to these positions of power?


I head off to the Royal Arms inn to await the councils resolution. A series of brief cutscenes ensue (with appropriate brooding cello piece - the music in this Saga is A1).
Firstly, Lord Covington betrays me to his liege, King Seamus. That bastard...

Secondly, many knights and Terinus raid the inn. I am king-hit by a knight and captured by the authorities.
By order of the King, you are under arrest! - Terinus.

Don't worry, I will get you out of here! - Criosa.

Thirdly, I am judged.
You have been found guilty of high treason and will be executed at dawn. - King.
Father, no! You cannot do this! - Criosa.
You are in league with this traitor? Then you too will be punished! - King.

And lastly, I am executed...
For your treachery, you are to be executed by firing squad. Sentence to be carried out immediately. - spineless Duke Montague.
Archers! Stand ready!
Take aim...
Loose!
*PC is executed*
Pity. - Terinus.

Hocarum Desert: Chasm
*PC is raised from the dead by Nellise*
You awaken with a terrible headache. - DM.

The short of it: my body was smuggled out of Fairloch by Nellise at the behest of Criosa (who has been exiled from the Kingdom of Aielund).

The angelic trio reforms! *group hug*
We must travel to Tusone and seek the aid of King Osric.

I stand in what amounts to rags (Death Shroud and Shadowed Hood). I don't even have a weapon. All of my phat lewt is gone, including six full inventory layers, twelve full Bags of Holding and about 300,000 GP! Plus muh Barony!
Nellise managed to salvage some light items from my body, namely the Ring of Elemental Earth (Greater Stoneskin 1/day), Belt of Fire Giant Strength (+5 STR), Amulet of Natural Armor +5, Ring of Regeneration (Regen +4), Nymph Cloak +4, Panther Figurine (capped at lvl 20?) and a few lousy potions. Better than nothing, I guess.
Criosa comes "complete" with Criosa's Armor (DR 10/+4), Healer's Kit +6 (4) and a Dagger +0! (I borrow her dagger for now.)
Oddly, she's been adjusted from Rogue (15) / Wizard (9) to Rogue (12) / Wizard (12).
Nellise is grateful to at least have her Priest's Robe (+2 AC vs. evil), a Mace and Healer's Kit +3 (4).
Ok so! Time to leave the camp and start adventuring again!
East of the campsite is a destroyed bridge, still aflame.
I destroyed the bridge to prevent anyone pursuing us. There's no turning back now. - Criosa.
Without the bridge, any pursuit should be thwarted for a good long while. - Nellise.
Two scurrying scorpions (+12 EXP ea) are squished en route to the western end of the map.

Desert Highway
Three ravens flap lazily away as I approach a body lying on the road.

It would seem this traveler has met an untimely end. - Nellise.
What was your first clue, Captain Obvious? Could it be the...
... Arrow-filled corpse? Tattered Leather, Tarnished Gladius (yes, a weapon for me!), Empty Water Bottle, Composite Shortbow +2, Bodkin Arrow (20), Arrow (99).
The ravens unnervingly continue circling overhead, waiting for us to leave... or also die.

An injured old man resting nearby (Najjar) knew the dead man, and will die of thirst if we can't bring him water soon.

Tusonite Outpost
Ah, the Aielund/Tusone border. I hope the guards are not too suspicious of us... - Criosa.
You must be careful here, one false move and the border guards will likely attack us. - Nellise.
This outpost is guarded by a Tusonite Commander and six unmounted Chevaliers.

Yeah, these guys aren't letting in those whom they perceive as lowly desert-roaming vagabonds, that much is certain. The gate can be bashed down (eventually!) or Criosa can attempt to unlock it, fail in her attempt (DC-50 [success not possible]), and then cast Knock to open it. However, the guards obviously go hostile and they're extremely difficult to beat with little or no items. They also keep spawning, and in greater numbers. Moreover, it doesn't look like there's a way through there, anyway.
The journal hints of another entrypoint to Tusone "in the west", but the only other exit on this map is in the southeastern corner, which we now take.
Hocarum Desert: Ruins
Poised in the sand, ready to strike, are several Huge Desert Vipers (+380 EXP ea). With our noob weapons, these things aren't exactly cakewalked.

Level Up to 25!
(Epic Characters)
Lilura1: Champion of Torm (9) / Paladin (12)/ Fighter (4), +1 STR, Armor Skin, Great Strength I
Criosa: Rogue (13) / Wizard (12)
Nellise: Cleric (23) / Paladin (2)
We start scavenging for gear, looking for anything to equip ourselves with (but a longsword would be nice...)
Chest: Cudgel, Light Crossbow, Bolts (198), Empty Water Bottle.
Spear rack: Quarterstaff, Spear.
Atop a crumbled lookout sits a pile of bones: Tarnished Scimitar, Shortbow, Bodkin Arrow (40), Arrow (99).
At this stage, we'll take what we can get. Beggars can't be choosers.

There is a "big hole" in the southeast which we peer down into - we judge it to be deep, and would need some rope to climb down there.
An ancient stone structure stands prominently in the center of the map.
This appears to be an ancient temple to one of the forgotten gods. We should be very careful if we venture inside. - Nellise.
Mmm... maybe we'll find some rope in here...

Ruined Temple
This place has been abandoned a long time. Let's take whatever's useful! - Criosa.
In a central room stands a Statue with some coiled up rope at it's feet. I pick up the rope and the statue comes to life. I was ready for a very difficult and drawn-out fight here, but Nellise simply cast Implosion against which the statue failed it's save (+1292 EXP, Helm of Maecal [-4 CHA, +4 AC def, Imm: Fear, Power Word, Stun [13] 1/day) various crafting components).

The receptacles in the northeastern room are looted for: Empty Water Bottle (2), crafting components, Ancient Tome (cannot read, lack Lore [+8 is not enough]), scrolls of Raise Dead, Resurrection, Greater Restoration and Heal, Potion of Lore and a set of Rusted Chainmail.
The southernmost room has its floor littered with various crafting components.
Before the door leading to the westernmost room spawn four Skeletal Guardians (+12 EXP ea). Nellise immobilizes a few with turn undead, and the rest we dispatch of the hard way.

Criosa unlocks the DC-40 door to a tomb.
It would appear to be the burial chamber of one of their high priests. - Nellise.

There are eleven sarcophagi in the tomb, the head sarcophagus containing: Ancient Full Plate (+4 AC arm mod, Slash resist 5/-), Ancient Scimitar +4, Chain Helm (+1 AC def, Disc +1), Empty Water Bottle, Amulet of the High Priest Maecal (+5 AC nat, Imm: Death/Disease, Regen +1, SR 28.)
Upon retrieval of these items a Revenant manifests. I don the items as it manifests, before combat begins (you can't put armor on if combat is already engaged).
Die, thief! - Revenant.

Again I prepare for a tough fight, but Nellise simply casts Banishment on this undead foe (+1275 EXP).

As we backtrack out of the temple, Nellise casts the uber-helpful Earthquake, Circle of Doom and Flame Strike on six newly-spawned Blade Spiders (+152 EXP ea).

Nellise definitely wins the MVH award (Most Valuable Henchman) so far in the Saga. It will be difficult if not impossible for any other Henchman to top her performances with only one Act remaining.
Rope in hand, we exit the ruined temple.
Hocarum Desert: Ruins
Back outside, the Revenant intercepts us and demands the return of the amulet.
Returrrnnn my amulet! - Revenant
We refuse.
Revenant bout: Round Two (+1140 EXP).

We now use the rope we found in the temple to climb down into the deep, dark hole.

You climb down through the darkness. - DM.
Ancient Cave
This is not a cave.. it seems to be some sort of buried building. - Criosa.

Here we crush five Giant Ant Soldiers (+12 EXP ea) and one Giant Ant Hive Queen coated with stone (+152 EXP).

Amongst piles of bones we find a Crumbling Journal, Ancient Journal (cannot read either, lack Lore [+8 is not enough]) and Belt of Fire Giant Strength (+5 STR).
So that's the forth "book" I haven't been able to read due to low Lore skill. For those who enjoy extra flavor, do not skimp on Lore!
We climb back up the rope, out of the hole, and then head south into the...
Hocarum Desert: Oasis
Returrrnnn my amulet! -
Again we refuse.
Revenant bout: Round Three (+1140 EXP).

An oasis! Just what we needed, thank God. - Nellise.
If this is the only water around, there will most likely be other creatures here too. Let's be careful. - Criosa.

Submerged in the water are six Crabs (+12 EXP ea) and one Giant Crab (+988 EXP).

Criosa cast Fireball and Nellise Word of Faith and Storm of Vengeance, but the giant uber-tanky crustacean doesn't flip over and die without many additional slashes from my Ancient Scimitar.

I now fill five bottles with water from the ponds in the oasis; then we backtrack north to the ruins, and north again to the Desert Highway where we hydrate the most grateful Najjar (+1000 EXP, +1500 EXP).

Backtracking south to the ruins and then heading west from there, we reach...
The Dire Crossing
Returrrnnn my amulet!
Never!
Revenant bout: Round Four (+1140 EXP).

The heat in this area is far more intense than before. Thankfully you have a good supply of water with you. - DM.
So thirsty... please, give me some water! - Criosa and Nellise. (I give them both a Full Water Bottle each.)
Without water, this place kills you before you can reach the opposite side. We also take environmental fire damage, simulating the extreme heat.
So many have died here.. this is a terrible place, and I'll be glad to put it behind us. - Criosa.
Amazing. This stone skull must have been worshipped as some sort of desert deity. - Nellise.

We spy another Tusonite Outpost up ahead, maybe we'll have better success parleying with these guys..?

Act Four, Part II: Tusonite - Aielund Desert Battle, City of Myrfell:
Tusonite Outpost
We've now come into Tusone from the west, avoiding the "heavily guarded against Aielund" eastern side.
This second military outpost consists of six Tusonite Footsoldiers, three Tusonite Chevaliers (mounted, unlike the last lot) and two Tusonite Clerics commanded by General Adroine.
A footsoldier refers us to the General.

These hard-pressed Tusonite forces are attempting to repel Aielundian invaders. We strike a deal with the General: we help him fight off the Aielundian force and, in return, he takes us to meet the Tusonite King. Note: funny comment at bottom.

As the General and I come to an agreement, an Aielundian Knight-Commander trots over to parley.

There is mention here of the priesthood brainwashing Aielundians into thinking the Ironlord armor was gifted to King Seamus by God. I then fail my persuasion check against the knight, which means a diplomatic solution is now out of the question.

The Knight-Commander now confidently trots off to ready his force for what he's convinced will be an easy victory.

With battle imminent, the trio quickly scavenge for supplies stored behind the tents: Arrows of Impact (594), Armor-Piercing Bolt (495), Giant's Bane (18), Healer's Kit +6 (6), Healer's Kit +10 (4), scroll of Raise Dead (2) and various average and strong traps. Most important is the ammo for Nellise and Criosa's ranged weapons.
About one minute passes before the Aielundian force comes into view on the horizon.
Here they come... hold the line, for your King! - General.
The initial wave consists of three knights, three archers and one each of halberdier, war wizard and war cleric.
Nellise of course shines in the battle, casting an array of devastating AoEs over its course.


As the Aielundian units are defeated, they're quickly replaced by reinforcements...


We must have taken out seventeen knights (+12-60-121 EXP ea) and three or four Knight-Commanders (+380 EXP ea)...

Looted from corpses in the aftermath of the battle: Bolt +5 (198), Bolt +1 (a few hundred) Longsword +4 (2), Longsword +3 (3), Grey Wizard's Robe.
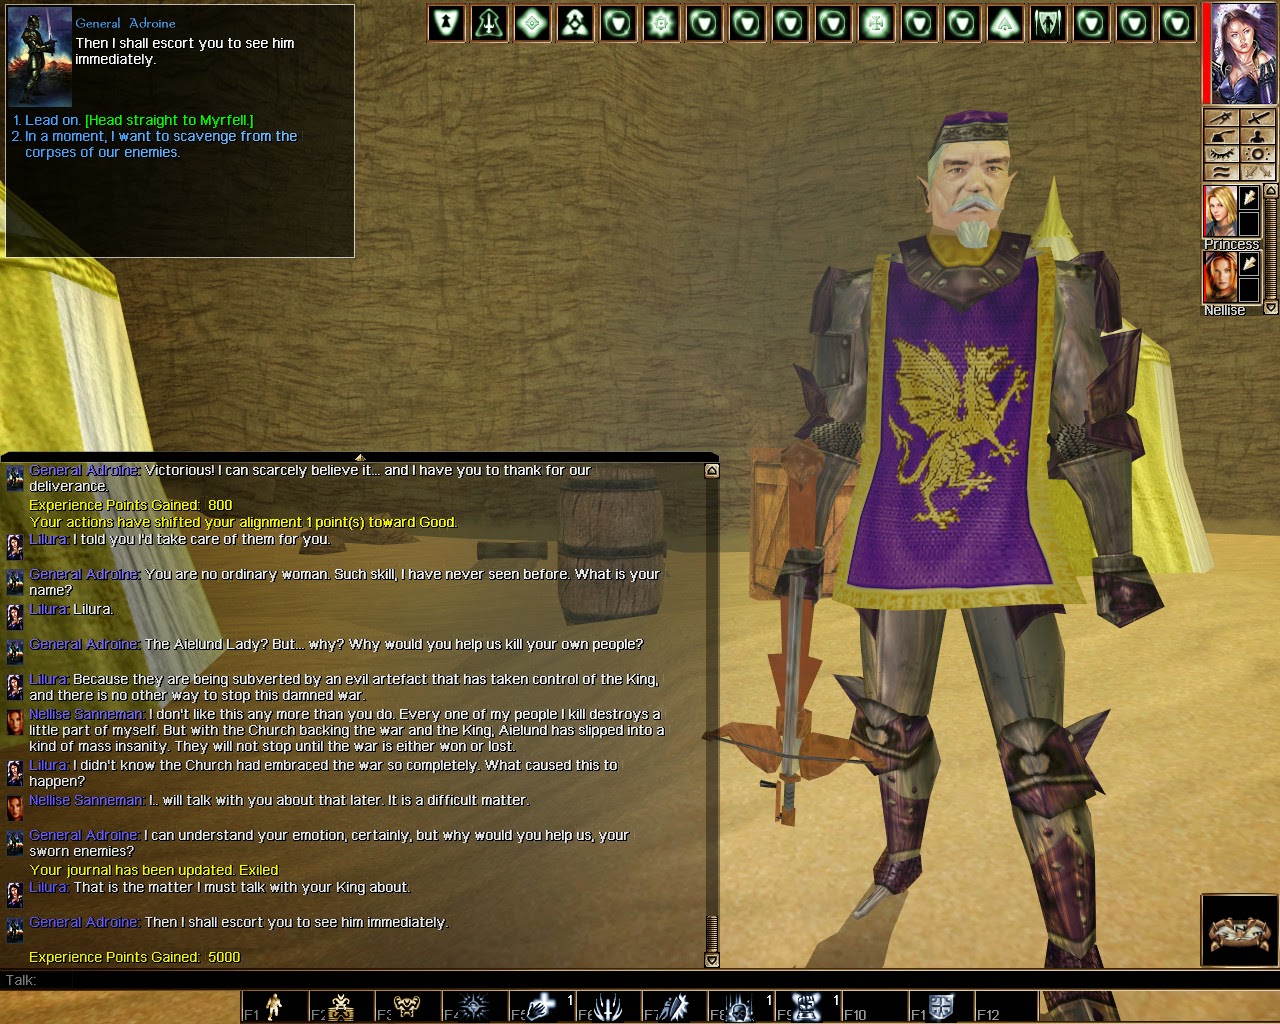
Victorious in repelling the Aielundians, we now return to General Adroine who is happy to fulfill his side of the bargain (+800 EXP, +5000 EXP).

The commander escorts you into the capital city and takes you directly to the palace. - DM.
City of Myrfell, capital of Tusone: Palace

General Adroine introduces us to the amusing King Osric Davignon whom I beseech to aid us in the removal of crazed King Seamus from the throne of Aielund (+800 EXP).
In this dialogue I finally max out my Lawful alignment to 100 (Good was maxed loooong ago), so I now earn the title of Crusader. I don't believe Aielund Saga reacts to this title, though.

I tell King Osric that in order to dethrone King Seamus we first need to acquire the Scepter of the Ages from Terinus, by means of an elite strike force assault on Castle Fairloch. However, in order for this to happen the King has to divert attention away from the castle by staging an attack on the city.
The King now takes his leave to confer with his military advisors. In the meantime, we are invited to take a tour of the city of Myrfell, if we so desire. So, questing time!

Level Up to 26!
(Epic Characters)
Lilura1: Champion of Torm (10) / Paladin (12)/ Fighter (4), Epic Prowess, +2 to AB, saves, and "divine" dmg (damage increase) for reaching CoT 10. Nice!
Criosa: Rogue (14) / Wizard (12), Uncanny Dodge IVNellise: Cleric (24) / Paladin (2)
Myrfell: Government District

(Myrfell consists of three districts: Government, Commerce and Docks. There is an accessible sewer system beneath the Commerce District).
I have heard much of Myrfell, but have never seen it first-hand. It is smaller than I had imagined. - Nellise.
I had hoped we'd left the heat behind us! This place is an oven! - Criosa.
We skip across the street to the Myrfell church where I spy a +4 WIS hood for Nellise. We can't afford it right now, though. Or anything, really. We need to do some quests!

Next up, we visit the impressive mage tower.

Inside, Archmage Michel Dupont explains his ice elemental-powered air conditioning system; then requests our services in destroying a massive ice elemental of which he lost control, currently residing in the sewers - to which he hands us the key.

Government District: Sewers
The sewers are bitterly cold, a sharp contrast from the sweltering streets above. - DM.
Frozen-solid rats, lol! They can be shattered for +12 EXP ea...

Frostillicus must be mighty indeed to have frozen this entire sewer system. - Nellise.
We track down the roaming elemental behemoth and throw everything we have at it (+380 EXP).

Frostillicus splits into two, not once...

... but twice... tough little blighters, these!

With Michel's rebel creation finally disposed of, we return to him and are rewarded with any one of these: Antique Armor +5 (DR 10/+3, Imm: Knockdown), Staff of the Archmagi (Haste, several spells with charges) or Epic Bracers of Archery (Weapon Focus, Weapon Specialization, Epic Weapon Focus, Epic Weapon Specialization: Longbow/Shortbow).
I accept the bracers and gift them to Criosa for +6 bow damage.

Myrfell: Commerce District
We come across a man praying outside his home...
Charles Bodine's wife has been kidnapped by The Syndicate, organized criminals who control the Docks. We offer to find and return her, but not right now.

In the Myrfell smithy we agree to assist Gaston Case in clearing his debt with an underworld figure known as Rene who can be found just west of here, in the Business Club.

(Harbin - proprietor of The Long Shot Bowyer & Fletcher - does not offer a quest).
The Business Club
You be real nice or I'll rip your bloody arms off. - Half-orc bouncer.
Having given the Half-orc bouncer the password ("liberty"), he opens the door.

It seems every city has it's seemy side. I don't care for this place at all. - Nellise.
A pianist entertains the patrons as we ask the bartender to see "The Boss."

This reputable es-tab-lish-ment. Um, that mean you watch yourself or me thump you. - Half-orc bouncer.
Behind the common room stands Rene with his two uncouth associates.
Go away you annoying peasant. - Meram.
Get lost. - Nathell.
In order to cancel Gaston's debt, Rene requests that we procure three valuable portraits from Pascal Rousseau's estate in the Government District.

Hardly a paladinly action, but I receive +800 EXP for lawfully objecting to break n enter, after which Rene assures me Pascal is no angel. Oh well, whatevs. Let's do this.

Pascal Rousseau's estate
We arrive at the Pascal's estate under cover of darkness.
Criosa unlocks his front door (DC-45).

Startled out of gazing deeply into a portrait on the wall, Pascal Rousseau runs up and demands to know wtf we're doing in his home. Was ever a fairer question asked? Well, we're here for your "ladies", and we're not leaving without them.
*Pascal snaps*

Pascal is a rapier-wielding weapon master, and is the first whirlwind user I've encountered in this Saga. WW attack sounds great and the animation is showy, but it's utterly useless.
Needless to say, this pansy is roflstomped for +152 EXP and his corpse is looted for the Blademaster's Outfit (Haste, Bonus Feat: Defensive Roll, Piercing resist [10/-], Parry +12), Tactical Rapier +4 (Keen, magical +3, Mass crits: 2d6), Ring of Protection +5 and Belt of Agility +4.
Two Rousseau House Guards were owned on the side for +12 EXP ea and Falchion +2 (2).

Sitting on a bookshelf here is a copy of A Brief History of the Kingdom of Tusone. Since the author bothered to do lore write-ups, I should probably at least post a screen of the efforts he went to in fleshing out his world - it's good stuff!

Wall-mounted on this floor is one of the three priceless portraits by the artist Anatole Badeua: Angelique. We gently lift it from the wall and take possession of it.

Criosa unlocks the door to upstairs (DC-42), then unlocks/detraps the door to Pascal's bedroom (DC-42/45), wherein a rather odd enemy attacks us: The Luggage, an animated chest (+988 EXP).

The two other portraits are found mounted on the walls of this room, opposite to each other: Susanne and Victoria. We now have possession of all three portraits.

Also looted in the bedroom is a Lesser Ioun Stone: Pink (CON +2), Expensive Dress (needed to be ID'd, sells for 1 GP...), Expensive Clothing (sells for 3 GP...), precious gems and jewellery etc.

The portraits are delivered to Rene back at the Business Club (+1000 EXP). The hard-to-please Rene now wishes us to procure for him the Valdelay gemstone, a Tusonite artefact. I am to assume the name of "Devereux" and meet Jimmy at the Dockside Arms tavern where I'll negotiate for the gemstone as a middleman.

Dockside Arms tavern
Upon entry we spot the shifty Halfing, Jimmy, looking over his shoulder at us.

I fail my persuade check, but it auto-succeeds and Jimmy flicks me the gemstone. How easy was that..?

Myrfell Docklands
... Too easy.
You catch a glimpse of Jimmy as he comes running out of the tavern. - DM.
Looks like he's running off to his ship.

In pursuit of Jimmy we enter the Scarlet Lady by means of the forward hatch.

Ah, crap. - Jimmy.
Jimmy now flicks us the real Valdelay Gemstone, and warns us of the Syndicate. We buff up before returning to the pier.

Sure enough, no sooner have we stepped off the Scarlet Lady, we're intercepted by the Syndicate.

Led by Devon, they demand the gemstone. We refuse to hand it over. A dance of death ensues.
Sneak attacking thugs now stubbornly train on their soft targets, inflicting deep cuts on both Nellise and Criosa, but their night out is ruined by four crits from me inflicting about 70 damage each (+60 EXP ea, Short Sword +3).

The cat-like Devon then moved in on Criosa to sink his dagger into soft royal flesh, but was ended soon after by a tremendous blow from a buffed holy warrior (+380 EXP, Dagger of Assassination +3 [on-hit DC-14 vorpal, Evil only]).

The cowardly bard-thug hangs back to sing and conjure a Dire Tiger with Summon Creature VI; then follows up with Darkness. His crow-like cry of death echoed throughout the Docks, and then all was silent but for the lapping of the waves (+121 EXP, Bardic Leather Armor [Bonus bard spell slots lvl 3/4]).

We now head back to the Business Club and deliver the real Valdelay Gemstone to Rene: +5000 EXP. He warns us never to return, or we'll be killed.
We inform Gaston that Rene has released him from debt: +1000 EXP, Gaston's Longsword +5 (Keen, Mass Crits 2d6, on-hit DC-14 Slow). Not bad, but a definite downgrade from my Angelfyre Holy Avenger.

Time to take out the Syndicate, after which we'll return to this district to take out Rene for threatening us.
The Northern Star - Syndicate vessel
You walk up the gangplank onto the ship. - DM.

My Lawful warning to the Syndicate Sailors yields +800 EXP, but doesn't stop the three fools from attacking us (+12 EXP ea, Scimitar +2 [2]).

Criosa unlocks the DC-45 door to belowdecks.
From the Captain's empty cabin, we duck down a stairway hatch to the deck below where we're caught off-guard by five Syndicate Thugs (+12 EXP ea, Short Sword +3 [5]).
(This is how wealth is built up, looting many corpses of enchanted weapons which then sell for a pretty penny).

We descend to the lowest deck whereon four more Syn-thugs assail us, but they are effortlessly dispatched and then looted (+12 EXP ea, Short Sword +3 [4]).
At one end of this deck we locate Elan Bodine and five other female slaves, whom we free from captivity (+200, +100 EXP [x5]).

Climbing back up to the middledeck...
There are the bastards who let my cargo free! Kill them! - Captain Edgar Vance.
My bitch-slapping of this Syndicate Wizard causes him to fizzle Horrid Wilting (+12 EXP, Greater Hood of Clarity [+4 INT, Conc +10, Bonus feat: Slippery Mind]).

Now I duel the despicable Vance, dual-wielder of whip and kukri (+684 EXP, Whip +3, Black Lotus +4 kukri (on-hit DC-16 poison -STR).

We return to the grateful Bodine couple for +5000 EXP and the Boots of Striding +6 (CON +6) which bestow a very welcome HP boost.
Thank you for freeing me, I can never repay you for your heroism. - Elan.

From here we now march over to the Business Club to wipe out Rene for daring to threaten our lives.
Oddly, the bouncer at the door isn't hostile, but everyone excluding the patrons inside are - including three Half-orc Bouncers, the Bartender and Rene himself.
An all-in brawl ensues in the common room.
The raging barbarian bartender (+12 EXP, Club +4) and bouncer trash is taken out first (+12 EXP ea, Dagger +2 [6]).

Rene foolishly leaves the backroom to wade into the fray, going straight for Nellise who pissed him off in conversation, coming so close to killing her it wasn't funny. Luckily I was flanking Rene here, otherwise he would have survived another round and Nellise would have been dead. From his corpse we loot: Dagger +4 (2), Amulet of Natural Armor +4, Armor of the Night (Haste, Hide/Move Silently +12, Imm: Darkness, Darkness [3] 5/day, Ultravision [6] 1/day). What a pity he didn't surrender so that we could force him to hand back the portraits and gemstone - the snob's tears would have been delicious.

We now sprint to the backroom, where Rene should have stayed hidden along with the much smarter Meram Ryskill and Nathell.
Meram casts Time Stop...

... followed by Greater Planar Binding (Death Slaad); then unleashes Meteor Swarm behind the slaad and Nathell, but I just bust Nathell's nose (+12 EXP, Sword of Many Blades [Blade Barrier (11) 1/day, Respectable Citizens Attire [DR 5/+4, SR 20]) to get to the Halfling wizard, who then joins him in the after-life one round later (+12 EXP, Bracers of Armor +5).

Back outside, the Half-orc door bouncer is now hostile. It would have been more amusing if he simply ran off, but wiping the floor with him as we left was also funny.
Having completed the jobs available to us in Myrfell, we now sell off all unneeded loot acquired during our questing, thereby amassing a tidy sum of about 300,000 GP. I now purchase for Nellise the Cleric's Hood (+4 WIS, Conc +10); for Criosa the Greater Amulet of Health (Imm: Disease, Level/Ability drain, poison, Regen +1); and for myself a Wooden Tower Shield - after which we're still sitting pretty on a mound of about 200,000 gold.
Palace Revisited
Our timing in returning to the palace is of course impeccable. Just as we enter, King Osric - flanked by his Master-At-Arms - strides out to the throne room, having finished conferring with his advisors. After he's done critiquing our escapades in his city (the Ice Elemental, Rene, the Syndicate), the King now announces that he wishes us to work together in our attempt to dethrone King Seamus.
He now permits his Master-At-Arms to speak, which adviser presents a plan to hire mercenaries to attack Fairloch (since the Tusonite forces have been depleted by the war with Aielund). I Lawfully express concerns of mercenary loyalty (800 EXP), but King Osric assures me they'll be well-paid veterans who will see the campaign through to its conclusion.
The mercs will be recruited from Trinity, a desert town bordering three nations, known for its neutrality and as a merc gathering point (we've been there - it was our hub for seeking two of the Scepter pieces, and where we first encountered the Ironlord). We must first head east to the marshlands near the Aielundian border, where General Duquesne will show us to a Tusonite representative who will oversee the merc transactions for us (500,000 GP is involved).
Fully prepped, we head immediately to the Eastern Front in the marshlands.
Act Four, Part III: Eastern Front, Battle for Bracksworth:
The Eastern Front: a gloomy marshland
Here the trio meet up with a Tusonite Cleric (Cleric [10]/Monk [6]) and two Tusonite Footsoldiers (Fighter [12]) who have been ordered to accompany me into battle, if I so request them to. I don't bother recruiting them, though. Moreover, Nellise and Criosa now buff me fully in readiness for what I decide this time will be a solo mission, at least at first.

Victorious in repelling the Aielundians, we now return to General Adroine who is happy to fulfill his side of the bargain (+800 EXP, +5000 EXP).
The commander escorts you into the capital city and takes you directly to the palace. - DM.
City of Myrfell, capital of Tusone: Palace

General Adroine introduces us to the amusing King Osric Davignon whom I beseech to aid us in the removal of crazed King Seamus from the throne of Aielund (+800 EXP).
In this dialogue I finally max out my Lawful alignment to 100 (Good was maxed loooong ago), so I now earn the title of Crusader. I don't believe Aielund Saga reacts to this title, though.

I tell King Osric that in order to dethrone King Seamus we first need to acquire the Scepter of the Ages from Terinus, by means of an elite strike force assault on Castle Fairloch. However, in order for this to happen the King has to divert attention away from the castle by staging an attack on the city.
The King now takes his leave to confer with his military advisors. In the meantime, we are invited to take a tour of the city of Myrfell, if we so desire. So, questing time!

Level Up to 26!
(Epic Characters)
Lilura1: Champion of Torm (10) / Paladin (12)/ Fighter (4), Epic Prowess, +2 to AB, saves, and "divine" dmg (damage increase) for reaching CoT 10. Nice!
Criosa: Rogue (14) / Wizard (12), Uncanny Dodge IVNellise: Cleric (24) / Paladin (2)
Myrfell: Government District

(Myrfell consists of three districts: Government, Commerce and Docks. There is an accessible sewer system beneath the Commerce District).
I have heard much of Myrfell, but have never seen it first-hand. It is smaller than I had imagined. - Nellise.
I had hoped we'd left the heat behind us! This place is an oven! - Criosa.
We skip across the street to the Myrfell church where I spy a +4 WIS hood for Nellise. We can't afford it right now, though. Or anything, really. We need to do some quests!

Next up, we visit the impressive mage tower.

Inside, Archmage Michel Dupont explains his ice elemental-powered air conditioning system; then requests our services in destroying a massive ice elemental of which he lost control, currently residing in the sewers - to which he hands us the key.

Government District: Sewers
The sewers are bitterly cold, a sharp contrast from the sweltering streets above. - DM.
Frozen-solid rats, lol! They can be shattered for +12 EXP ea...

Frostillicus must be mighty indeed to have frozen this entire sewer system. - Nellise.
We track down the roaming elemental behemoth and throw everything we have at it (+380 EXP).

Frostillicus splits into two, not once...

... but twice... tough little blighters, these!

With Michel's rebel creation finally disposed of, we return to him and are rewarded with any one of these: Antique Armor +5 (DR 10/+3, Imm: Knockdown), Staff of the Archmagi (Haste, several spells with charges) or Epic Bracers of Archery (Weapon Focus, Weapon Specialization, Epic Weapon Focus, Epic Weapon Specialization: Longbow/Shortbow).
I accept the bracers and gift them to Criosa for +6 bow damage.

Myrfell: Commerce District
We come across a man praying outside his home...
Charles Bodine's wife has been kidnapped by The Syndicate, organized criminals who control the Docks. We offer to find and return her, but not right now.

In the Myrfell smithy we agree to assist Gaston Case in clearing his debt with an underworld figure known as Rene who can be found just west of here, in the Business Club.

(Harbin - proprietor of The Long Shot Bowyer & Fletcher - does not offer a quest).
The Business Club
You be real nice or I'll rip your bloody arms off. - Half-orc bouncer.
Having given the Half-orc bouncer the password ("liberty"), he opens the door.

It seems every city has it's seemy side. I don't care for this place at all. - Nellise.
A pianist entertains the patrons as we ask the bartender to see "The Boss."

This reputable es-tab-lish-ment. Um, that mean you watch yourself or me thump you. - Half-orc bouncer.
Behind the common room stands Rene with his two uncouth associates.
Go away you annoying peasant. - Meram.
Get lost. - Nathell.
In order to cancel Gaston's debt, Rene requests that we procure three valuable portraits from Pascal Rousseau's estate in the Government District.

Hardly a paladinly action, but I receive +800 EXP for lawfully objecting to break n enter, after which Rene assures me Pascal is no angel. Oh well, whatevs. Let's do this.

Pascal Rousseau's estate
We arrive at the Pascal's estate under cover of darkness.
Criosa unlocks his front door (DC-45).

Startled out of gazing deeply into a portrait on the wall, Pascal Rousseau runs up and demands to know wtf we're doing in his home. Was ever a fairer question asked? Well, we're here for your "ladies", and we're not leaving without them.
*Pascal snaps*

Pascal is a rapier-wielding weapon master, and is the first whirlwind user I've encountered in this Saga. WW attack sounds great and the animation is showy, but it's utterly useless.
Needless to say, this pansy is roflstomped for +152 EXP and his corpse is looted for the Blademaster's Outfit (Haste, Bonus Feat: Defensive Roll, Piercing resist [10/-], Parry +12), Tactical Rapier +4 (Keen, magical +3, Mass crits: 2d6), Ring of Protection +5 and Belt of Agility +4.
Two Rousseau House Guards were owned on the side for +12 EXP ea and Falchion +2 (2).

Sitting on a bookshelf here is a copy of A Brief History of the Kingdom of Tusone. Since the author bothered to do lore write-ups, I should probably at least post a screen of the efforts he went to in fleshing out his world - it's good stuff!

Wall-mounted on this floor is one of the three priceless portraits by the artist Anatole Badeua: Angelique. We gently lift it from the wall and take possession of it.

Criosa unlocks the door to upstairs (DC-42), then unlocks/detraps the door to Pascal's bedroom (DC-42/45), wherein a rather odd enemy attacks us: The Luggage, an animated chest (+988 EXP).

The two other portraits are found mounted on the walls of this room, opposite to each other: Susanne and Victoria. We now have possession of all three portraits.

Also looted in the bedroom is a Lesser Ioun Stone: Pink (CON +2), Expensive Dress (needed to be ID'd, sells for 1 GP...), Expensive Clothing (sells for 3 GP...), precious gems and jewellery etc.

The portraits are delivered to Rene back at the Business Club (+1000 EXP). The hard-to-please Rene now wishes us to procure for him the Valdelay gemstone, a Tusonite artefact. I am to assume the name of "Devereux" and meet Jimmy at the Dockside Arms tavern where I'll negotiate for the gemstone as a middleman.

Dockside Arms tavern
Upon entry we spot the shifty Halfing, Jimmy, looking over his shoulder at us.

I fail my persuade check, but it auto-succeeds and Jimmy flicks me the gemstone. How easy was that..?

Myrfell Docklands
... Too easy.
You catch a glimpse of Jimmy as he comes running out of the tavern. - DM.
Looks like he's running off to his ship.

In pursuit of Jimmy we enter the Scarlet Lady by means of the forward hatch.

Ah, crap. - Jimmy.
Jimmy now flicks us the real Valdelay Gemstone, and warns us of the Syndicate. We buff up before returning to the pier.

Sure enough, no sooner have we stepped off the Scarlet Lady, we're intercepted by the Syndicate.

Led by Devon, they demand the gemstone. We refuse to hand it over. A dance of death ensues.
Sneak attacking thugs now stubbornly train on their soft targets, inflicting deep cuts on both Nellise and Criosa, but their night out is ruined by four crits from me inflicting about 70 damage each (+60 EXP ea, Short Sword +3).

The cat-like Devon then moved in on Criosa to sink his dagger into soft royal flesh, but was ended soon after by a tremendous blow from a buffed holy warrior (+380 EXP, Dagger of Assassination +3 [on-hit DC-14 vorpal, Evil only]).

The cowardly bard-thug hangs back to sing and conjure a Dire Tiger with Summon Creature VI; then follows up with Darkness. His crow-like cry of death echoed throughout the Docks, and then all was silent but for the lapping of the waves (+121 EXP, Bardic Leather Armor [Bonus bard spell slots lvl 3/4]).

We now head back to the Business Club and deliver the real Valdelay Gemstone to Rene: +5000 EXP. He warns us never to return, or we'll be killed.
We inform Gaston that Rene has released him from debt: +1000 EXP, Gaston's Longsword +5 (Keen, Mass Crits 2d6, on-hit DC-14 Slow). Not bad, but a definite downgrade from my Angelfyre Holy Avenger.

Time to take out the Syndicate, after which we'll return to this district to take out Rene for threatening us.
The Northern Star - Syndicate vessel
You walk up the gangplank onto the ship. - DM.

My Lawful warning to the Syndicate Sailors yields +800 EXP, but doesn't stop the three fools from attacking us (+12 EXP ea, Scimitar +2 [2]).

Criosa unlocks the DC-45 door to belowdecks.
From the Captain's empty cabin, we duck down a stairway hatch to the deck below where we're caught off-guard by five Syndicate Thugs (+12 EXP ea, Short Sword +3 [5]).
(This is how wealth is built up, looting many corpses of enchanted weapons which then sell for a pretty penny).

We descend to the lowest deck whereon four more Syn-thugs assail us, but they are effortlessly dispatched and then looted (+12 EXP ea, Short Sword +3 [4]).
At one end of this deck we locate Elan Bodine and five other female slaves, whom we free from captivity (+200, +100 EXP [x5]).

Climbing back up to the middledeck...
There are the bastards who let my cargo free! Kill them! - Captain Edgar Vance.
My bitch-slapping of this Syndicate Wizard causes him to fizzle Horrid Wilting (+12 EXP, Greater Hood of Clarity [+4 INT, Conc +10, Bonus feat: Slippery Mind]).

Now I duel the despicable Vance, dual-wielder of whip and kukri (+684 EXP, Whip +3, Black Lotus +4 kukri (on-hit DC-16 poison -STR).

We return to the grateful Bodine couple for +5000 EXP and the Boots of Striding +6 (CON +6) which bestow a very welcome HP boost.
Thank you for freeing me, I can never repay you for your heroism. - Elan.

From here we now march over to the Business Club to wipe out Rene for daring to threaten our lives.
Oddly, the bouncer at the door isn't hostile, but everyone excluding the patrons inside are - including three Half-orc Bouncers, the Bartender and Rene himself.
An all-in brawl ensues in the common room.
The raging barbarian bartender (+12 EXP, Club +4) and bouncer trash is taken out first (+12 EXP ea, Dagger +2 [6]).

Rene foolishly leaves the backroom to wade into the fray, going straight for Nellise who pissed him off in conversation, coming so close to killing her it wasn't funny. Luckily I was flanking Rene here, otherwise he would have survived another round and Nellise would have been dead. From his corpse we loot: Dagger +4 (2), Amulet of Natural Armor +4, Armor of the Night (Haste, Hide/Move Silently +12, Imm: Darkness, Darkness [3] 5/day, Ultravision [6] 1/day). What a pity he didn't surrender so that we could force him to hand back the portraits and gemstone - the snob's tears would have been delicious.

We now sprint to the backroom, where Rene should have stayed hidden along with the much smarter Meram Ryskill and Nathell.
Meram casts Time Stop...

... followed by Greater Planar Binding (Death Slaad); then unleashes Meteor Swarm behind the slaad and Nathell, but I just bust Nathell's nose (+12 EXP, Sword of Many Blades [Blade Barrier (11) 1/day, Respectable Citizens Attire [DR 5/+4, SR 20]) to get to the Halfling wizard, who then joins him in the after-life one round later (+12 EXP, Bracers of Armor +5).

Back outside, the Half-orc door bouncer is now hostile. It would have been more amusing if he simply ran off, but wiping the floor with him as we left was also funny.
Having completed the jobs available to us in Myrfell, we now sell off all unneeded loot acquired during our questing, thereby amassing a tidy sum of about 300,000 GP. I now purchase for Nellise the Cleric's Hood (+4 WIS, Conc +10); for Criosa the Greater Amulet of Health (Imm: Disease, Level/Ability drain, poison, Regen +1); and for myself a Wooden Tower Shield - after which we're still sitting pretty on a mound of about 200,000 gold.
Palace Revisited
Our timing in returning to the palace is of course impeccable. Just as we enter, King Osric - flanked by his Master-At-Arms - strides out to the throne room, having finished conferring with his advisors. After he's done critiquing our escapades in his city (the Ice Elemental, Rene, the Syndicate), the King now announces that he wishes us to work together in our attempt to dethrone King Seamus.
He now permits his Master-At-Arms to speak, which adviser presents a plan to hire mercenaries to attack Fairloch (since the Tusonite forces have been depleted by the war with Aielund). I Lawfully express concerns of mercenary loyalty (800 EXP), but King Osric assures me they'll be well-paid veterans who will see the campaign through to its conclusion.
The mercs will be recruited from Trinity, a desert town bordering three nations, known for its neutrality and as a merc gathering point (we've been there - it was our hub for seeking two of the Scepter pieces, and where we first encountered the Ironlord). We must first head east to the marshlands near the Aielundian border, where General Duquesne will show us to a Tusonite representative who will oversee the merc transactions for us (500,000 GP is involved).
Fully prepped, we head immediately to the Eastern Front in the marshlands.
Act Four, Part III: Eastern Front, Battle for Bracksworth:
The Eastern Front: a gloomy marshland
Here the trio meet up with a Tusonite Cleric (Cleric [10]/Monk [6]) and two Tusonite Footsoldiers (Fighter [12]) who have been ordered to accompany me into battle, if I so request them to. I don't bother recruiting them, though. Moreover, Nellise and Criosa now buff me fully in readiness for what I decide this time will be a solo mission, at least at first.

Under the effects of Improved Invisibility, I leave my five allies behind and pass over a bridge into the thick of things. You can see all Aielundian units highlighted in red, including four patrolling skirmishers in the foreground and four halberdiers, two war clerics and one war wizard encamped in the distance.

My first mark is - to no surprise - the war wizard, whose face I plant in the dirt before he could even raise a bristling eyebrow.

Now in plain sight of my foes, I rotate 180 degrees and smack down one of the two war clerics, after which I find myself boxed in by halberdiers and four more skirmishers who were undetectably blended into the swampy flora before the commotion began. Not to worry, I am a tank coated in Greater Stoneskin - these poor bastards can barely put a scratch on me. I take em out, one-by-one.

As I single-handedly fight off halberdier reinforcements and knights, my old merc-friend Robert Black thunders in from the north to join the fray. The fanatical Aielundian units maintain morale, however, and fight to the bitter end.

Most enemy units in this battle yielded +15 EXP ea when killed.
Campsite receptacles and corpses of the many fallen are now looted with relish.
War Wizard: Grey Wizard's Robe, Ring of Protection +3, Wizard's Sidearm +1 crossbow.
Skirmishers: Composite Longbow +5, Composite Longbow +1 (2), Dagger +2 (3), Longsword +2 (3), Arrow +5 (293), Enhanced Camouflage Armor (Haste, bonus ranger spells 1-2-3-4, Hide/Move Silently +8, Ranger only).
War Cleric: Boots of Traveling (AC dodg 2), Bolt +5 (99).
Iron-bound chest with heavy lock (DC-DT40/OL45): Robe of the Archmagi and Greater Stoneskin, Bigby's Crushing Hand, Resurrection (2) scrolls.
Crates: Strong Spike Trap Kit (2), Strong Tangle Trap Kit, Strong Frost Trap Kit, Deadly Fire Trap Kit, Potion of Heal (3), other trivial treasure.
Robert is revealed to be the "trusted vassal" with whom King Osric sent me to rendezvous. He also warns of a second enemy wave approaching...

Aielund's forces are this time headed up by archmage Auberon (and Ignatius!) whom we met in Amalis.
It goes without saying I make a bee-line for Auberon.

Before the archmage can so much as whip out his staff, he is critically stabbed in the guts for 70 dmg.
Bugger this! - Auberon.
*Auberon goes ethereal and leaves battle*
(I hate it when they do that!)

As the battle wages on, Nellise and Criosa create a hell hole for our enemies to wail and burn in (Firestorm/Fireball combo).

Three Aielund Knight-Commanders then charge us in a bold attempt to turn the tide, but are immobilized by my casting of Earthquake from the Ring of Elemental Earth, and then beaten to a pulp while on their asses (+380 EXP, Knight's Full Plate, Knighthood Tower Shield +3 ea).
With the battle ended, Nellise and Criosa are now ordered to auto-loot corpses, coming up with a few hundred +5 bolts.
We high-five Robert Black and enjoy an amusing convo with him before heading off to meet with General Duquesne at the Tusonite Camp.
+10,000 EXP

Level Up to 27!
(Epic Characters)
Lilura1: Champion of Torm (11) / Paladin (12)/ Fighter (4), Great Strength II
Criosa: Rogue (15) / Wizard (12), Sneak Attack (+8d6)Nellise: Cleric (25) / Paladin (2), Great Wisdom II
Tusonite Camp: West of Bracksworth
The music here is one of the most famous and unforgettable of NWN tracks, the one that plays majestically in Lith'Myathar of Chapter 2 HotU. It is also well selected for this segment of Aielund Saga.
Robert Black wanders off to the General's tent, but the trio have a little nose around camp, first, before getting down to business.

Visibly occupying the camp itself are eight foot soldiers, four chevaliers, three archers, two clerics, one bombardier, one quartermaster and nine pack oxes.

Our new bombards will be more than enough for their fortifications. - a proud Bombardier.


Bugger this! - Auberon.
*Auberon goes ethereal and leaves battle*
(I hate it when they do that!)
As the battle wages on, Nellise and Criosa create a hell hole for our enemies to wail and burn in (Firestorm/Fireball combo).

Three Aielund Knight-Commanders then charge us in a bold attempt to turn the tide, but are immobilized by my casting of Earthquake from the Ring of Elemental Earth, and then beaten to a pulp while on their asses (+380 EXP, Knight's Full Plate, Knighthood Tower Shield +3 ea).
With the battle ended, Nellise and Criosa are now ordered to auto-loot corpses, coming up with a few hundred +5 bolts.
We high-five Robert Black and enjoy an amusing convo with him before heading off to meet with General Duquesne at the Tusonite Camp.
+10,000 EXP

Level Up to 27!
(Epic Characters)
Lilura1: Champion of Torm (11) / Paladin (12)/ Fighter (4), Great Strength II
Criosa: Rogue (15) / Wizard (12), Sneak Attack (+8d6)Nellise: Cleric (25) / Paladin (2), Great Wisdom II
Tusonite Camp: West of Bracksworth
The music here is one of the most famous and unforgettable of NWN tracks, the one that plays majestically in Lith'Myathar of Chapter 2 HotU. It is also well selected for this segment of Aielund Saga.
Robert Black wanders off to the General's tent, but the trio have a little nose around camp, first, before getting down to business.

Visibly occupying the camp itself are eight foot soldiers, four chevaliers, three archers, two clerics, one bombardier, one quartermaster and nine pack oxes.

Our new bombards will be more than enough for their fortifications. - a proud Bombardier.


A herd of unhitched pack-oxes quietly graze under a tree canopy.


Loot is now sold off to the camp Quartermaster. I also splash out on gear for Criosa (Ring of Protection +5, Amulet of Natural Armor +5 and Ring of Clear Thought +4) and Nellise (Mighty Crossbow of Speed +5 [Bonus Feat: Rapid Reload, Mighty +4, Mass Crits 1d10]). Our wealth has been kept around the 200,000 GP mark.
We stroll over to and enter General Duquesne's command post.

We stroll over to and enter General Duquesne's command post.

Introductions...


We learn from the General that in order to proceed south to Trinity we must first take the town of Bracksworth (where our adventure began, all those years ago...)


We also learn from the General that we cannot head south through Fort Highmarch, but according to Robert we can go under it, by braving the infamous Lowmarch - a system of deep caverns which wind all the way to Trinity! The journey won't be easy, but we're sort of used to "roughing it" by now.

Time to get some shut-eye; our attack on Bracksworth will begin at first light tomorrow.
The Battle of Bracksworth

Time to get some shut-eye; our attack on Bracksworth will begin at first light tomorrow.
The Battle of Bracksworth
We've traveled 15 miles east of our camp to arrive here, just outside of Bracksworth.

The Aielundian force is led by our good old friend, Commander Dante Colt, along with the elven Mona Te'Rei and Priestess Celeste (both of whom we've previously helped and been on friendly terms with). Those three are bolstered by six rangers and three siege engineers operating the catapults behind the wall. The General asks us to parley with Dante.

Quite a defensive setup they've got here. This could be a tough fight. Watch your back. - Robert Black.
The trio buff up, then march towards Dante's Aielundian force.
Don't shoot! Let them approach. - Commander Dante Colt.

The trio buff up, then march towards Dante's Aielundian force.
Don't shoot! Let them approach. - Commander Dante Colt.

I fail my persuasion check on Dante, dammit!


Remember Priestess Celeste, from the Culdeny chapterhouse? Well, she's a bit of a hard-liner now. Nellise attempts to snap her out of Ironlord fundamentalism, but also fails.


Mona has also decided to stand by Dante's side, no matter what. She loves him, what can we do?
Shaking their heads in disbelief, the trio march back to the Tusonite force to deliver this news to the General: Dante's crew will not back down.

Shaking their heads in disbelief, the trio march back to the Tusonite force to deliver this news to the General: Dante's crew will not back down.

Suddenly, three fireballs launch into the sky and arc over and down toward us! IT'S ON!
Sacrebleu! They have started firing! ALL BOMBARDIERS COMMENCE FIRING! Infantry... ADVANCE! - General Duquesne.

Sacrebleu! They have started firing! ALL BOMBARDIERS COMMENCE FIRING! Infantry... ADVANCE! - General Duquesne.

We rapidly advance towards the "enemy" with me as spearhead - outrunning the mounted Chevaliers.


Dante strides out to meet the cavalry, expertly firing piercing volleys from his Thunderstrike longbow as I charge straight past him and towards Celeste, my primary target.


Celeste super-humanly managed to conjure a water elemental and unleash Storm of Vengeance followed by Firestorm before the mighty blows from my sword sent her flying backwards into the dirt (+250 EXP). In the background, you can see Dante has since tucked away Thunderstike and drawn out his Bastion of Power greatsword to wreak havoc on the Tusonites.


I now ignore the nearby Mona and turn to flank Dante - who is holding his own against the Tusonite Chevaliers despite being outnumbered - ending him with a 67 dmg crit (+650 EXP). In the background, Nellise and Criosa are keeping the desperate Mona busy, the third and last high priority target in this battle.


As I stride over to hasten Mona's demise, the poor elf is incinerated by bombard fire (+0 EXP).


The remainder of the rangers are now mopped up both external to and behind the walls, along with the three siege engineers (paltry EXP ea).


Victorious, we stand atop a lookout within Bracksworth's walls, overlooking what was once the town paddocks - and fondly remembering the farm-hands disguised in cow costume! How Nellise and I miss those carefree days, life seemed so much simpler back then! We shed a tear for our good friend, Dante. I can't believe he had to die, and by my hand... forgive me, my friend. This has been a dark day...


Robert Black now hands us King Osric's seal, which gives us the authority to represent the King when dealing with others. The merc also hands us a Stone of Recall and Recall Gem. At this point he can rejoin the party, but I'm sticking with the Angelic Trio.


We return to the Tusonite General for our reward (+800 EXP, +2500 EXP), concluding the Battle of Bracksworth segment.


Epic loot is epic:
Dante Colt: Enhanced Camouflage Armor (Haste, bonus ranger spells 1-2-3-4, Hide/Move Silently +8, Ranger only), Bastion of Power +4 greatsword [+10 magical vs. constructs], Greater Boots of Agility (+4 DEX, Improved Evasion), Thunderstrike +5 longbow (Mass crits 2d12, Mighty +5, Unlimited arrow: 1d6 lightning, Great Thunderclap [13] 1/day) Ring of Power (Resist cold/ele/fire 15/-, Regen +1, Freedom), Ring of Protection +5. High Priestess Celeste Patterson: Angelfyre +5 scimitar (Holy Avenger, on-hit DC-16 slay Evil), Divine Halfplate (+5 AB, Haste, Imm: Level/ability drain, Greater Planar Binding [15] 1/day), Periapt of Wisdom +6 (WIS +6), Divine Ring of Holiness (Bonus cleric spells 5/6/7/8/9), Bolt +5 (99).Mona Te'rei: Deathwind +5 shortbow (Bonus feat: Crippling Strike, Mass crits 20), Elfblade +4 longsword (on-hit DC-20 Stun, Elf/Half-elf only), Faithblade +4 short sword (+1d6 vs. Evil, Good/Neutral only, Word of Faith 1/day), Greater Belt of Guiding Light (Imm: Death Magic/Fear, +4 Spot, Search, Listen, Lore), Arrow of Piercing (99), Arrow of Intense Cold (99).
Arrow +4 (300+).
Nellise is now gifted with Periapt of Wisdom +6, Divine Ring of Holiness and Divine Halfplate; Criosa with the Deathwind shortbow, Greater Belt of Guiding Light and Greater Boots of Agility.
Each member of the trio now has Haste bestowed upon them by their armor.
Act Four, Part IV: Bracksworth, Lowmarch, Hiring Mercs in Trinity:
Bracksworth:
The town appears to have been deserted before the battle took place. Little remains of the town you once knew. - DM.
A scroll of Raise Dead can be found in the barracks. The Inn can also be entered, but only contains broken furniture.
Both the northern and eastern gates are barricaded, but that's cool because we're not visiting Culdeny or the barbs this time - we're headin' south.

Spartan flutters down in front of us at the south gate...

He promises to aid in our diversionary ploy at Fairloch, also handing us a coin with which we can summon him. With a few mighty wing buffets, Spartan launches himself into the air and is gone.

Stepping out of Bracksworth's south gate, we find ourselves once again in the...
Highmarch Foothills
We've been here twice before, the first time hounded by wolves; the second time battling ogres and mountain giants. This time, there is nothing to kill as we follow the road south, west and then north to what was once the entrance to a wolf den. We step into the cave...

Cave
We locate the ancient self-illuminating crystal of which Robert spoke, marking our point of entrance into the water.
I hope this leads somewhere... I don't particularly want to drown in an underground river! - Nellise.
You jump into the water and swim as hard as you can. - DM.

Lowmarch: North
Well, that wasn't so bad, I... oh my, this doesn't look promising at all. - Nellise.
A vast subterranean environment stretches out into the darkness, sort of like a mini-Underdark...

Note the map-size
Well, it beats tromping through a sewer! - Criosa.
A lithe figure approaches and beckons us to follow him.

We refuse to be lured into a trap, so the dual-wielder draws swords even as two of his fellow Drow Nether Elf Rogues ooze out of the darkness. The trio promptly send them to an even darker place.

Mysterious Stranger: +100 EXP, Nether Elf Longsword +4 (Keen, Mass crits 1d10).
Nether Elf Rogue: +8 EXP ea, Nether Elf Light Crossbow +6 (1d10 crits [2]), Kukri +5 (2), Nether Elf Poisoned Bolts (on-hit DC-22 Slow [52]).
Not far from that point, a pair of wizards and one no-nonsense grunt get the jump on us.
Nether Elf Wizards (+10 EXP ea). Nether Elf Warrior (+850 EXP, Nether Elf Longsword +4).

Venturing deeper into the cavern, Criosa now disables a DC-45 trap.


Venturing deeper into the cavern, Criosa now disables a DC-45 trap.

Just after this, a pair of Beholders drop from the ceiling! They open up with antimagic cone and then spam negative energy from range, knocking us down.

Our MVH implodes them (+450 EXP ea).

Now reaching the cavern's heart, I scope the area out a bit. Looking down from atop a ridge, I spot two non-hostile Vampire Rogues and two Vampire Warriors led by Cadmus, just below, who has them standing in formation.

En route to the vamps this rockfall manages to inflict about 30 dmg on me. Bah!

The passageway opens up into a clearing of sorts in which the vamps begin battle with more Nether Elves, right upon our arrival. (Nether Elf Cleric [+750 EXP], Nether Elf Wizard and a pair each of Nether Elf Rogue and the drider-like Nether Elf Abomination (+350 EXP ea, Mild Poison Arrow [198]).
We join the friendly vamp side, turning the tide greatly in their favor. The fight is over with quickly.

Cadmus gives us the lowdown on Nether lore, then explains that these dark elves have a Draco-lich at their disposal.

I vow to aid the vamps in destroying the Draco-lich (+800 EXP); and Cadmus explains that a Priestess is in possession of it's phylactery. We agree to meet him and his vamp force in the southern caverns, where we'll join forces against the Nether Elves and Draco-Lich.

Lowmarch: South
I REALLY hate this place! - Criosa
There is something immensely evil ahead... we must be prepared for the worst! - Nellise.
Rounding a corner we find ourselves face to face with two more Nether Abominations (+350 ea, couple hundred Mild Poison Arrows) and one dual-wielding Nether Abomination Weapon Master (+950 EXP, Nether Elf Longsword +4 [2]) who is not to be trifled with.

This guy is a DPS machine.

We catch up with Cadmus who now leads us over a bridge that crosses a large underground lake.


We catch up with Cadmus who now leads us over a bridge that crosses a large underground lake.

*Nellise inhales sharply* Something wicked this way comes. - Nellise.
Three vamps await us on the opposite side of the bridge... and the Draco-lich.

Wailing on the over-sized bag of bones will drop it, but then it just reanimates - so don't bother.

Instead, we make a bee-line for she who holds the soul jar.
Destroy them my pet, destroy them all! - Nether Elf High Priestess.

One of the rules of D&D: always kill the mouthy one with the phylactery FIRST. She took some killin', though! And her scream as she died echoed cavern-wide and curdled our blood. I take the soul jar from her cold, dead hand and shatter it against the rock wall...

... after which a disc of white light radiates through the cavern...


... causing the Draco-lich to be engulfed in a conflagration (+3000 EXP).

Surviving a heavy fight in the dark with three undeterred warriors finally ends this encounter.


Surviving a heavy fight in the dark with three undeterred warriors finally ends this encounter.

Nether Elf High Priestess: +1200 EXP, Nether Elf Flail +5 (on-hit Wounding DC-22, NegEn +1d10), Nether Elf Plate Armor +5 (Haste, Imm: Darkness, Hide +12, CHA -2), Nether Elf Shield, Ring of Fire Resistance.three Nether Elf Warriors: +850 EXP ea, Nether Elf Longsword (3).
If you're curious, Cadmus can easily die in this fight if left to charge the Draco-lich alone. His weapon is the companion blade wielded by Carthach (Elemental Longsword +4 [+1d4 cold +1d4 elect +1d4 fire]), but Cadmus' is upgraded to +5, does 1d6 elemental and has on-hit DC-16 slay elemental.
We now farewell Cadmus (+2500 EXP) and continue on our underground journey.

Will we ever see the end of this infernal passage? - Criosa.
There was but one last hostile encounter en route to the exit, consisting of four more Nether Abominations and a second Nether Abomination Weapon Master.
Level Up to 28!
(Epic Characters)
Lilura1: Champion of Torm (12) / Paladin (12)/ Fighter (4), STR +1
Criosa: Rogue (16) / Wizard (12), DEX +1
Nellise: Cleric (26) / Paladin (2), WIS +1

The southern exit of Lowmarch is reached.
The daylight blinds us as we transition back to the Hocarum desert.
North of Trinity
Well, aside from the hordes of evil monsters, that wasn't too bad really! See? I can joke around too! - Nellise.

There being nothing else to do here but admire the view, we head southeast into Trinity.
Trinity
My, this place has certainly prospered... after a fashion. - Criosa.
The Villeancourt tent has been replaced by this fancy piece of architecture:

Honest Hakim - Merchant Prince
Looks like Hakim's done well for himself, he had nothing but a tiny tent pitched in the sand last time we dealt with him. How shrewd to take advantage of the mercs selling off their spoils so cheaply, including some gear that used to be ours? Such business acumen! Ah well, there's no way to demand him to return our items, so I guess we have to pay through the nose... again (Unfavorable Reaction, again!)
Mmm... but nice work salvaging one of the Ironlord's golems.
Please enjoy your shopping experience. Any attempt at theft will be met with swift justice. - Iron Golem.

A reworked Iron Legionnaire.
Hakim's buying cap has been increased to 30,000 GP per item. He also purchases "stolen" items of all kinds, including traps and the three portraits painted by Anatole Badeua (~11,000 ea). On top of that, he doesn't seem to run out of money when purchasing our stuff.
What does all this mean? Well, it means we're filthy stinkin' rich! Basically, +600,000 GP (bal = 800,000 GP).
Time now for an epic splurge!
Lilura1: Nymph's Cloak +6 (CHA +6), Ring of Resistance +3.Nellise: Blessed Vestments of Faith (DR 20/+5, Imm: Death Magic & Level/Ability drain), Boots of Striding +6 (CON +6).Criosa: Ring of Clear Thought +6 (INT +6), Hood of Intellect (INT +6, Saves +1, Conc +10), Amulet of Vitality +6 (Con +6), Belt of Frost Giant Strength (STR +4).Utility items: Potion of Epic Heal (5), Potion of Heal (10), Bag of Holding (4). We can't afford the Fortified Shield of Endurance (400,000 GP); I'll grab it later.
= 700,000 GP total outlay.
As explained earlier, Trinity is a merc gathering point that stands neutral in Aielund-Tusone affairs. At this point, both the south and west gates are locked, Sahir seems to be off on a expedition and the palace is in lock-down due to drunken mercs. It doesn't matter; we're here just to hire the mercs and then return to Bracksworth - a simple mission from this point, I'd wager. So let's hop to it.

Cooling off in the central oasis.
Trinity is currently hosting only three merc groups: the Hellfires, Sand Dragons and Juggernauts.
One wrong word spoken could cause a riot - some of these mercenaries don't like each other much. Be careful. - patrolling Desert Warrior.
If you're looking for my commander, he's at the command tent in the southeast. - Hellfire merc.
Oh, you're from Aielund aren't you? Shame about the war and all that. - a Sand Dragon.
If you're after our boss, she's at the inn. - a Juggernaut.

Southwest Trinity, and the west gate to Tusone
We skip into the Inn, first.
Traveler's Rest Inn
Ah, I have fond memories of this place! This is where I had the bar-room brawl with Drake, the last living Ironlord Cultist.
This looks like a good place to find mercenaries. Just.. watch your back. And mine, while you're at it. - Criosa.
The Juggernauts are led by the female Half-orc, Viga Sudeten. After emptying our pockets of the 100,000 gold required to hire the group, we are left quite literally broke! (+1500 EXP).

What IS that thing?
Also in the inn...
The Sand dragon leader (Eredel Mason) wants us to kill the Hellfire leader...

Eredel Mason.
... and the Hellfire leader (Marcus Kanange) wants us to kill the Sand Dragon leader.

... and the Hellfire leader (Marcus Kanange) wants us to kill the Sand Dragon leader.

Marcus Kanange.
So as predicted, all three merc leaders are assholes and I share Nellise's disgust of both Eredel and Marcus. These guys've got nothin' on Robert Black...
Anyway, I choose to do Eredel's dirty work for this recounting, since the fight against the Hellfires is harder and more of a spectacle.
Marcus loves to open up by casting Meteor Swarm followed by Epic Spell: Epic Warding, followed by Epic Spell: Greater Ruin, and then followed by all sorts of nasty stuff.
Thankfully the DR 20/+5 and 50 soak/lvl of the second spell doesn't come complete with an overly long duration.

The white shields = Epic Warding
The Hellfire grunts are obsessed with Criosa - it doesn't matter if I tuck her in the corner, at least one will sniff her out.

The Hellfire grunts are obsessed with Criosa - it doesn't matter if I tuck her in the corner, at least one will sniff her out.

Center screen: Greater Ruin
I lay the smackdown on Marcus as Isaac's Greater Missile Storm is hurled by a Hellfire Brigade Sorcerer at my two Henchmen, and Criosa is knockdown-critted by a persistent grunt, and then killed soon after!

I lay the smackdown on Marcus as Isaac's Greater Missile Storm is hurled by a Hellfire Brigade Sorcerer at my two Henchmen, and Criosa is knockdown-critted by a persistent grunt, and then killed soon after!

Right: Knockdown crit
I mop up the sorc, raise Criosa and sever Marcus' head.
I was praying for Nellise to completely trivalize this battle with a single casting of something like Implosion or Destruction - but neither were forthcoming. Ah well.
Note that it's entirely possible to simply wipe the floor with all three merc groups, thereby yielding all phat lewt (You just have to hire at least one group, then you can kill 'em. I wonder if they still appear at the diversion lol?). However, that isn't exactly "role-playing" a Lawful Good Paladin, is it? Not only would I feel dirty and feel the need to bathe in holy water, I'd also feel cheap. Plus it just doesn't make sense from a story PoV to jeopardize the plan by limiting the diversionary force.
Marcus Kanange: +950 EXP, Robes of the Dragon (DR 10/+6, CHA +4, Haste, Conc +12, Sequencer [3 spells] 1/day, Clear Sequencer Unlimited/day ), Third Eye (True Seeing, Search +5), Belt of High Sorcery (Spell Focus: all schools, Bonus spell slots 6-7-8-9, Resist bludg/pierce/slash [5/-]), Wand of Meteor Swarm ([17], 5 charges use), Marcus' head.two Hellfire Mercenaries: (Epic Gloves of Discipline [2], Disc +30), Hellfire Shield (+5 AC shld mod, SR 22, Regenerate [13] 1/day) and one Hellfire Brigade Sorcerer.I didn't wipe out the other merc groups, but here's their EXP yield and loot if you're curious:
Eredel Mason: +1200 EXP, Tainted Short Sword +5 (Neg-en +2d6, Regen +10), Sand Dragon Light Chainmail (Haste, SR 30), Zen +7 longbow (Will saves +6, Mass crits +2d6, Mighty +10), Potion of Epic Healing. two melee Sand Dragon Mercenaries (Short Sword +4, Arcane Arrows [198]) and two ranged who have Arcane Archer levels and fire Imbue Arrow (Arcane Arrows [198]).Viga Sudeten: (850 EXP) Decapitator +5 (Keen, on-hit vorpal DC-14), Battle Axe +5, Phalanx Plate of Resilience (DR 10/+6, Haste, CON +4, Imm: Knockdown/Paralysis, Regen +3, Barb/Fight only), Phalanx Helm (AC def +5, Imm: Critical Hits, Darkvision, 100,000 GP (if you payed her).three Juggernaut Mercenaries: Razor's Edge +5 (Keen, Mass crits 1d10, on-hit DC-14 Greater Dispelling, +1d10 piercing [2]), Ring of Resistance +3 (3), Greatsword +5 (2).On the way out I splatter the door guards against the tent's canvas.

The gruesome head of Marcus is now delivered to Eredel (+2500 EXP).


Back outside the inn...
So I heard you hired us. Smart move, we'll kill anyone you want, no questions asked. - a charming Juggernaut merc.
Heading north towards Hakim's and the north gate, we fight off the last of Hellfire trash, including two last grunts (Epic Gloves of Disipline [2]) and one last brigade sorcerer.

So I heard you hired us. Smart move, we'll kill anyone you want, no questions asked. - a charming Juggernaut merc.
Heading north towards Hakim's and the north gate, we fight off the last of Hellfire trash, including two last grunts (Epic Gloves of Disipline [2]) and one last brigade sorcerer.

Right: A Celestial Avenger, conjured by the sorc.
I still can't afford the Fortified Shield of Endurance from Hakim because I didn't kill all the mercs and take their stuff! I guess I'll come back here later, when I'm cashed up. For now, I use the Stone of Recall to teleport instantly back to the Bracksworth recall point.
Back in Bracksworth.

I still can't afford the Fortified Shield of Endurance from Hakim because I didn't kill all the mercs and take their stuff! I guess I'll come back here later, when I'm cashed up. For now, I use the Stone of Recall to teleport instantly back to the Bracksworth recall point.
Back in Bracksworth.

The barracks.
Act Four, Part V: Southern Foothills, Cairnwood Aflame:
Bracksworth
General Duquesne has taken up the barracks - the small village now being in control of Tusonite forces (thanks to our successful siege).

Act Four, Part V: Southern Foothills, Cairnwood Aflame:
Bracksworth
General Duquesne has taken up the barracks - the small village now being in control of Tusonite forces (thanks to our successful siege).

Tusonite heavy warhorses.
We report to Duquesne our success in securing the aid of two merc groups (Juggernauts & Sand Dragons [+2500 EXP]). I suggest to the him that we further bolster reinforcements by seeking out the aid of the barb tribes, the Acadian Elves and the Stoneguard Dwarves if possible.
(The PC also mentions a fact of which I was not aware: that Terinus has a wizard tower in a place called Blackwood Glade, southeast of Stoneguard.)

We exit the now unbarricaded eastern gate, venturing out into the...
Southern Foothills
The road here is littered with Aielunder corpses and - what's this? Werewolf corpses?

Four Elder Werewolves lurk in these lower foothills, revealing themselves when we close in and then using innate haste before clawing at our faces and trolling us with Epic Dodge (+350 EXP ea).
Monstrous creatures! This is the sort of thing we should be fighting, not wars of aggression. - Nellise.

Mmm... Wolfsbane herb nestled in the grass..? I harvest a piece.

We head east, up-hill.
There are quite a lot of fresh footprints here... a lot of people went into the tomb not too long ago. - Criosa.

That tomb being...
The Tomb of the Exiled Knight
Ah, we have fond memories of this place: Sir Augustus Charleston, Angels, Greater Balor Lords... but this time, all we find inside are ten survivors from Bracksworth holed up in the vault (the rest of the dungeon is sealed off).
Such resilient people! This makes me proud to be an Aielunder. - Nellise.
Yeah, the townsfolk've had a tough run. Terrorized by goblins n giants - and now werewolves. If we can get them through this, some psychological counselling will be in order.
David Pateel - the simple leather worker from Bracksworth - recounts a horrific ordeal from which we judge he acted most courageously.

David is convinced there is a werewolf amongst the people here, and requests we retrieve for him five pieces of Wolfsbane so that he can test his theory. We already have one piece, but agree to find him four more.
For those who are curious about the weapon mentioned in David's story, he wields the Wolfsong +1 (+5 vs. shapechanger, +2d8 divine vs. shapechanger, on-hit slay DC-26 shapechanger).

Most of the townsfolk can optionally be spoken to for what I call "flavor convos".

A heavy-hearted old man.


A thoughtful young boy.
Ok, that's enough small-talk - we have work to do.
Southern Foothills
Rain begins to fall as we take on four more Elder Werewolves higher up in the foothills.

We harvest four more pieces of Wolfsbane as we explore the foothills (very easy to spot) and deliver it to David, who then prepares and hands us a Wolfsbane swatch with which to dab the townsfolk to test for infection.
We test Mayor Olaf first. *dab* Hmm... you seem ok!
Now.. Laura Pateel? *dab* You pass!
Come here, Roslyn Tam. *dab* Congrats, we don't have to kill you!
Bob Holland? *dab* You have much facial hair and yet you're not a werewolf? Interesting!
Oh, hi Tom Johnson! *dab* You're the farmer whose barn we cleared of rats, I remember you! Oh dear, this is NOT good. I'm afraid we're gonna have to put you down (+8 EXP).

Poor farmer Tom. He must have been hiding his illness for months. At least now he can rest in peace. - Laura Pateel.
David is pleased that everyone can rest easy tonight (+2500 EXP). But would we be so kind as to retrieve some food from Bracksworth Inn, the townsfolk are quite hungry? Anything for you, David!
Bracksworth Inn
Back to where it all started. I get the feeling we're never going to see this wonderful place again. - Nellise.
We find a pie on a table in the common room, and more food left over in the kitchen.

No sooner have we returned to the foothills, we're ambushed by four hungry Aielund Deserters led by a Fallen Knight.
They've got food! Take it from them! - Fallen Knight.
Nellise cast Earthquake to put the three grunts on their assess (I know, it sounds like overkill but it really isn't). I hack them up while they're sitting down.

The weaker units run off when they realize they can't take us (+250 EXP [2], +200 EXP [2]).
The Fallen Knight (Sir Simon) surrenders, but I Lawfully allow him to park his butt in the tomb with the Bracksworth civilians, since his reason for desertion was noble (+50 EXP, +250 EXP, +1000 EXP).
Back to the Tomb
Thank you for giving my life purpose once more. - Sir Simon Templar.
Anytime Simon! Now iff you'll excuse me, I must deliver these precious perishables!
I inform David Pateel that I have the food (+5000 EXP), and then deliver the four food items to the innkeep, Bob Holland (+500 EXP ea [4], +2500 EXP).
That there is some very decent quest EXP.

Yum! Raspberry pie!


Hope this fatty shares the food...
We head now to the highest point of the foothills and east into the Cairnwood.
Cairnwood Forest
Here we find Hasrinaxx, his leopard companion Sebastian and two Ancient Treants defending the forest against Elder Fire Elementals (+80 EXP ea).
Bug: Elder Fire Elementals have no portrait.

Hasrinaxx brings us up-to-date on current events. The King has ordered mad wizards to conjure fire elementals in Cairnwood with the intent of burning it all down!

The elves have evacuated from Acadia, they entered portals to who-knows-where. Bottom line: we can't enlist their aid. Ilkesh the Ent Treant now promises to aid in our diversion at Fairloch if we help the treants save Cairnwood from the arsonists. As we take our leave to do just that, Hasrinaxx hands us the Sphere of Elemental Water, with which to quench the many fires raging in the forest.
Protip: Hasrinaxx sells Potion of Epic Healing (5) which restore 250 HPs.

Love the treant models/textures.
Cairnwood: Southern Slope
The branches of the trees have been blackened by fire. I put on the Ring of Fire Resistance.

No less than one dozen (!) Elder Fire Elementals (+80 EXP ea) swarm the trio (and two treant allies).

I use the Sphere of Elemental Water on a fire at the base of a tree (+120 EXP).
Water appears directly inside the fire, extinguishing it immediately. - DM.

You have served us well. We will honor our bargain. - Ancient Treant.
This mission has only just begun, however.
Ascending the slopes we're confronted by another half-dozen elementals, at which Criosa uselessly cast not one but two Fireballs. Fortunately, common sense prevailed with Nellise casting Storm of Vengeance (which at least rains down electrical and acid over several rounds) and then Firestorm (which at least does half divine). Implosion or Earthquake would have been more effective, but whatevs. Two more fires are quenched.
Ascending higher up the slopes, yet another half-dozen elementals are dispatched similarly to the last; and a fourth fire is quenched.

Level Up to 29!
(Epic Characters)
Lilura1: Champion of Torm (13) / Paladin (12)/ Fighter (4), +1 AC (+5 Tumble).
Criosa: Rogue (17) / Wizard (12), Uncanny Dodge V, Sneak Attack (+9d6)
Nellise: Cleric (27) / Paladin (2)
Still on the same elevation, but in the southeast, yet another half dozen elementals are neutralized; and three more fires are quenched.

We ascend to the pinnacle of the slopes, quenching one last fire before moving into the...
Cairnwood Grove
Maggie! Maggie Fairweather now joins our party, for a party of four! This amused me, because I was just thinking how awesome it would be to have her here with us, and also have both her and Nellise unleashing nature's fury and divine judgment on our fiery foes, at the same time! And here she is!
*group hug*

For the last few years Maggie has been protecting the Feybourne from "industrialists". Just like us, she's been working out since last we adventured together.

In God's name, I have never seen so much devastation. We must stop this! - Nellise.
I cannot believe the lengths people will go to for victory. This is an atrocity. - Criosa.

Sixteen Elder Fire Elementals roam this smouldering clearing overseen by three war wizards. I lure them all together for a mass quenching.
I cast my pally buffs...

... then fearlessly wade into a wall of fire...

... along with three enraged treant allies.

We hold the wall of fire back as key spells are cast by Nellise (Implosion and Storm of Vengeance) and Maggie (Bombardment, Call Lightning and Ice Storm). Both Nellise and Maggie unleashed Earthquake. Even Criosa chipped in with Lightning Bolt.

The three Aielund War Wizards are "Criosa-like" in their arcane repertoire. That is to say, they have none. Reminder to readers: Criosa "sucks" because her leveling script is bugged not to level Wizard. And even if it wasn't bugged, hybrids generally suck anyway (still, it would be better than being stuck as Wizard [12]).

We quench five fires in this clearing and then take the northeast exit.
Cairnwood North
We're descending the other side of the slope now, a furnace-like wasteland.
Upon entry we're assailed by another burning wall of six elementals.

Nellise + Maggie = epic win
We fight off a dozen more flaming foes on our descent of the molten slopes, en route to the source of the conjurings.

We fight off a dozen more flaming foes on our descent of the molten slopes, en route to the source of the conjurings.

Bombardment does bludgeoning, not fire.
The conjurer is located and identified as Orville Helliconia, a Red Dragon Disciple who has buffed himself with Elemental Shield and Premonition. He fires an IGMS into us as we sprint down to the bottom of the slopes, wherefrom he conducts his pyromantic antics.

As I close in for the kill Orville casts Meteor Swarm and then momentarily disables me with Power Word, Stun. Obviously, this arsonist loves his fire spells, not hesitating to scorch us with Firebrand and Delayed Blast Fireball in addition.
The enemies of the King shall burn! - Orville Helliconia.

For Maggie, this was personal.

Orville has grown wings. But that's just a helm, not his face
Orville fell to my sword before he could inflict too many third-degree burns on the four heroes (+918 EXP). We loot his red-hot corpse for the Firestaff +5 (Fire resist 20/-, +1d8 fire, Delayed Blast Fireball [20], Firestorm [18], Firebrand [15], Incendiary Cloud [15] ) Helm of the Red Dragon (Imm: Knockdown, True Seeing, SR 30, RDD only), Orville's Blazing Robes +5 (Haste, Improved Evasion, Conc +6, Spellcraft +2, Sequencer [3 spells 1/day], Clear Sequencer [Unlimited/day], Imm: Knockdown).
At this point we can take the northeast exit to Stoneguard Village; however we should probably also enlist the aid of the barb tribes before progressing the plot. It would have saved backtracking to visit the High Plains first, but no matter - the upside is I have Maggie for longer.
I set a Recall Point near the entrance to Stoneguard Village, then backtrack through the Cairnwood maps to Hasrinaxx and the treants (who have nothing to say about me saving the forest...). I backtrack still further to the Southern Foothills and then head south to the snowy High Plains.

Act Four, Part VI: Black Tiger Tribal Grounds, Battle of Silent Valley, Mist Dragon, Blackwood Glade:
The Black Tiger - The Silent Valley Battle - The Black Wizard
High Plains
The contrast between Cairnwood-ablaze and the chilly High Plains couldn't be starker. Upon our arrival at the gates a Barb Warrior coldly greets us.

Valennia refers us to her father, Chief Morik Far-Eagle.

Lazy barbs, always loafing around!
It seems Morik is facing another leadership challenge, this time from the Elder Shaman Talon Black Tiger whose father, Tald, we killed during the fight with the Half-orc, Erag Rulash.
Talon intends to defend the barbs from King Seamus by using his necro talents to raise from the dead the Dread Legion and hero of legend, Reikthor Black Tiger.

We are to travel to the burial grounds and wipe out Talon and whatever ancestors he's managed to raise - including Reikthor - in return for barb assistance in our diversion at Fairloch.

I suspect some here would like for Talon to succeed with his plan. The idea of our ancestors coming to save us has great power. - Barb Shaman.
I cannot bear the thought of meeting my honored ancestors in battle. How can we face such a thing? - Barb Warrior.
Black Tiger Tribal Holy Grounds
We bump into Talon almost immediately upon entering the burial grounds. There is an insight check here, perhaps based on Wisdom or just cosmetic (?), but Talon has made his mind up and nothing will change it, anyway.
Talon teleports to the burial grounds atop a hill. We begin our ascent in pursuit of him.

Here we face six enraged Dread Legionnaires...

... whom Nellise instantly implodes but for one (+70 EXP ea).

Ascending higher, Nellise quakes and flamestrikes the next lot of six, saving me much manual labor.

Now atop the hill, the expansive burial grounds of the Dread Legion stretch out before us. I order Nellise, Maggie and Criosa to hold their ground in the north, away from any potential aggro. As I explore the grounds, no less than fifteen legionnaires animate to attack me - and they are all tough muthas.

Talon is raising the dead - en masse!
I buff with Divine Shield and lure them to the north, ordering my three Henchmen to follow me to the south a little.

I buff with Divine Shield and lure them to the north, ordering my three Henchmen to follow me to the south a little.

The undead legion.
Maggie and Criosa stupidly wade into the fray (my fault), the former being cut down just before Nellise casts Mass Heal, inflicting massive positive energy damage upon the legion.

Nellise casts Mass Heal again for good measure, reducing each legionnaire to Near Death status.
Wow.
(This brings back memories of Maggie at the Edge of the Abyss against the specters).

Nellise having basically eaten the legion up, I feed on the scraps left over. Criosa, who literally did nothing all battle, ironically shot dead the last legionnaire (the turned unit at the back).

Nellise also turned a few of them - an all-star performance
I now spy Talon engaged in some kinda necromantic ritual..?

Oh, hi Reikthor! It seems the Elder Shaman has reanimated the Black Tiger of Legend.

My critical hit knockdown on Talon is as solid as openers come.

I pulverize Talon with powerful "divine" blows which bypass his obnoxious Epic Warding buff. Reikthor rages, Nellise casts Implosion, Maggie casts Storm of Vengeance and Talon begins casting... Horrid Wilting.

Horrid Wilting is dumped on three of the four heroes, inflicting "only" 270 damage all up. The annoyed shaman then quickly follows up with IGMS, inflicting a further 90 dmg, but really, his end is nigh (+393 EXP).

I now pick Reikthor apart while Maggie's Storm of Vengeance rages on, round by round (+866 EXP).
corpse of Reikthor: Cold Fury +6 greataxe (Keen, +2d10 cold, Dragon Breath, cold 1/day, Vamp Regen +8)corpse of Talon: Black Tiger Amulet (Haste, CHA -10, Imm: Death Magic/Disease/Mind-affecting/Paralysis, Regen +5, Evil/Neutral only)


We return to the yurt of Morik and inform the Chief of our success. He promises to send a few barbs our way when the time comes.
+5000 EXP


I now recall to North Cairnwood and take the exit into Stoneguard Village.
Stoneguard Village
Maggie now farewells us, an amusing departure.

A large Tusonite and allied force is now assembled in the Dwarven village, but no Dwarves are in sight?
You have served us well. We will honor our bargain. - Ancient Treant.
I have come to honor the pact between us. Death to our enemies! - Barb Berserker.
Damn this chainmail. Sure it looks good, but it absorbs the cold like some sort of... cold sponge! - Sand Dragon Merc.

It seems that, for now, the Dwarves are off-limits, their entrance purposely collapsed to keep them safe from King Seamus.

We catch up with General Duquesne in the Miner's Rest Inn.
Short of it: Criosa offers to assist a Tusonite archer platoon who have just been ambushed by an Aielund force in the Valley of Silence. We head straight there!

The Battle of Silent Valley
I sprint past a Siege Engineer, three Aielund Knights (+8 EXP ea) and two Knight-Commanders (+350 EXP ea) en route down the slope to the bridge where both Aielund and Tusonite forces are engaged in heavy conflict.

An enemy engineer launches his catapult at the Tusonites
I carefully lure the five mounted Aielunders down to the bridge, upon which ten Rangers (+40 EXP ea) are attacking our allied Tusonite force who are attempting to cross the bridge from the opposite end.


This shot perfectly shows the initial situation.
I shout out for Nellise and Criosa to follow me down the slope, tanking hard in anticipation of their arrival.

I shout out for Nellise and Criosa to follow me down the slope, tanking hard in anticipation of their arrival.

Heavy tanking right here.
Having been slightly delayed by taking out the engineer, Nellise and Criosa soften the pack up very nicely with their ranged weapons.

Having been slightly delayed by taking out the engineer, Nellise and Criosa soften the pack up very nicely with their ranged weapons.

Note the monastery top-right. Remember the slaadi?
The force all but annihilated, I clean up three rangers on the side of the lake - Criosa chipping in with a Fireball launched from the bridge.

Two allied Chevaliers and one archer died in the battle, compared to fifteen Aielunders.
The Tusonite Commander now warns of a second wave of hostiles.
Eight more Rangers now descend the hill to assail us, buffing with Protection From Elements, Cat's Grace and One With the Land, then launching an Imbue Arrow bombardment. I charge them, keeping Nellise and Criosa in the back row.

Center: Imbue Arrow strikes me.
As I hold these Arcane Archers at bay, Nellise teaches them how to properly inflict fire damage...

As I hold these Arcane Archers at bay, Nellise teaches them how to properly inflict fire damage...

... before imploding them.

Tons of loot is left post-battle, but Hasrinaxx, the Tusonite Quartermaster and the Grandmaster merchants have extremely limited buying power (about 12,000 GP, if memory serves). Only Hakim can afford this stuff (and he's a loooong way away):Knight loot: Knight's Full Plate (2), Knighthood Tower Shield +3 (2), Longsword +3 (2).Ranger loot: Great Sword +3 (18), Arrow +4 (1200).
Note that it doesn't matter whether you save one or all the archers, you will only ever receive +1000 EXP from the first Tusonite archer you talk to post-battle, and only three will appear in Stoneguard Village regardless.
We return now to the village inn and inform Duquesne of our success in the Valley, our failure with the elves (though we at least secured treant support) and our success in enlisting the barbs. The General now orders us to raid Terinus' tower for the Scepter of the Ages.
But before that, I travel aaalll the way back to Hakim in Trinity to sell off tons of loot and finally buy the Fortified Shield of Endurance +5 (DR 15/+6, CON +4) for ~400,000 gold. Our pockets are officially penniless. Whether the shield was worth it, only time will tell.

Blackwood Glade
We arrive in Blackwood Glade, cloaked in mist. This is a creepy place...
Terinus' tower can be seen silhouetted against the night sky. It is built atop (or carved out of) a huge towering rock in the center of the glade, with a yawning cave entrance which we now approach.

I glow in the dark, I am no rogue. Tower in background.
Guarding the front door is an acid-breathing Mist Dragon (+850 EXP, Dragon Blood). I chop it up into a dish fit for the wolves.

Guarding the front door is an acid-breathing Mist Dragon (+850 EXP, Dragon Blood). I chop it up into a dish fit for the wolves.

Things look cooler when they're wreathed in mist.
We cautiously creep into the tower...
Blackwood Glade Tower - Level One
At the end of a corridor is a room with fours doors, three of which are conventionally locked and one of which is magically warded (the leftmost/southern).

I bash down the mundane doors to three cells. From one cell emerges a Balrog (+350 EXP)...

Two crits (85+62 dmg)
... and from another, a Beholder (+1200 EXP). They never knew what hit 'em. The other cell was simply trapped with strong fire and poison.

... and from another, a Beholder (+1200 EXP). They never knew what hit 'em. The other cell was simply trapped with strong fire and poison.

Too much EXP for such a weak enemy
Each cell contains a floor lever, all three of which I now pull (in no particular order). This dispels the magical ward on the southern door, giving us access to another large room with three pentagrams enscribed on the floor.
Summoning circles that don't do anything. How odd. - Nellise.
These circles seem to be dormant, for the time being at least... - DM.

The pentagram summoning room.
The corpse of a dead adventurer also rests here (Dagger of Assassination +5 (on-hit vorpal DC-20), Stealth Armor +3 (Hide/Move silent +8.. srsly..), Epic Mantle of Spell Resistance (SR 32).
Of most interest is his journal, containing a riddle:
Twist and turn lest you fall,
The path below shall only stall.
We keep this in mind as we climb the stairs to the second floor.
Blackwood Glade Tower - Level Two
The first room on the second floor is also locked, and is furnished with a grand piano, an elegant standing harp and three wall-mounted paintings - one of which is magical. I touch the harp to the painting depicting a lady harpist. To my surprise, the lady in the painting plucks the strings of her harp! I mirror her plucks with the actual harp in the room, opening the locked door.

We're now confronted with a simple trapdoor maze which can be successfully navigated by "twisting and turning", as per the above-quoted riddle. There are three horizontal rows of six tiles each, side by side. To progress to the other side of the room we must take the far left tile (the only one that isn't a trapdoor on that row), then the far right tile on the second row, then finally the far left tile of the third and final row, leading to a door to the tower's third floor (+2500 EXP).

Three lines of six tiles each.
For extra EXP, we purposely fell down a trapdoor of each row to land three separate times in the "pentagram room" below, facing off first against two Balrogs (+350 EXP ea)...

For extra EXP, we purposely fell down a trapdoor of each row to land three separate times in the "pentagram room" below, facing off first against two Balrogs (+350 EXP ea)...

Whee! *thud*
... second, against two Glabrezus (+950 EXP ea)...

... and third, against two Vorlan Demons (+850 EXP ea).


Nellise's Banishment makes short work of a Vorlan
Level Up to 30!
(Epic Characters)
Lilura1: Champion of Torm (14) / Paladin (12)/ Fighter (4), Great Strength III, Great Charisma I
Criosa: Rogue (18) / Wizard (12)
Nellise: Cleric (28) / Paladin (2), Great Wisdom III
Blackwood Glade Tower - Level Three
This is quite a library. Terinus must have the knowledge from hundreds of years stored here. - Nellise.
Three insultingly weak Spectral Librarians attack us (+8 EXP ea).
Bookshelves here contain various scrolls: Legend Lore, Shapechange, Wail of the Banshee, Mordenkainen's Sword, Great Spell Breach, Displacement and Resurrection.

In the next room stands a Banshee, an ex-elven sorceress who buffs with Epic Warding and Epic Mage Armor.
You should not be here, pretty mortal. - Banshee.

She has a nasty repertoire: Power Word, Stun, Horrid Wilting, Wail of the Banshee and then alternating between IGMS/Cone of Cold spam.
Two more irrelevant spectres uselessly float around, but they just die by the wayside.
This fight went on for quite awhile, the Banshee having epic tanking ability and a scary battery of spells to unleash.Banshee: +850 EXP, Banshee's Robe +5 (Bonus sorc spell slot 6-7-8-9, CHA +4, Haste, on-hit Bestow Curse [12]).

IGMS has been nerfed by EMS.hak, but still hurts.
Bookshelves here contain even more scrolls: Improved Invisibility, Invisibility Purge, Meteor Swarm, Greater Spell Mantle, Glboe of Invulnerability, Isaac's Greater Missile Storm, Mass Charm.
The final room of level three is yawn-inducing: three more spectres and a bookshelf containing Fireball and Mordenkainen's Disjunction scrolls.
Criosa now detraps and unlocks the door leading to the fourth and final floor of the tower (DC-45/50).
We rest first, then buff before climbing the stairs.
Blackwood Glade Tower - Level Four
We don't even have time to climb the final stairs before three hulking Enhanced Iron Legionnaires charge us (650 EXP ea)! Ternius hangs back, buffing with Improved Invisibility, Epic Warding, Epic Mage Armor and Elemental Shield.
As we knock out two of the golems, Terinus - outside our line of sight - centers Greater Ruin on Criosa.

He follows up with IGMS before I can get in his face, at which point Criosa is insta-killed by Weird.

Terinus now unleashes Meteor Swarm, Prismatic Spray and then zaps Nellise and I a few times with Ball Lightning (60 dmg ea - they hurt).

Hitting Terinus inflicts solid fire damage on me (Elemental Shield), so I quickly swap out my Ring of Protection +5 for the Ring of Fire Resistance, and just before he unleashes Firebrand, too! (Which scorches Nellise for 60 dmg, prompting her to Heal herself immediately).
Terinus now shakily absorbs three critical blows from me as he desperately tries to hold on with lesser spells like Melf's Acid Arrow, but the power of the sustained attacks overwhelm him and he surrenders.

Crits of 62-61-60
I yield! Stay your attack! - Terinus.
I raise Criosa, then demand the Scepter of the Ages from Terinus, who also gifts us the Belt of Null Magic (CON +2, Imm: level 6 or lower spells).
We learn from Terinus that he has "masters" who will be most displeased with my progress against King Seamus, however he reveals nothing more than that, adding only that if we succeed in dethroning the King, he will reveal all.

We've searched for this scepter for a loooong time, but only now do we hold the assembled artifact in our hands.
+5000 EXP

There is a portal room in the center of this floor which teleports us outside to where we fought the Mist Dragon at the entrance; and in the most distant room - which we can't yet access - are illithid mechanisms, presumably used later.

We nose around the top floor a bit... Tick-tock - a grandfather clock? ...

Nice placeable!
... And two Brownie servants from another world..?
Oi! Don't step on me! - Lucas.

We take our leave of Terinus' tower, portaling outside and then heading northwest back to Stoneguard Village with the Scepter of the Ages FINALLY in our possession.
Act Four, Part VII : Battle for Fairloch, Ironlord's Fall:
The Battle of Fairloch
With the Scepter of Ages in hand, we return to General Duquesne at the village inn. The trio are to set sail on a small fishing boat to Fairloch harbor, where we'll disembark, stealthily wind our way through the sewer system, and attempt to open the front gates from the inside for our support forces who will be waiting. Meanwhile, the General will be staging an attack to draw attention away from the Castle, that we may face as little resistance as possible en route to King Seamus.

Nellise now warns me of Seamus' fanatical royal guard (hand-picked by her at the behest of the King) who will no doubt have his back. We won't underestimate them.

We take the northern exit out of Stoneguard Village.
North of Stoneguard Village
Oh, Kipper Bob is now married and lives in this sea-side cottage? How wonderful!

Kipper and Alene relax outside their home.
Kipper can always be relied upon to sail us somewhere - and we're only going to Fairloch this time (not the Isle of the Dead!). Thanks Bob!

Right then. Let's head out! - Kipper Bob.

The Saltfish heads out to sea and sails northeast, to Fairloch. - DM.
Fairloch - Docklands District
The Saltfish arrives in Fairloch without incident.

We farewell Kipper Bob...

... then step off the pier...
They're coming in through the Docks, run for your lives! - Commoner.

They're coming in through the Docks, run for your lives! - Commoner.

Lol, peasants! We gonna get you!
Let's try to avoid killing too many of the guards. I'm certain they're just following orders, and not actually evil. - Nellise.
Hmm... there's a rather large trap here, actually two set concentrically (DC-45/45). When tripped, they trigger a fireball and the ignition of alchemist fire barrels craftily concealed under broken pieces of wood.

The darker edge signifies two traps
Unfortunately, fully detrapping the area didn't prevent the barrels from inexplicably igniting and then exploding on us, anyway!

Unfortunately, fully detrapping the area didn't prevent the barrels from inexplicably igniting and then exploding on us, anyway!

We take major magic dmg.
Ah well, it was actually quite funny. You know, it would have been cool if Aielund Saga (and official content and other modules) made more use of deadly traps such as this...
Under the effect of Invisibility, I now scout out the Aielund force guarding the gate to the Market District, made up of three dismounted Knights, four City Watchmen, one War Cleric and one Aielund Archmage (who is the focal point in the below pic and becomes my target as soon as he walks around the corner of the District Guardhouse, on the right).

I knockdown-crit and then kill the Aielund Archmage and then immediately go for the War Cleric, whom I also knockdown-crit and kill. With the two annoying weaklings out of the way, the six grunts charge and circle me. Nellise now casts Word of Faith, inflicting severe sonic and stun on the hapless clumped-together Aielunders, making them easy marks.

All units yielded +8 EXP ea. (I won't be recounting small EXP rewards anymore - not at this lvl..)three Aielund Knights: Longsword +4 (3), Knighthood Tower Shield +3 (3)four City Watchmen: Leather Armor +2 (4), City Guard Shield +2 (4), Watchman's Club +3 (on-hit DC-14 Daze) (4).Aielund Archmage: Robes of the ArchmagiAielund War Cleric: Mace +0 lol
This gate has been blocked off with massive rocks. - DM.
Our arrival has been anticipated it seems. Let's try another entrance elsewhere. - Nellise.
Looks like the gate has been blocked off. I can't believe I'm saying this, but let's take the sewers! - Criosa.
We locate the entrance to the Docklands sewers, and enter...

Dockland District Sewers
Oh yeah, this was a great idea. - Criosa.
Nellise implodes four Assassin Elites in the blink of an eye (+80 EXP ea, Dagger +4 ea).

At the eastern entrance to the Market Sewers, we welcome Ronan back into the party.

Like Maggie, Ronan's been working out since we last adventured together.

Market District Sewers
They didn't have time to block off the entire system, so we have limited freedom of movement. - Ronan.
Limited all right! The only exit we can use is the southern one which leads to the Residential District; all others are barricaded.
We should head south to open the gates as soon as possible. - Criosa.
Before doing that, we explore in search of more assassins.
The old thieves guild was closed up years ago. Most of the people moved out of the city, but there's a couple of them still around.. - Ronan.

We dispatch three more assassin packs; then head to the Residential District sewers.
Residential District Sewers
Nothing much down here, just a solitary assassin pack roaming around, waiting to be killed. We rest up before climbing out of the sewers into the Residential District.

Residential District - Southern Gate
Sir Gabriel (ie, General Duquesne) has done it, the defenders have taken the field, leaving us free to open the gates! - Criosa.
Not quite.
Insurgents! Stop them before they get to the gates! - Sir Dennis Richmont.

Always kill the mouthy one first.
The High Priestess is the priority target in this battle, since there's nothing worse than working hard to wear down a royal knight to Near Death, only to have him be healed... Oddly, Sir Dennis yields zero EXP in this battle whereas the two Aielund Royal Knights yield +656 EXP ea and everyone else yields at least something. Weird..

The High Priestess is the priority target in this battle, since there's nothing worse than working hard to wear down a royal knight to Near Death, only to have him be healed... Oddly, Sir Dennis yields zero EXP in this battle whereas the two Aielund Royal Knights yield +656 EXP ea and everyone else yields at least something. Weird..

Sir Dennis is a badass - he wears no helm
Sir Dennis Richmont: Maul of the Titans +4 (STR +6), Amulet of Natural Armor +5, Epic Potion of Healing (2).
Aielund High Priestess: Potion of Epic Healing (2).six Rangers: Greatsword +3 (6), Arrow +4 (900).Aielund Archmage: Epic Potion of Healing (2).two Aielund Royal Knights: Potion of Heal (2).
The southern aka front gate is trapped and locked DC-30/40. Criosa beats Ronan to it.

The front gate to Fairloch is OPENED. Our allies enter Fairloch!
One each of allied Barb Berserker, Juggernaut merc, Sand Dragon merc, Tusonite Archer, Tusonite Chevalier and Ancient Treant now charge nine enemy Aielund Royal Knights who have thundered in from the north (ie, the Market District).
You pay, we come. Is good arrangement. Now, we kill! - Juggernaut merc.

Nellise rains down Storm of Vengeance and Fire Storm from which the enemy does not recover.

That damage!
Note that if your mercs die in these fights they will be replaced with a new unit and you can loot the old unit's corpse. In the case of Juggernauts, that's a Greatsword +5 and Ring of Resistance +3 (I ended up with eleven each); in the case of Sand Dragons, that's a couple hundred Arcane Arrows.
The next wave coming out of the Market District is soft n squishy: one Aielund War Wizard (Grey Wizard's Robe), one Aielund War Cleric and four Aielund Halberdiers. The battle is not worth recounting.
We take the north gate into the...
Market District
Standing in the center of the district is King Seamus in Ironlord suit, backed up by a harder hitting crew consisting of three Aielund Royal Knights, two Aielund High Priestesses, two Adamantium Shield Guardians, an Aielund Archmage and two (initially hidden) Assassin Elites.
Hold them here, or your lives are forfeit! - the motivational Ironlord.
The Ironlord now stomps off to his Castle.

The royal knights are kept down n dazed by Earthquake, Word of Faith and Hammer of the Gods. Three royal knight reinforcements arrive to replenish their losses, but they too meet the same fate.

An even stronger force guards the Castle Gate: eight Aielund Royal Knights, two Adamantium Shield Guardians, five Rangers and one each of Enhanced Iron Legionnaire (+568 EXP), Aielund Archmage and Aielund War Cleric.

It was a bloodbath...

The city forces now defeated, Criosa disables the DC-40 lock on the front gate of Castle Fairloch, which we now enter.
Castle Fairloch
Here we face off against the Knight-Templar to the crown, Sir Gregory Vance, flanked by two Aielund Royal Knights, an Aielund Archmage and an Adamantium Shield Guardian.

He survives longer in the duel because his Mithril armor bestows crit-immunity (+743 EXP).

Sir Gregory's corpse is looted for Stormbringer +4 longsword (Elect resist 20/-, +1d10 electrical, Call Lightning [10] 5/day, Chain Lightning [10] 2/day), Cloak of Fortification +5 (+5Ac def, all-Saves +5) Mithril Tower Shield [DR 10/+5], Mithril Full Plate (+4 AC arm mod, Imm: Critical Hits, 40% weight reduction).
Throne Room
Crazy King Seamus, flanked by Archbishop Anthony Brown and Archmage Auberon, runs up to us and initiates dialogue.

I use the Scepter of the Ages on the Ironlord, stripping the suit of the power which grants King Seamus "immortality".
Terinus has betrayed me! - Ironlord.
Ignoring the Ironlord for the moment, I take out both the archmage and bishop before they can cast anything too annoying (the bishop manages to cast Greater Dispelling on me, and Epic Spell: Mummy Dust while we take out the archmage, but that's it). Aielund's highest paid assassin (the initially hidden Sandoval Kai) enters the fray but fails to make any impact on the fight, also dying not long into it.

Free to focus now on the Big Bad, we don't hold back.

Sir William! Send in the reinforcements NOW! - Ironlord.

You will taste justice at last Seamus. My one regret is it didn't happen sooner! - Sir William Bryce-Clifton.
Bursting through the door in the north comes Sir William along with a few militia noobs; from the south, two royal knights come to the King's aid.

We continue pummeling the Ironlord as his two royal knights fall by the wayside.

It's going to explode! Get me out of this thing! - Ironlord.
+4830 EXP

He wasn't kidding. A huge ball of light and fire expands outward...

... engulfing the Castle and shaking the city itself...
The Ironlord has FALLEN! The mad reign of King Seamus is ENDED!

Corpse looting ensues:
Ironlord: Blacklight +6 greatsword (on-hit DC-18 Doom, +2d12 electrical, True Seeing).

Archmage Auberon: (+7 EXP), Staff of Thunder & Lightning +3 (+4 electrical, on-hit DC-14 Daze, charges: Call Lightning, Great Thunderclap), Robes of Darkness (+5 AC arm mod, Imm: Death Magic, Level/Ability Drain, Saves +2, Conc +4, Spellcraft +2), Ring of Protection +5, Amulet of Natural Armor +5, Dragon Slippers (DEX +2, Imm: Fear/Knockdown, SR 10).
Archbishop Anthony Brown: (+35 EXP), Heavy Mace of Order +4 (+2d10 sonic vs chaotic, Lawful only)
Sandoval Kai: (+656 EXP), Tuxedo of Infiltration (+8 AC arm mod, DR 10/+5, Darkvision, Freedom, Haste, Improved Invisibility [7] 5/day, Knock [3] 5/day, Hide/Move Silently +8), Belt of Agility +6 (DEX +6, Freedom).
I guess the people should have stood up against this tyrant sooner. - City Watchman.
Sir William is ashamed of his past inaction, but we assure him that we think he acted prudently.

And what's this, King Osric has just strolled in?

I guess the people should have stood up against this tyrant sooner. - City Watchman.
Sir William is ashamed of his past inaction, but we assure him that we think he acted prudently.

And what's this, King Osric has just strolled in?

The black cat slinking off to the right is Terinus
Osric now boldly claims the Kingdom of Aielund as his own. (During this conversation Criosa is auto-removed from the party, replaced by Robert Black).

Criosa agrees to marry Osric in order to end the war. The satisfied Osric now leaves for his ship. At this point, Terinus now cancels his polymorph.

We farewell Criosa..

I now take some time to speak with my companions. First, Robert Black:

Now Nellise:

And Ronan, who asks me to meet him outside; then leaves the party.

Lastly, I initiate dialogue with Terinus. He tells me of "the Ancients" (whom I read about in the Hall of the Ancients - referred to in a note as "Saqarin"). They destroyed the Eldar as they left this world, are the wardens of all races, have god-like power (the Minogon-like exoskelly is their tech) and are gonna kill us all unless we kill 'em first. Terinus promises to tell us more when we reach the privacy of his tower.
With regard to Aielund's fate, Terinus is positive enough. He believes Criosa will rule Aielund as Queen and the Kingdom rebuilt will be more powerful and prosperous than ever before - if we can stop the Saqarin.
Nellise and Robert Black are now auto-removed from the party, but will follow both Terinus and I to the tower in Blackwood Glade.

We step outside the castle into the city of Fairloch, perhaps for the last time...
Cutscene - Fairloch Market District
Lilura1, a moment of your time. - Sir William Bryce-Clifton.

Hello everyone, what are you all doing here? - PC.
We were fighting in the battle of course. I wouldn't have missed it for the world! - Valennia.
But now that it's over, I figured we could use a drink or ten. - Ronan.
And we get to thank you for everything you've done for the country! - Maggie.
You are the one who united us in common cause. Without that, we never would have won this war. - Sir William.
It means a lot to me to see you all again. More than you can know. - PC.
We're heading to the Fair Maiden tavern for a drink, come with us! Spartan is going to change into a rat! - Maggie.
I never agreed to that, tiny woman. - Spartan.
I... need to sort a few things out first. - PC.
What things? - Sir William.
*turns to face Black Cat* (ie, Terinus)
Oh, nothing important. I'm just... going for a walk. I may be some time. - PC.
As you wish. After you've cleared your head, come and join us. - Sir William.
Yes, I will. Until then... farewell. - PC.
*PC walks off with black cat; they both teleport out of Fairloch*

Act Four, Part VIII: Blackwood Glade, Vault, Ebon Tower, Veronique Le Noir:
The Tower of Blackwood Glade

So! We've defeated the mad King in Ironlord get-up and stopped the Aielund-Tusone war, but now it seems there's an even greater threat to face - the Saqarin.
We're standing in the tower's portal chamber, having teleported here from Fairloch's Market District. We're here to learn more about the Saqarin.
Lucas will see to your needs. I will return shortly. - Terinus slinks off to his bedroom and cancels polymorph.

Nellise rejoins me. I love her steely determination to bring Terinus to justice if his explanations fail to impress her.

Robert's only concern is how much he'll be paid..

We are now greeted by Lucas and Saphiron, the two brownies we almost squished last time we were here. Lucas is a merchant with ID ability and infinite buying power (like Hakim), but can also pay up to 30,000 GP for a single item. He doesn't really sell anything, though. Financially, we were struggling to make ends meet with only 50,000 GP in the coffers, but after selling the phat lewt from the Battle of Fairloch, we're now sitting pretty on a mound of 900,000 gold - but nothing to spend it on, at least at this stage.

Prattler.
I love what they've done with the place. Nothing says 'home' more than a bunch of broken golems. - Robert.

I love what they've done with the place. Nothing says 'home' more than a bunch of broken golems. - Robert.

Our handiwork from our last visit raid.
We meet up with Terinus in his bedroom. At our request he removes his hood, revealing himself as Dak'kon Gith! He is from "a pocket dimension inside the Astral Plane." He invites us to dinner; we graciously accept.

Having finished our meal, Terinus expresses concern over King Osric's acquisition of an Adamantium Golem. From where or from whom did he acquire it? We'll need "powerful weapons" if we're to destroy it, and acquiring them will be our first course of action.

Much wine is sipped and many a cigar is puffed as Terinus divulges info on his former masters: Ancients aka Devourers aka Saqarin. The trio agree they sound like a rather unsavory lot.

Terinus now deactivates a shield and shows us to his hitherto inaccessible lab.
Nice digs. Lots of whirring devices and such. I bet he craps out the window just like the rest of us though. - Robert.
Switch on the power generator, and I shall set up the teleporter. - Terinus.
I do so.
Thank you. - Terinus.
The Gith now recalibrates the portal to send us to a Saqarin outpost sealed inside the belly of a mountain. Let's go get our hands on these uber-weapons!

We follow Terinus into the portal...
The Vault
We arrive unscathed, and look around dumbly.
Come... - Terinus.
We follow.
Arg! A trap... wand... door... - Terinus.
Terinus is paralyzed by a trap.

I pick up the Wand of Lightning at his feet and fire it at the Energy Converter, releasing the wizard and opening the door to another chamber. Terinus is suspicious, since he didn't set the trap last time he was here...

This entire section of the wall has been smashed in with incredible force. The remains of a device can be seen within the wall. - DM.

We enter the vault proper..
No.. no it cannot be! The vault has been ransacked!
All that knowledge... stolen.

Normally aloof and clinical, Terinus also has a flair for the dramatic
Having regained his composure the Gith asks me to replace a power generator's crystal.

The dresser from which I procure the Crystal Rod zaps us for 228 electrical damage each - we laugh at each others' hair standing up.
The power generator is now functioning (+1000 EXP).

Now with power, Terinus uses the console to review security footage of what transpired in the Vault. When I impatiently ask what he saw, he tells me to look for myself.
The panel flashes and blinks randomly at you. It seems to be working, after a fashion. - DM.

This is what I saw:
*Cutscene*
The Vault

*Tusonites creep into the vault*
It seems safe enough. - Tusonite Chevalier.
*An Adamantium Golem lumbers into the chamber*
I don't care what His Majesty says, I don't trust that thing. - Tusonite Chevalier.
Keep your opinions to yourself, Sir Knight. - Tusonite Commander.
Sorry, Sir. - Tusonite Chevalier.
*Osric strolls in*
Excellent, everything is as I was told. Our troubles are over, gentlemen. - King Osric Davignon.

Any idea how we are to get through that magically barred door, Majesty? - Master-At-Arms.
Of course. A simple matter, easily resolved with the right tool.
*King Osric zaps the Energy Converter with a Wand of Lightning*

One last thing before we enter. Golem, destroy that scrying device. - King Osric.
*The Golem lumbers over and smashes the scrying device*
*Black out*
/cutscene
Terinus is understandably pissed off. Apparently, the only one who could have given Osric the knowledge to raid this place is an associate of his, another "warden"..

The Gith now recalibrates the portal destination to this "paranoid woman's" tower..
The Ebon Tower
I guess all their towers are built the same way. It looks almost identical to the Blackwood Tower. - Nellise.
Yep, this place is a carbon copy of Blackwood Tower.
I need to speak with you... come here. - Veronique Le Noir.
The short of it here is that Veronique is, like Terinus, guilty of working for the Saqarin and is responsible for making Osric filthy rich and powerful (just as Terinus did for Seamus). She refers to both monarchs as "projects" and "King-puppets".


Veronique teleports us back to Terinus' tower, but not before giving a word of warning: do not interfere with Osric.
The Tower of Blackwood Glade
Terinus now heads to the lab to scry for Osric's location (he's probably sailed back to Tusone by now, I guess..)

With Terinus' permission we loot his antechamber:
Bookshelf: (scrolls) Resurrection (4), Greater Restoration (4), Wall of Fire, Fireball, Globe of Invulnerability, Greater Planar Binding, Greater Spell Mantle, Isaac's Greater Missile Storm, Summon Creature VIII, Wounding Whispers, Energy Buffer, Dispel Magic, Delayed Blast Fireball, Clarity, Chain Lightning, Bigby's Clenched Fist.
Chest of Drawers: Potion of Epic Healing (12), Potion of Heal (15), Potion of Restoration (15), other trivial potions.
We return to Terinus who has now located Osric in Myrfell Palace in Tusone. Our mission will be to rescue Criosa, take out the Dreadnought and end the threat posed by Osric.

We take the portal to Myrfell, at which point Terinus joins the party (cool, a party of four now!) I can now also enchant weapons through him, but obviously not here, so we return immediately to the tower lab in order to enchant and jiggle our inventories around in preparation for this assault on the Palace. (Why Terinus doesn't just join/enchant before Myrfell, I have no idea.)
First up, let's see what gear our two new companions come decked out with. Hmm.. not bad, not bad. But I think we can do much better:
Robert Black: Razor's Edge +5 (Keen, Mass crits 1d10, on-hit DC-14 Greater Dispelling, +1d10 piercing [2]), Chevalier's Shield +3 (Piercing resistance 10/-) Hellfire Shield +5 (SR 22, Regenerate [13] 1/day), Armor of the Warlord (DR 5/+5, Regen +1) Mithral Full Plate +4 (Imm: crits), Cloak of Resistance +2 (all-saves +2) Epic Mantle of Spell Resistance (SR 32), Gauntlets of Ogre Power (STR +2) Epic Gloves of Discipline (Disc +30), Assault Helm (Bonus Feat: Slippery Mind, STR +2, Saves +2, Disc +6, Intim +6, Regen +1), Greater Belt of Guiding Light (Imm: Death Magic/Fear, +4 Spot, Search, Listen, Lore) Belt of Fire Giant Strength (STR +5), Ring of Protection +5, No second ring Ring of Resistance +3, Amulet of Protection +4 Black Tiger Amulet (Haste, CHA -10 [lol], Imm: Death Magic/Disease/Mind-affecting/Paralysis, Regen +5, Evil/Neutral only), No boots Boots of Striding +6 (CON +6), Composite Longbow +3 Thunderstrike longbow (Mass crits 2d12, Mighty +5, Unlimited arrow: 1d6 lightning, Great Thunderclap [13] 1/day), Arrow +4 (198), Potion of Heal (3).

CHA 3 - such a charmer!
Ooo, I like your boots Terry! But I think they'd look better on me, what do you think? No? Well too bad! I'm takin' 'em..
Terinus Blackcloak: Staff of the Ancients +6 (+20 magical dmg, True Seeing, Regen +2. Cold/fire resist 10/-), Robes of Terinus +5 (DR 15/+7), Haste, Imm: Death Magic/Knockdown/Paralysis, all-Saves +2, Conc/Spellcraft +8), Epic Mantle of Spell Resistance (SR 32), Hood of Intellect (INT +8, Bonus Feat: Slippery Mind, Boots of Hardiness +4 Greater Boots of Agility (DEX +4, Bonus Feat: Improved Evasion), Ring of Clear Thought +6, Ring of Protection +5, Greater Amulet of Health (Imm: Disease, Level/Ability Drain, Poison, all-Saves +3, Regen +1), No gloves Gauntlets of Ogre Power (STR +2), No belt Belt of Null Magic (CON +2, Imm: level 6 or lower spells).
Wait what? No Spell Focus feats? Ze horruh! Mmm... perhaps I will give you the Belt of High Sorcery..

I might as well bring Nellise and myself up-to-date in this post, too:
Nellise Sanneman: Mighty Crossbow of Speed +5 (Bonus Feat: Rapid Reload, Mighty +4, Mass Crits 1d10), Nether Elf Plate Armor +5 (Haste, Imm: Darkness, Hide +12, CHA -2), Belt of Frost Giant Strength (STR +4), Cleric's Hood (+4 WIS, Conc +10), Blessed Vestments of Faith (DR 20/+5, Imm: Death Magic & Level/Ability drain), Epic Gloves of Discipline (Disc +30), Boots of Striding +6 (CON +6), Periapt of Wisdom +6 (WIS +6), Divine Ring of Holiness (Bonus cleric spells: 5/6/7/8/9), Ring of Protection +5, Bolt +5 (99).

WIS 39 - godly.
Lilura1: Gaston's Longsword +5 (Keen, Mass Crits 2d6, on-hit DC-14 Slow), Divine Half Plate +5 (Haste, Imm: Level/ability drain, Greater Planar Binding [15] 1/day), Fortified Shield of Endurance (DR 15/+6, CON +4), Belt of Fire Giant Strength (STR +5), Hood of Intellect (INT +6, Conc +10, all-Saves +1), Nymph Cloak +6 (CHA +6), Boots of Hardiness +4 (+4 AC dodg, CON +4), Epic Gloves of Discipline (Disc +30), Amulet of the High Priest Maecal (+5 AC nat, Imm: Death/Disease, Regen +1, SR 28), Ring of Regeneration (Regen +4), Ring of Protection +5.

Lilura1: Gaston's Longsword +5 (Keen, Mass Crits 2d6, on-hit DC-14 Slow), Divine Half Plate +5 (Haste, Imm: Level/ability drain, Greater Planar Binding [15] 1/day), Fortified Shield of Endurance (DR 15/+6, CON +4), Belt of Fire Giant Strength (STR +5), Hood of Intellect (INT +6, Conc +10, all-Saves +1), Nymph Cloak +6 (CHA +6), Boots of Hardiness +4 (+4 AC dodg, CON +4), Epic Gloves of Discipline (Disc +30), Amulet of the High Priest Maecal (+5 AC nat, Imm: Death/Disease, Regen +1, SR 28), Ring of Regeneration (Regen +4), Ring of Protection +5.

I like what I see.
Utility items: Ring of Elemental Earth (Greater Stoneskin, Earthquake 1/day), Ring of Fire Resistance (Fire resist: 30/-, vs fire saves +10), Ring of Power (Resist cold/ele/fire 15/-, Regen +1, Freedom), Panther Figurine (summon Astral Panther [capped at lvl20]), Potion of Epic Healing (28), Potion of Heal (50+), Bag of Holding (4), 900,000 cold hard cash and probably excess junk worth about 500,000 gold...
Act Four, Part IX: Myrfell, Osric's Downfall:
Tusone Capital City - Myrfell
We stealthily teleport back into Myrfell, ending up just behind the Cathedral.
Okay people, we're not here to see the sights. Let's do what we came to do and get out of here. - Robert.
That's right - the other districts and buildings are off-limits, anyway.
Remember, we're here for Osric. Do try to avoid any needless killing.. - Nellise.
We approach the entrance to Myrfell Palace.
This place is off-limits to you. Begone. - Tusonite Royal Guard.

We can simply kick down the Palace door and kill off the royal guards, but that hardly seems noble or the elegant solution, now - does it..?
We look around, searching for ideas..
On the northern end of the Palace is a foreman and three laborers, busily repairing it...

I get them to leave (+2000 EXP)...

... then set the lumber alight and run off, giggling, to hide behind the Palace, where we wait to see what unfolds..

One of the workers returns to the scene...
Sacre bleu! FIRE! FIRE! - Worker.
Several royal guards exit the Palace to see what all the fuss is about.
While they busily extinguish the fire, we sneak into the Palace behind their backs.
+5000 EXP

Myrfell Palace
Well, that wasn't too hard. But I still expect a lot more guards up ahead. - Robert.

Level Up to 31!
(Epic Characters)
Lilura1: Champion of Torm (15) / Paladin (12)/ Fighter (4)
Nellise: Cleric (29) / Paladin (2)
Robert: Fighter (31)
Terinus: Wizard (30) - no level up script
His (Osric's) chambers are through that door if I recall correctly. - Nellise.
A guard looks through a slot in the door and says 'You cannot pass'. - DM.
Terinus casts Knock on the door, I open it, and then Terinus insta-kills the three royal guards with Weird.

In the next room stand three Tusonite Commanders, strategizing. Terinus launches Incendiary Cloud into the room, then points his finger at one of the commanders, insta-killing him. I clean up the scraps. Only one commander corpse can be looted for Elite Chevalier Armor +5 (Piercing resist 5/-) and Chevalier Warhammer +5.

Palace Level 2
Robert and I take on three more royal guards the conventional way, just outside the dining hall.
Say what you will about Osric, he has good taste. We still gotta kill him though, no question. - Robert.
Tusonite vintage is looted from a wine cabinet.

As we head north along a passageway, nine royal guards charge us from the other end. Terinus withers 'em with Horrid Wilting...

... then zaps em with Chain Lightning...

... and then Nellise finishes them off with Storm of Vengeance and Fire Storm...
Their screams of anguish and pain reverberated through the many halls of the Palace..

Off this main passageway is Osric's bedroom with an Adamantium Vault set firmly into the wall, but we don't yet know the combination. We loot an armoire of royal attire and robe, then continue heading north up the passageway.

In the northwest of this floor is a library, an armory and a treasury.
Library: Improved Invisibility, Elemental Shield, Bigby's Clenched Fist, various lore books.
Armory: Halberd +5, Halberd +4, Halberd +3, Spear +5 (2), Spear +4 (2), Warhammer +5, Chevalier Armor (8), Chevalier Helm (8), Flaming Arrows (396), Armor Piercing Bolts (396).
Treasury: +250,000 GP sprinkled generously on the floor and in six coffers. The DC-55 safe contains: Diamond (3), Emerald (2), Ruby (3), Lesser Ioun Stone: Pink (CON +2), Lesser Ioun Stone: Pale Blue (STR +2), Lesser Ioun Stone: Deep Red (DEX +2), Lesser Ioun Stone: Pink and Green (CHA +2).
Oh look, here's my retirement pay. - Robert Black.
This must be the left over gold from Osric's ill-gotten gains. - Nellise.

The six coffers are filled with gold.
In another bedroom a drunken nobleman - who looks strikingly similar to Osric - mistakes us for mere maids.
Just take the chamberpot and leave some more wine, maid. - Drunken Nobleman.
We ignore him, and descend to the third level.

Palace Level 3
We shrug off two royal guards on our approach to the Saqaarin Dreadnought (ie, Adamantium Golem).
Intruders! Golem, destroy them! - Osric.
(Osric scurries into a makeshift bedroom to join Criosa.)

The Dreadnought is a beast - one can grow old waiting for colossal tanks like this to finally fall... (+1190 EXP).

We now confront Osric.
My word! This place is most unseemly! - Nellise. (There is a whip in the room)
Osric is brimming with confidence, what with the Saqaarin relics he wields (his blade is similar to if not the same as the one Seamus wielded)..
En Garde! - Osric.

Veronique almost immediately comes to Osric's aid, unleashing Epic Spell: Mummy Dust and Epic Spell: Greater Ruin.
I told you to STAY AWAY FROM OSRIC! Now you will suffer the consequences. - Veronique.

Despite toting relics of the Saqaarin and buffing with Epic Spell: Epic Warding, it doesn't take overly long to reduce Osric to Neath Death status (I inflict 28 damage increase dmg per crit that bypasses ES: EW, and that's if he manages to cast it), at which point:
Don't send me away Veronique! I can beat them! Noooo! - Osric.
Osric is teleported out of harm's way by Veronique just as Robert says something badass to him and Nellise Mass Heals us.

Veronique - a wizard with Pale Master levels - calls down Meteor Swarm as I'm caught in the grasp of her Bigby's Crushing Hand.

Terinus now insta-kills Veronique with Weird.

Veronique has some tricks up her sleeve, though. She comes back to life and casts another Meteor Swarm even as Terinus unleashes Prismatic Spray. On her last legs and in desperation, she casts Horrid Wilting and IGMS, but they don't stop the mighty sword-blow that drops her dead (+1330 EXP, Searing Kiss +7 (+2d6 Neg-en, Keen, vamp regen +10], Ring of the Phoenix [Regen +4, Resurrection [13]).

We learn from Terinus that Osric was no doubt teleported to the Ebon Tower, but that it would take him several weeks to bypass the wards blocking entry to it. Anyway, we have reduced Osric back to the weakling he is and have bigger fish to fry, though first we must find the immensely important documents and books that he stole from the Vault!

Criosa now temp-joins so that we may escort her out of the basement and back to Blackwood Tower.

Palace Level 2
Back upstairs, we now give some wine to the drunken nobleman (Osric's cousin) in return for the combination to the Adamantium safe in Osric's room.

Inside the safe we find: Stolen Saqarin tome, Stolen Saqarin documents, Birth record, Rod of Resurrection (13). We're too dumb to understand anything but the Birth record, which is actually quite interesting. It seems Osric is not the true King of Tusone - that drunkard is!

We now give Sebastian a reason to give up drinking. With Osric's life ruined, we take our leave (+3500 EXP).

Palace Level 1
En route to the exit, Nellise implodes the Master-At-Arms (+300 EXP, Adamantium Helm [DR 10/+7, True Seeing], Ring of Protection +7, Sightblinder +5 bastard sword [+5 piercing dmg, Keen, on-hit DC-26 Blindness, 2d6 mass crits], Lesser Force Shield of the Ancients +8 [25% resist bludg/pierce/slash, on-hit 2% Chaos Shield lvl3]) and three royal guards (Elite Chevalier Armor [3], Chevalier Helm [3]).

We exit the Palace and take the portal back to the Blackwood Tower.
The Tower of Blackwood Glade
Terinus informs us that if we wish to find anti-Saqaarin weapons, then we must travel to other planes of existence.

Terinus and Criosa now exchange words, probably for the last time...


We farewell dear Criosa, who must leave now to take up the mantle at Fairloch.

Act Four, Part X: Hall of Worlds, Assumption, Mount Erebus, Archangel Benedictum, Archduke Insidiae:
Heaven & Hell

Act Four, Part X: Hall of Worlds, Assumption, Mount Erebus, Archangel Benedictum, Archduke Insidiae:
Heaven & Hell
Blackwood Tower
Terinus tells us where to find uber-loot for use against the Saqaarin: the plane of Twilight and The Border Ethereal. He then opens a planar gate to an "extra-dimensional space" called The Hall of Worlds.
We step into it..

The Hall of Worlds
Now here's something you don't see everyday. - Robert Black.
Wonders never cease. I've never imagined anything like this place. - Nellise.
This great circular Hall is lined with eight doors leading to the planes of Abraxus, Assumption, The Abyss, The Nine Hells, Acheron, The Border Ethereal and Twilight.

I open the door leading to The Abyss. How appropriate: an Abyssal Nightmare pops out which just keeps on respawning until I listen to Terinus.
Close the door! - Terinus.
I slam it shut.

Mmm... another door, this one leading to Assumption.. this one doesn't sound like a threatening plane...
We enter...
Assumption - The Blessed Vale
A choir can be heard, sort of like Gregorian chant, I guess - very relaxing..
Contemplative Heavenly Souls and eager-to-help Archon Lanterns peacefully inhabit this place, with Angels patrolling the lower reaches of the Vale.
This place is more beautiful than I have ever dreamed! - Nellise.

May the peace of Assumption be upon thee, traveler. - Heavenly Soul.
Thou arrival has been anticipated traveller. Proceed forthwith to the Cathedral of the Seraphim, there ye shall find the answers ye seek. - Angel.
It's a bit bright for my taste. I mean, glowing angels, beautiful skies, inner peace - who needs all that stuff. - Robert Black.

Thou arrival has been anticipated traveller. Proceed forthwith to the Cathedral of the Seraphim, there ye shall find the answers ye seek. - Angel.
It's a bit bright for my taste. I mean, glowing angels, beautiful skies, inner peace - who needs all that stuff. - Robert Black.

In the southeast of the Vale stands the Contemplative, Aoipe. She is not an angel, but a muse (ie, "a source of inspiration"). She's also a bard. I attempt to tell her my tale, but my performance is rather poor (+1000 EXP).


Humbled by the muse, we make our way north and then east into...
The Isle of Light
The radiant Cathedral of the Seraphim rises up majestically over the Isle.

Two bear-headed Celestial Avengers guard the bridge across a holy stream.
The avenger gazes at you with eyes filled with resilience and benevolence. - DM.

Holy water springs up from the fountains, soothing and healing us.

We ascend the slope..
Ok, now that's impressive. - Robert.

Ok, now that's impressive. - Robert.

With reverence we enter the cathedral...
Cathedral of the Seraphim
Three Utopian beings stand before us: Archangel Benedictum (the right hand of God), Veritas (Defender of the Faith & Sword of Aeladin) and Serenity.

A rather lengthy discussion now unfolds, but the short of it is that Benedictum will aid us against the Saqaarin after we aid him against the demon lord Abaddon in the plane of Acheron (we have to pass through Archeron eventually, anyway - and without the aid of the Utopians and their "Tempest", we'd stand no chance against Abaddon..). Now, in order for the angels and heroes to even enter Acheron, we first must travel to The Nine Hells to procure from the devil, Insidiae, a talisman. We are promised material rewards of divine epicness should we be successful in delivering the talisman to the Archangel.


A revealing flavor convo between Nellise and Veritas:

We now take our leave, backtrack through the Vale and out to the Halls, then take the door to the The Nine Hells.
Mount Erebus
Mount Erebus is a volcano. Avoiding the lava flows is paramount as they inflict epic fire damage. Worse than that, being part of The Nine Hells, Erebus is swarming with devils ("baatezu").
We are set upon a most perilous course. Keep your mind focused on our goal, and we will walk out of here alive. - Nellise.

It's just like I always pictured it. Let's get this over with, I don't fancy being a prisoner here for the next thousand years. - Robert.
Get away from me! I *deserve* to be here! - Tortured Soul.

Three Elite Cornugons or "horned devils" whip us with fire as we head eastward, winding our way around the bubbling lava flows (+1680 EXP ea).


Having wound our way to the central north, three death-attacking Greater Osyluth or "bone devils" claw at us with blinding speed (+910 EXP ea).

Now in the far west, three roguish Erinyes Matriarchs troll us with their Epic Dodge and sneak attacks (+910 EXP ea).


Having wound our way to the central north, three death-attacking Greater Osyluth or "bone devils" claw at us with blinding speed (+910 EXP ea).

Now in the far west, three roguish Erinyes Matriarchs troll us with their Epic Dodge and sneak attacks (+910 EXP ea).

Get around the side, try to outflank them. - Robert.
We tried, but flying enemies are difficult to outflank.

We tried, but flying enemies are difficult to outflank.

Foolish mortals... you will rue the day you came here. - Pit Fiend.
Guarding the eastern exit of Erebus is a Pit Fiend (+1386 EXP, HelBlade +6 greatsword [+2d10 fire, vamp-regen +3]) and a few flanking cornugons.

The Fields of Torment
Five more Greater Osyluths are dispatched here upon our arrival.
Level Up to 32!
(Epic Characters)
Lilura1: Champion of Torm (16) / Paladin (12)/ Fighter (4), STR +1
Nellise: Cleric (30) / Paladin (2), WIS +1
Robert: Fighter (32), STR +1
Terinus: Wizard (30)
We cross a gated bridge leading over a river of fire..

.. and are mobbed on the other side by four more Greater Osyluths, three Erinyes Matriarchs and a second Pit Fiend, this one wielding the Felreiver +7 battleaxe (+2d10 neg-en, Keen, Mass crits 2d10, vorpal DC-14). I tried to bottleneck them on the bridge, but the Osyluths simply walked through the lava flow and the Erinyes took to the skies, landing to flank us.


We spy a cave entrance in the far east leading to Hammerheim..
Fort Insidiae
One Archdevil and an uber Pit Fiend and Erinyes stand before us.

Fort Insidiae
One Archdevil and an uber Pit Fiend and Erinyes stand before us.

From left to right: Errath, Insidiae and Jezelle
You shall listen to me. - Archduke Insidiae.
I listen up to a point, as Robert is funny and you can ally with the devils if you like. But, as a Paladin, it just wouldn't make sense, so the inevitable battle begins!

You shall listen to me. - Archduke Insidiae.
I listen up to a point, as Robert is funny and you can ally with the devils if you like. But, as a Paladin, it just wouldn't make sense, so the inevitable battle begins!

As you can see from the feedback window, Jezelle neglecting to throw up Epic Warding meant she wasn't gonna be in this for the long haul. This gives us a huge advantage.


Furious at Jezelle's premature departure, the Archduke casts Greater Dispelling followed by Greater Ruin and Mestil's Acid Sheath as Robert and I pummel the enraged General Errath (and Nellise stings Errath with armor-piercing bolts from safe distance).


Errath is repeatedly stung by Nellise and can't tank for long the mighty blows inflicted upon his thick hide by Robert and I, falling humiliatingly early in the bout just like Jezelle.


Everyone now focuses on Insidiae, who staunchly endures the relentless assault by the four heroes...

.. but eventually falls to a Robert Black critical. However, it isn't over..

Even Terinus landed a melee blow!
I am not as easy to destroy as you might think, fool. - Archduke Insidiae.
Insidiae rises from the ashes and is as butthurt as ever!

I am not as easy to destroy as you might think, fool. - Archduke Insidiae.
Insidiae rises from the ashes and is as butthurt as ever!

A second ass-kicking is administered, and from this one the Archduke has no comeback.

We relieve the devils' corpses of some wicked items:
Archduke Insidiae: +1470 EXP, Helstaff +7 (+2d10 fire, charges: Firebrand, Fire Storm, Flame Strike, Epic Spell: Hellball), Talisman of the Tempest.Jezelle: +1190 EXP, Diabolic Armor +9 (Divine resist 40/-, CON +4, STR +4, Haste, Imm: Death Magic, Evil/Neutral only), The Scourge +7 whip (+2d10 acid, Keen, Mass crits 20, Bonus feat: Disarm [whip], on-hit DC-20 Demon Fever disease) Infernal Shield of the Lower Planes +8 (DR 15/+7, Fire resist 30/-, Elemental Shield [12] 5/day, Fire Storm [18] 1/day).General Errath: +1330 EXP, Destroyer +7 bastard sword (+2d10 fire, Fire imm bonus 75%, Fire Storm [18] 2/day).
Satisfied with this haul, we take our leave of the fort.
Backtracking through the Fields of Torment, five more Greater Osyluths fall to our righteous wrath; and as we wind our way back through Mount Erebus, three more Greater Osyluths and four Elite Cornugons are kicked to the curb.
We now exit to the Halls, and back into Assumption, through the Blessed Vale and Isle of Light to again reach the towering...
Cathedral of the Seraphim
The Talisman of the Tempest is now returned to the Archangel, Benedictum.
+10,000 EXP.
Before fluttering away, Benedictum hands us the Key to Acheron. He promises the angels will meet us in Archeron to aid us against Abaddon and secure a gateway that will take us to the Saqaarin citadel.

Serenity now rewards us: +2500 EXP, Nightbane +7 longsword (+2d10 divine dmg, on-hit DC-16 Dispel, on-hit DC-14 slay evil), Angelic Hood (+10 AC vs. Chaotic Evil, CHA +4 , WIS +4 , Imm: Level/Ability drain, Regen +1), Angelic Shield +8 (DR 20/+7, CHA +4, Regen +2), Angelic Armor +9 (Neg-en resist 30/-, CHA +4, STR +4, Haste, Imm: Death Magic/Knockdown, Good only), Arrows of Divinity (+2d12 divine, on-hit DC-14 slay evil [396]).
Veritas now imparts to Nellise the gift of Ascendence, which as far as I can tell adds three effects (damage resistance, damage immunity increase [negative] and regenerating [not sure of exact numbers]) and +stats (STR +6, WIS +2). She also sprouts wings!

Level Up to 33!
(Epic Characters)
Lilura1: Champion of Torm (17) / Paladin (12)/ Fighter (4), Great Strength IV
Nellise: Cleric (30) / Paladin (2) - Nellise has stopped leveling
Robert: Fighter (33)
Terinus: Wizard (30)


Unicorns! But we would have preferred pegasi..
I know what you're thinking.. so what's the angels' loot like?
Aoipe: +1680 EXP, Shield of Cosmic Might +8 (Elect resist 40/-, on-hit ILMS [15], Cloak of the Muse (Bonus Bard slot 4/5/6, CHA +8, all-saves +5, Perform +50), Belt of Agility +8 (DEX +8, Freedom).

Archangel Benedictum: +1470 EXP, Nightbane +7 longsword (+2d10 divine, on-hit DC-16 Dispel, on-hit DC-14 slay evil), Archangel's Armor +8 (Neg-en resist 30/-, CHA +4, STR +4, Haste, Imm: Death Magic, Good only), Sphere of the Hellion (quest item for Insidiae), Monk's Hood of Nirvana (WIS +4, Imm: crit hits/sneak attacks, all Saves +5, True Seeing).Veritas: +1050 EXP, Angelic Blade +5 falchion (+2d6 divine, Keen), Angelic Armor +9 (Neg-en resist 30/-, CHA +4, STR +4, Haste, Imm: Death Magic/Knockdown, Good only).Serenity: +1190 EXP, Paragon of Virtue +7 scimitar (+2d10 divine, Keen), Angelic Armor +9 (Neg-en resist 30/-, CHA +4, STR +4, Haste, Imm: Death Magic/Knockdown, Good only), Sacred Aegis +8 (Neg-en resist 40/-, on-hit Searing Light [15], Heal [11] 2/day).
Satisfied with our treasures we gate back to Blackwood Tower in preparation for the next planar assault.
Act Four, Part XI: Border Ethereal, Dragon's Throne, Xyrnamaxus, Magnificent Harp:
The Border Ethereal
Blackwood Tower
The heroes are becoming godly now.
We step back into the planar gate to the Halls, and from there take the door into...
The Border Ethereal
(We're putting the assault on Acheron off for the moment, there are other planes to explore first..)
Well, this place is a whole lot of nothing. - Robert.
We're here to find a dragon, an uber-dragon that exceeds even Salinder in power. We need phat lewt from its hoard if we're to defeat the Saqaarin in their citadel.

Exploring in an eastward direction.. Oh, who's this? Archmage Cuthbeort! Why, we haven't seen you since Ethereal Feybourne. And you're battling Slaadi once again, I see!
We pitch in, helping him out with two Black Slaadi (+350 EXP ea) - just as we did as Level 14 noobs all those years ago..

We prepare for a larger and stronger force of Slaadi to emerge from the portal.

After a short wait, four each of Black (+300 EXP ea) and White (+9 EXP ea) Slaadi rear their ugly toad-like heads. Nellise shakes the earth to put them flat on their asses, after which Terinus drops a Horrid bomb and flings in an IGMS for good measure. Not to be seen as utterly useless, Cuthbeort launches a Delayed Blast Fireball into the mix, after which Robert and I mundanely put the wounded out of their misery.

The heroes are surprised by a second emergence from the portal: a falchion-wielding Disciple of Abaddon, but it can neither soak our blows nor endure the arcane barrage for more than a couple rounds (+850 EXP, Falchion of the Horde +6, +2d10 fire, +2d10 neg-en, on-hit DC-20 Poison).

Cuthbeort now recalibrates the portal that we may enter the pocket plane to the dragon.

Dimensional Pocket
Uh, has anyone else noticed this island appears to be floating in the middle of a great big nothing? - Robert.
A ramp leads straight up to a solid steel fortress.

Two gargoyle nuisances ask us riddles, pretending to guard the gate (+1500 EXP).

We humor them, answer the riddles, then enter the fortress.

Dragon's Throne
Oddly, merely entering the throne debuffs us..
Simply magnificent. - Nellise.


We humor them, answer the riddles, then enter the fortress.

Dragon's Throne
Oddly, merely entering the throne debuffs us..
Simply magnificent. - Nellise.

Xyrna stands before us.
Come and listen... I must speak with you. - Xyrnamaxus.
Xyrna challenges us with four riddles.


Each riddle is sort of random, but the rewards for each seem consistent and are as follows (you can only choose one from each; my choices are underlined..):
Riddle one: +1000 EXP, Spellbane Shield +7 (Arcane Spell Failure +25%, Imm: Spells >=lvl8) OR Longbow of the Eldar +10 (STR +4, Mass crits 20, Mighty +10) OR Adamantium Gauntlets of Destruction +10 (+2d12 magic, Lawful Monk only).Riddle two: +2000 EXP, Voidwalker Armor +8 (no armor feat req, DR 20/+7, Freedom, Haste, Imm: Knockdown, Hide/Move Silently +12) OR Adamantium Robes of Harmony +7 (DR 20/+7, WIS +4, Freedom, Haste, Epic Warding 1/day, Monk only) OR Mageplate +7 medium armor (DR 20/+7, Conc +12, Bonus spell: Wiz lvl9, Sequencer [3 spells] 1/day, Clear Sequencer Unlimited/day) PLUS Enchanted Bracer of Armor Proficiency (Bonus feat: Armor Proficiency [Medium], all Saves +4, saves Mind Affecting +5).Riddle Three: +3000 EXP, Ring of Force Shield (+7 AC def, Epic Warding [1 charge/use]) OR Amulet of Life (+7 AC nat, WIS +8, Imm: Death Magic, Disease, Fear, Level/Ability drain, Poison, Regen +5, Good/Neutral only) OR Belt of Indefatigable Health (CON +10, Imm: Disease, Poison, Regen +3).Riddle four: +4000 EXP, Quicksilver Rapier of Perfection +7 rapier (Keen, Mass crits 20, +2d12 slashing, on-hit DC-18 Slow) OR Ancient Twinsword of Power +7 two-bladed sword (Keen, 2d12 electrical, Mass crits 20) OR Eldritch +7 mace (on-hit DC-24 Dispel Magic, +2d8 magical, Resist magic 10/-).
We now brazenly swipe a magnificent harp from right under Xyrna's nose, causing her to go hostile.

You are foolish to challenge me! -Xyrna.
I inflict immense damage on Xyrna before she casts Dragon Knight.

The poor old dear doesn't bring much more to the table, managing only to cast Greater Ruin and breathe Prismatic Spray (+1680 EXP)..

With riddle-loot and harp in hand we take our leave, heading outside to the Dimensional Pocket and then taking the portal back to...
The Border Ethereal
En route back to the "outhouse" that leads to the Halls, we spot a sick old man lying on the ground. The heroes can't directly help him, though, because he's on the Prime Material Plane.

We stroll over to a village in the north...
How strange this is, to see the world as we knew it reduced to little more than a shadow. - Nellise.
We communicate with an intuitive girl, but she won't follow us because her mother is watching over her.

A nearby pig can sense us; we scare it away and the mother gives chase. The girl now follows us to the old man.

She helps the old man, and together they wander off back to the village (+5000 EXP).

The ethereal quests now capped off, we travel back through the Halls and enter Assumption to deliver the harp to Aoipe: +2500 EXP, Angelic Hood (+10 AC vs. Chaotic Evil, CHA +4 , WIS +4, Imm: Level/Ability drain, Regen +1), Angelic Shield +8 (DR 20/+7, CHA +4, Regen +2), Angelic Armor +9 (Neg-en resist 30/-, CHA +4, STR +4, Haste, Imm: Death Magic/Knockdown, Good only), Arrows of Divinity (+2d12 divine, on-hit DC-14 slay evil [495]). (Ammo-wise, SO many arrows, and NO bolts..)

Level Up to 34!
(Epic Characters)
Lilura1: Champion of Torm (18) / Paladin (12)/ Fighter (4), Overwhelming Critical
Robert: Fighter (34)
Nellise: Cleric (30) / Paladin (2)
Terinus: Wizard (30)
Having added a few key pieces to our arsenal, we gate back to Blackwood Tower in preparation for the last planar assault before we take on Acheron.
Act Four, Part XII: Twilight, Bastion, Ruins of Botai, Party level = 35:
Twilight
Blackwood Tower
We step through the planar gate into the Halls, and then take the door leading to the plane of Twilight..
Portal Chamber
It seems we're stuck in Twilight until we can find a means to reactivate this portal.

Southern Waste
The cold air hits you in the face like a wet brick. You've never felt anything quite like it. - DM.
This place seems peaceful enough. But there is definitely something wrong here, I can feel it. - Nellise.

There is literally nothing but trees in this wasteland, so we take the north exit into..
The Bastion
A Knight of the Bastion refers us to their leader in the fort, one Katsumi Sato.

If we cannot find a way to leave this place soon, we will most surely die here. - Commoner.
We keep the peace. Do not break it, or we shall break you. - Knight of the Bastion.
The merchant can't offer us wares, at least at this stage..

We enter the great fort...

Inside the Bastion
Welcome to the end of the world stranger. None of us are leaving here alive. - a Commoner.
You wish to speak with our leader? She is in the large chamber to the north. - Knight of the Bastion.
Katsumi requests that we retrieve a crystal from the ruined city of Botai, in the west. The crystal can reopen the portal and we, and her people, can finally leave this frozen wasteland (which was devastated by a Saqaarin cataclysm - a fate that Aielund will also meet, should we fail in our quest).

While in Batai, we'll also be keeping a look out for signs of previous expeditions.


Two other people of interest dwell in the Bastion.. Sakumi the engineer stands between two giant crystals, in the middle of which is an empty mounting bracket - into which the missing crystal must be placed to reactivate the portal.

We keep the peace. Do not break it, or we shall break you. - Knight of the Bastion.
The merchant can't offer us wares, at least at this stage..

We enter the great fort...

Inside the Bastion
Welcome to the end of the world stranger. None of us are leaving here alive. - a Commoner.
You wish to speak with our leader? She is in the large chamber to the north. - Knight of the Bastion.
Katsumi requests that we retrieve a crystal from the ruined city of Botai, in the west. The crystal can reopen the portal and we, and her people, can finally leave this frozen wasteland (which was devastated by a Saqaarin cataclysm - a fate that Aielund will also meet, should we fail in our quest).

While in Batai, we'll also be keeping a look out for signs of previous expeditions.
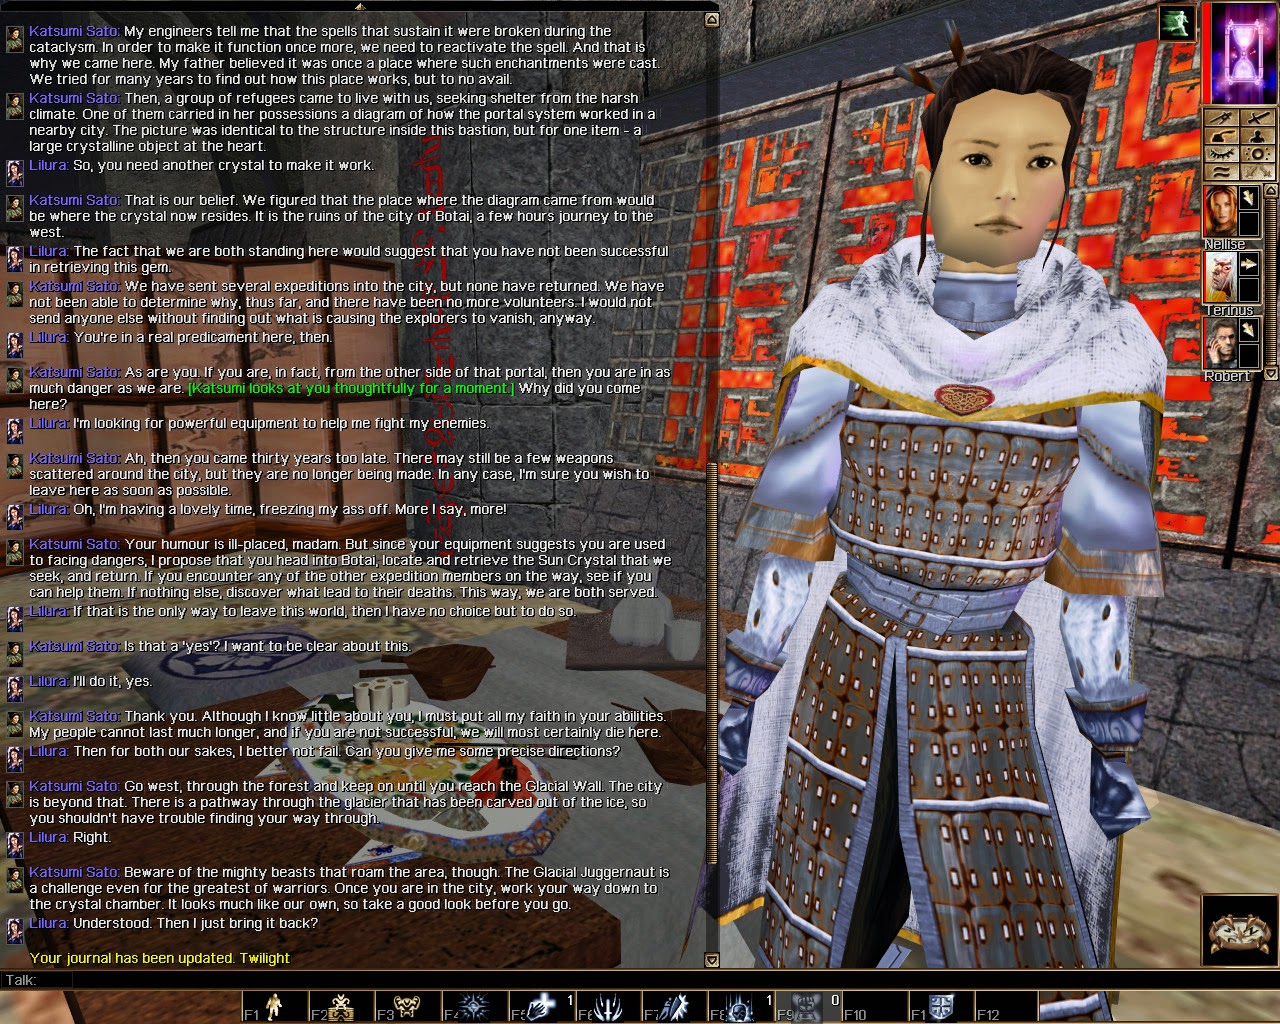

Two other people of interest dwell in the Bastion.. Sakumi the engineer stands between two giant crystals, in the middle of which is an empty mounting bracket - into which the missing crystal must be placed to reactivate the portal.

An unusual character model.
Tetsuo Umezawa is the Bastion's weaponsmith. He requests we retrieve for him a flawless ruby from his workshop in the Botai ruins so that he may set it onto a sword pommel..

We buff up and take the western exit into...
The Frozen Forest
The only enemies lurking in the forest are two Shadow Tigers (+500 EXP ea).

We head west..
The Glacial Wall
We pound two raging, cold-breathing Glacial Juggernauts into submission (+1330 EXP ea).

We weave our way around and over a massive iceblock.
In the far west, a third Glacial Juggernaut - this one guarding the entrance to Botai - is ripped a new asshole.

Ruins of Botai Level One
The city appears to be completely deserted. Ice and snow cover the once magnificent alleyways. - DM.
This place has been abandoned for a very long time, but the sense of being watched is almost overpowering. Can you feel it? - Nellise.
They've really let the place go. If I lived here I'd fire the maid. - Robert.

This used to be a thriving city, 'til war destroyed everything. I am sick of war, and conflict. - Nellise.

*Robert whirls around* Did you see that? I swore something was moving.. - Robert.
Cold cold cold... never warm... always cold. - Apparition.
Apart from their fear effect, the Apparitions seem to be quite passive - at least for the moment..

In the northernmost chamber:
Look out! We're surrounded by... what the hell? - Robert.
Five Apparitions, who briefly scope us out and then fade away..
Corpse of Knight of the Bastion: Legendary Crossbow of Might +10 (Bonus feat: Rapid Reload, Extra Ranged Damage: Bludgeoning, Mass crits 20, Mighty +5, Unlimited +5 bolts), Armor Piercing Bolts (198), Potion of Heal.
Finally! Crossbow bolts for Nellise...!

A long, gated alleyway now leads to the second area..
Botai Ruins Level Two
The air is noticeably warm in this part of the complex. - DM.
The misery in this place is palpable. Let's get this over with, I feel something terrible is awaiting us. - Nellise.
We step into a large torture chamber with several encaged skeletons hanging from the ceiling..
Blood showers us and screams are heard all 'round..
Ugh! - Nellise.
What the hell?! - Robert.

It was an illusion, nothing more. A memory of horrors past. - Terinus.
+1500 EXP.
Phew..
Back out to the main alleyway, a crazed warrior, a survivor of an expedition, frantically approaches us.

I fail my persuade check, so Terinus Weirds him. Poor guy..
Crazed Warrior: (+11 EXP), Amulet of Natural Armor +7, Fine Katana +7 (Keen, 2d10 mass crits), Fortified Cape of Winter (+7 AC def, Cold resist 20/-, Saves +5 vs. cold).
A few more paces south down the alleyway..
These runes are wards against undead. This place has been sanctified. - Nellise.

The chamber contains only basic utility loot:
Bookshelf: Meteor Swarm, Melf's Acid Arrow (2), Mordenkainen's Sword, Power Word, Kill, Wall of Fire, Summon Creature VIII, Elemental Swarm, IGMS, Sunbeam.
Alchemist's Apparatus: Potion of Epic Healing (4), Potion of Heal (5).
On the opposite side of the alleyway is an unsanctified chamber infested with eight Frozen Undead, who Terinus zaps and incinerates (+112 EXP ea).

In the southernmost "pit chamber" I lure eight more Frozen Undead down into the pit, into which Nellise then targets her AoEs.
A water-logged corpse is found in the pit.
Yasuo Koga: Ninja-to of the Planes +7 (+2d10 Slashing, saves vs Mind Affecting +5, Keen, 2d10 Mass crits, on-hit Slay DC-16 Aberration), Belt of Agility +8 (DEX +8, Freedom), Koga's Ghi +8 (DR 20/+6, Freedom, Haste, Hide/Move Silently +12), journal.
The journal reveals Yasuo to be the last survivor of the ill-fated expedition, and lover of Katsumi.

East of the pit is Tetsuo's workshop. We take the Flawless Ruby from the forge, causing a Nightmarish Apparition to manifest (+56 EXP).

After that harrowing incident we head east and then north across an abyss, at which point eight more Frozen Undead are forthwith roasted and imploded.

Botai Ruins Level Three
No less than eight Elder Water Elementals bathe in this flooded section.. (+350 EXP ea).


Botai Ruins Level Three
No less than eight Elder Water Elementals bathe in this flooded section.. (+350 EXP ea).

Even in the heart of this forsaken city, something beautiful can exist. - Nellise.
Water cascades from the flooded platform, drowning out all other sound..

Botai Ruins Level Four
The heat in this chamber is intense. - DM.
Defend the crystal. Protect the core. Obey. - Quicksilver Golem.
This pure adamantium golem zeroes in on Terinus..

Everyone in the party participates in the lengthy melee..

Quicksilver Golem: +1386 EXP, Blackice bastard sword +7 (+2d10 cold, 50% imm bonus: cold, Cone of Cold [15] 3/day), Quicksilver Armor +8 heavy armor (Freedom, Haste, Imm: Crits, Knockdown, Sneak Attack), Glacial Shard Shield +8 (25% cold resist, 10% fire vulner, on-hit Freeze [15]).
The chamber looks identical to the one inside the Bastion, except for the installed crystal.
I now use the control panel to deactivate the power system, after which I safely remove the Sun Crystal from its mounting bracket.

Now in possession of the Sun Crystal, the Flawless Ruby and the journal, we begin backtracking out of the Botai ruins.
Frozen Souls have manifested now, seeking the warmth of the crystal - eight each on levels three, two and one (+490 EXP ea).

Guarding the exit to the ruins is the Shadow of the High Priest.


The gem must remain! - Shadow of the High Priest.
All the Priest did was summon a weak Shadow Lord, then feebly claw at us with cold/divine/neg-en (+1330 EXP).

All the Priest did was summon a weak Shadow Lord, then feebly claw at us with cold/divine/neg-en (+1330 EXP).

We exit the ruins..
(En route back to the Bastion we killed off four respawned Glacial Juggernauts and two more Shadow Tigers).
Level Up to 35!
(Epic Characters)
Lilura1: Champion of Torm (19) / Paladin (12)/ Fighter (4)
Robert: Fighter (35)
Nellise: Cleric (30) / Paladin (2)
Terinus: Wizard (35) gained 5 lvls...
Back Inside the Bastion
We now have three deliveries to make..
Firstly, the Flawless Ruby is delivered to Tetsuo (+3500 EXP, +5000 EXP).
We loot the sword from his corpse: Blackened Skies, Burning Rain +8 katana (CHA -6, +2d8 magical, Keen, Mass crits 20, Storm of Vengeance [17] 3/day).

Tetsuo's death throe anim was amusing
Secondly, I now socket the Sun Crystal for the engineer, thereby generating power to the long-dormant portal.. (+5000 EXP).

Secondly, I now socket the Sun Crystal for the engineer, thereby generating power to the long-dormant portal.. (+5000 EXP).

Lastly, Yasuo's journal is delivered to Katsumi.

Make way for the Heroes of the Bastion! - Knight.
The citizens of the Bastion give you a resounding cheer. - DM.
Thanks to your bravery, our long vigil will soon be over. All glory to Lilura1! - Knight.

Before leaving the Bastion we buy a few things from Rei Tagashi: Boots of Hardiness +4 (AC dodg +4, CON +4), Fortified Cape of Winter +7 (Cold resist 20/-, saves vs. cold +5), Bracers of Armor +7, Bracers of Dexterity +6 (-250,000 GP).

We now backtrack to the Southern Waste and into the Portal Chamber wherein the portal to the Halls is finally activated by means of the control panel.

Stepping into a mirror, the heroes now find themselves back in familiar territory: The Hall Worlds.
Perhaps for the last time, we gate back to Blackwood Tower in preparation for our assault on Archeron and the confrontation with the minor deity, Abaddon!
Act Four, Part XIII: Eternal Battlefield: Assault on Acheron & Abaddon, Archangel Benedictum:
The Eternal Battlefield - Assault on Acheron
We're closing in on the end of The Aielund Saga now, this probably being the second last post. This will be a relatively short post, as I want the Saqaarin Citadel to close this recounting out on its own.
Blackwood Tower

Blackwood Tower lab
(Total enchantment outlay = 1,050,000 GP).
Hall of Worlds
We use the spectral Key to Acheron.

Acheron - The Eternal Battlefield
We prepare for our assault on Acheron by buffing each other to the heavens..

We warm up on five haggard, enraged Warriors and one each of Sorcerer and Archer. Word of Faith, ftw. One of the best spells in Nellise's repertoire.

I now take a leaf out of Nellise's book by equipping Faithblade, luring eight Archers, five Swordsmen and two Sorceresses together in a clump, and then casting Word of Faith from the blade to daze them, after which Nellise casts Word of Faith again followed by Hammer of the Gods (another fave of mine since Act One!)...
The hapless mob were then mopped up by Robert and I without breaking a sweat..
(All of the above kills yielded +11 EXP ea).

There's something unsatisfying about killing my enemies, knowing they're just going to get back up again tomorrow. This place sucks. - Robert.
Terinus now casts knock on a large gate in the west..

We step through the gate to...
The Gate to Everywhere
Archangel Benedictum now flutters down to give us a motivational speech.
Stand ready. The enemy will be on us presently. - Benedictum.

We follow the archangel to the portal, surrounded by three staunch Celestial Avengers and four Angels whose solemn vows and divine confidence do much to strengthen our resolve..
Thy life must be secured if thou art to reach thine Saqaarin enemies in one piece. If thou perish, so too shall millions of innocents. - Angel.
Our enemies shall perish before reaching the portal. This, I swear. - Angel.
Abaddon should have stayed mired in the war upon this plane - His attempt to escape shall be his undoing. - Angel.
The forces of darkness approach. This is where we draw the line against them. Keep to thy faith and we shall claim victory! - Benedictim.
(I put on the Ring of Fire Resistance..)

The calm before the storm.
The infernal Disciples of Abaddon (+630 EXP ea) converge on us from all angles in groups of twos and threes, a total of about twenty in all over the course of the battle, with Benedictum periodically announcing the direction from which they're coming. They take time to put down, so their numbers begin to build up as the battle rages on, eventually swelling into a veritable demonic horde..
Our enemies seek to test our defences in the south. Show them what we are capable of! - Benedictum.

Fire Storm is the Disciples' bread n butter spell
It's a diversion! More invade from the north! I will now summon the Tempest! - Archangel Benedictum.
The Tempest is an allied mass of cloud and forked lightning that spams Scintillating Sphere, Great Thunderclap and Gust of Wind.


It's a diversion! More invade from the north! I will now summon the Tempest! - Archangel Benedictum.
The Tempest is an allied mass of cloud and forked lightning that spams Scintillating Sphere, Great Thunderclap and Gust of Wind.


The Tempest: Center-top.
The angels and avengers help us keep on top of things by frequently unleashing Sunbeam and hacking righteously at the wall of demons..
The main body is here, approaching from the east! - Benedictum.

Abaddon Himself approaches from the east. Ready thyself for the battle to come! - Benedictum.
The hulking minor deity strides into the fray, wielding an immense trident of destruction.


Abaddon and his horde of Disciples turn the battlefield into a conflagration of epic proportions: Incendiary Cloud, Fire Storm, Firebrand, Meteor Swarm. Does fire damage? Abaddon casts it. Again, and again and again. Oh, and he loves Chain / Ball Lightning too!

The Disciples detonate like nukes, forming mushroom clouds.


Nellise wisely hangs back for AoE castings and sniping.
With most of the angels and avengers still kicking and Nellise and Terinus casting their customary AoEs, the demonic horde's ranks are quickly thinned out..

... at which point our divine force piles up on Abaddon and finally overwhelms him.
I don't need this armor to destroy you! - Abaddon. (armor?)
Abaddon walks off a little, then his hulking frame suddenly comes crashing down into the blood-soaked ground (+440 EXP). (less EXP yield than a Disciple?)
Corpse of Abaddon: Trident of Destruction +8 (+1d10 acid, +1d10 fire, Keen, Hellball 1/day, Fire Storm [18] 2/day).

Archangel Benedictum congratulates us, blesses us in the name of Aeledan, and then opens the portal to the Saqaarin Citadel (+5000 EXP).

We rest up, rebuff ourselves into godly beings, then step into the portal ready to face the Saqaarin in their own citadel!

Act Four, Part XIV: Citadel of the Saqaarin Illithid, Dreadnoughts:
Citadel of the Saqaarin
Citadel: Living Chambers
So here we are - the Saqaarin citadel!
We find ourselves teleported into a storage room located in the central south of the level.

Terinus informs us that we're on a ship of sorts, that we need to find the Bridge, kill the Supreme Commander and destroy the engines in order to save Aielund from utter annihilation. He also warns us of Saqaarin psionics (they're basically illthid/mindflayers, similar to those found in Zorvak'Mur) and their expertise in golemcraft (ie, the Dreadnoughts).

There is a Saqaarin Panel standing beside the portal..
This panel seems to be barely functional. None of the buttons work, and the display indicates that the controls for this teleporter have been re-routed to the Bridge. - DM.

Across the hall is an armory.
The dust in this room is especially thick. It appears to be an abandoned armory. - DM.
There are several banged up Saqaarin Armors littering the floor, and two still standing (but immobile and inoperable).

Terinus believes one of the standing Ironlord suits can be fixed with minimal effort - we just need to find a few specific spare parts!

One of the spares is right here, on the other standing armor. We loot the golem leg.
We head north to the Sleeping Chambers in which two odious Saqaarin Technicians lurk. I take them out alone, since I can't fail the saving throws with Will: 50 (+1050 EXP ea).

Their "Cone attack" would likely be psionic mind blast (DC-29 Will), which stuns and inflicts tremendous magical damage on already-stunned victims. Only Robert ever got stunned in my few hours of testing and playing on the Citadel.

I presume "Psionic Ability" is basically psionic mass concussion, which inflicts serious AoE bludgeoning with knockdown chance (DC-31 Will, see below pic); other times it's the soak self-buff psionic inertial barrier (above pic, right).

Psionic mass concussion is an AoE; spread your party out
Backing out of the chamber onto the passageway, we bump into a patrolling Saqaarin Sentry Construct which Robert and I violently dismantle for its heart.
Saqaarin Sentry Construct: +910 EXP, golem heart, Ancient Longsword of Power +7 (+2d12 electrical, Keen, Mass crits 20), Lesser Force Shield of the Ancients +8 (25% resist bludg/pierce/slash, on-hit 2% Chaos Shield lvl3).
Four carbon copies patrol the main passageway that encircles the level, and are dispatched in like manner.

The northwesternmost chamber is the slave pens wherein several Mindless Slaves (aka human cattle) are imprisoned.
Finally, a decent meal! - Saqaarin Wizard.
Insidious occupants also dwell here, including a Saqaarin Wizard (+1190 EXP), Saqaarin Biologist (+910 EXP), technician (+1050 EXP) and construct (+910 EXP).
The biologist conjures a Greater Air Elemental and trolls us with AoEs from the other side of the gate, which I angrily bash down in order to get to it and rip its facial tentacles off. The biologist carried an impressive shield, the Force Shield of the Ancients +8 (50% imm to bludg/pierc/slash, Chaos Shield 2% [3]).

We nose around the slave pens..
This man stares vacantly at you, eyes devoid of all thought. His mind has been completely broken, and there is nothing more you can do for him. - DM.
Well, we can put them out of their misery but that shifts us five points towards evil..

Heading east along the northern passageway...
This place is vast. I wonder how many of them dwell here. - Nellise.
... and now south along the western one, we come across an armory. We clear out the two techs and then loot the golem brain from a Damaged Saqaarin Dreadnought. Three Legionnaires stand here, but they're dormant.

Level Up to 36!
(Epic Characters)
Lilura1: Champion of Torm (20) / Paladin (12)/ Fighter (4), STR +1, Great Strength V
Robert: Fighter (36)
Nellise: Cleric (34) / Paladin (2)
Terinus: Wizard (36)
With the three golem parts in hand, we return to the abandoned armory to fix the Ironlord armor (+1000 EXP per part).

Terinus has a new, Ironlordy look!

Nellise gets divine wings, Terinus gets a godly exoskeleton - what do Robert and I get? Nothing.
Anyway, heading south, east and then north along the passageway, we come to a dead-end.
This control panel is blank, apparently broken. You are unable to operate this teleporter. - DM.

Further east along the passageway we enter a library containing two more technicians, whom we beat into a pulp.
In the far northeast..
This seems to be sleeping chambers for the Saqaarin. It seems to have been in disuse for some time. - DM.
Nothing to kill in here..

A vacant seven-podded sleeping chamber.
Just south of the sleeping chambers is an entrance to the observation dome. The heroes promptly lay waste to three technicians, one construct and a wizard; then take the western exit into the last chamber of the current level.

Just south of the sleeping chambers is an entrance to the observation dome. The heroes promptly lay waste to three technicians, one construct and a wizard; then take the western exit into the last chamber of the current level.

Two more constructs guard the entrance to the armory level.

We take the stairs up to the armory..
Citadel: Armory
Before us appears an illusionary projection of a Saqaarin leader.
Yes, I thought I sensed intruders... - Saqaarin Supreme Commander.
It fades.


We take the stairs up to the armory..
Citadel: Armory
Before us appears an illusionary projection of a Saqaarin leader.
Yes, I thought I sensed intruders... - Saqaarin Supreme Commander.
It fades.

Saqaarin Supreme Commander
The whole Citadel now begins to adjust its position in order to target Aielund with it's apocalyptic weapon. Terinus explains Aielund is going to be turned to glass unless we shut down their weapons system, pronto.

The whole Citadel now begins to adjust its position in order to target Aielund with it's apocalyptic weapon. Terinus explains Aielund is going to be turned to glass unless we shut down their weapons system, pronto.

We smash through two constructs on our way to the south.

The leader projects itself again.
The guards have been informed of your presence. I shall enjoy watching you die. - SSC.
I'd pay real money if he'd shut up. - Robert.
Again it fades.

We enter the Dreadnought manufacturing plant..
"Several minutes until (Aielund's) destruction"! - Announcement.
A brief cutscene shows Dreadnoughts being activated by technicians.


There are eight Dreadnoughts in total (910 EXP ea), four on each side of the chamber. Three are initially hostile, and, as we overcome them, Saqaarin Technicians (+630 EXP ea) appear from a central portal to animate reinforcements.
I charge past three Dreadnoughts to reach my priority target, the squishy Saqaarin Scientist (+140 EXP).

The party then focuses on eliminating the eight Dreadnoughts - which is no mean feat! Robert and I sturdily carried the burden for the most part. The first time we fought one of these things was much harder than facing eight now. The reason for that? We're bypassing their DR with our uber-enchanted weapons.

With the Dreadnoughts reduced to mangled scraps of adamantium, we head through the door at the opposite end of the plant and smash through three more constructs en route to the firing chamber.

Electrified doors prevent direct entry to the chamber.
You must find the generator room to disable these doors. - Terinus.

Rounding a bend we encounter the weapon control room. Terinus casts Knock on the door, startling the two techs and one scientist, who then feebly defend themselves against my holy sword, Nightbane.
The final sequence is beginning, we must destroy the weapon NOW! - Terinus.
Leaving the Saqaarin pasted on the floor, we charge to the power room.

Two techs are splattered against the walls by my companions even as I begin smashing four of the eight power generators.

With the fourth generator smashed...
I believe that is sufficient to disable both forcefields. - Terinus.

An announcement now warns us that one minute remains before Aielund is glass. We charge headlong into the firing chamber, halting before a third projection of the Saqaarin leader!
You have crossed a line. Rest assured you will not leave here alive. - SSC.
It fades.

Four weapon crystals are now smashed to prevent the system firing (+3500 EXP).

It's going to explode! - Nellise.
Excellent work. The weapon should be disabled for some time. Let's get to the Bridge. - Terinus.
We dive through the door before the place turns into an inferno.

With the weapon systems (at least temporarily) disabled, power now runs freely to the nearby teleporter, which we now take to the Bridge.

Let's finish this! - The Heroes.
Act Four, Part XV: Illithid Supreme Commander, Devastation Spider, Destruction of the Citadel:
Aielund Saga Final Boss Battle
We need to activate two separate controls in order to gain access to the Commander's chamber and from there overload the engines to destroy the Citadel.

We open a door revealing a large central room guarded by two each of construct and tech, and one each of wizard and scientist.

The command deck has two wings, each of which contain an observation dome and a control panel; and are occupied by three techs and a scientist. In the northern wing it was nice to see Power Word, Kill actually work for once.

The panel is now activated to open the first lock to the Commander's chamber.

This operation is now repeated on the southern wing with no variation, granting us full access to the Supreme Commander.
Enough of this. I'm going to deal with you myself. - Armored Saqaarin Commander.
We buff up like never before and then charge back out to the central room for the Final Showdown.
The Saqaarin leader is securely encased in an Ironlord suit, but with everyone pulling their weight it doesn't take overly long to beat it down to Near Death status.


I don't need this armor to destroy you!
The Saqaarin leader walks away and removes its minogon-like exoskeleton, after which it immediately buffs itself with the obnoxious Epic Warding followed by Mestil's Acid Sheath.

I will utterly destroy you meddlers!
Though many of our attacks eat through the ward, the Supreme Commander brings new meaning to the word "tank"..
You will become but another upstart race to be destroyed before our might!

Two constructs and two techs come to its aid and manage to make nuisances of themselves to the point of Robert dying.
I promptly resurrect him and he immediately rejoins the battle with full HPs (I had seven more Resurrection scrolls to spare).

Behold! An unimaginable terror of the cosmos!
Devastation Spider
The Commander now summons a Devastation Spider - a sort of beefed up and enlarged Bebilith that inflicts DC-36 poison...

... But the Commander takes a pounding before the spider can take the heat off; then realizes the battle is lost..
Impossible. You are nothing but slaves! Nothing but insects! Nothing but mere cattle! Nothing but...

Humiliated beyond words - by mere cattle such as us - the Saqaarin Supreme Commander can do nothing but die (+1680 Exp).

We now hack at the legs of the epic arachnid (+1540 Exp).

The Devastation Spider now flips over onto its back, signalling the end to the final showdown.

Peering into the Commander's chamber, we see it occupied by a most repugnant specimen - some sort of overmind.
Terinus Sacrifice
Terinus now prepares to sacrifice himself for Aielund!

At Terinus' command we hurriedly backtrack out of the command deck, the armory and the living quarter levels - the Citadel igniting and imploding all around us - ...

... to reach the safety of the storage room portal from which we first arrived!

The portal transports us off the Citadel before it detonates!
Blackwood Glade

We now catch up with some old friends..


The portal transports us off the Citadel before it detonates!
Blackwood Glade

We now catch up with some old friends..

Saphiron:

Twilighters:

This is a very nice tower, although the little man does talk a lot. - Knight of the Bastion.
This place is a great wonder, Lilura1. Thank you again for leading us to freedom. - Sakumi (engineer).
It is pleasant to see you again, Lilura1. This is a very strange place, though I think we may be able to make a home here. Peace be upon you all. - Katsumi.
Queen Criosa Roebec
And last but certainly not least, Queen Criosa Roebec is found waiting for us in Terinus' bedroom.


*Fade to black*
Aielund Saga Ending
Now follows voiced narration by the author of The Aielund Saga, Savant, detailing the fates of the companions and of Aielund itself. To save me quoting too much, I'll only quote a select few.
Victory. But, at a price. The valiant sacrifice of Terinus the Black allowed the heroes to escape the doomed citadel, before it's inevitable destruction. By accepting his fate, Terinus managed to strike a fatal blow to his oppressors, ending their meddling in Aielund's development once and for all. The people went on with their daily lives, never knowing how close they came to annihilation. Only a handful of individuals mourned his passing, but were comforted knowing that Terinus had finally found peace.
Criosa Roebec went on to become one of Aielund's greatest leaders. Her experiences over the past few years taught her of courage, and duty. Despite Fairloch's fracturing nobility, Criosa never backed down when she knew she was right, even against threats of civil war. Through the force of her will, the young Queen held Aielund together in it's most difficult years, until once again, the country began to prosper.
Robert Black, rich beyond the dreams of his youth and tired of fighting, finally settled down with a new love, and together aided Queen Criosa in rebuilding the country. Although his gruff attitude caused friction within the nobility, his mercenary background gave him a particular insight into the corrupt dealings of the nobles that Mad King Seamus had placed into power. Robert found himself indispensible when proof of a noble's secret dealings was needed to bring them down, and within a year, had purged the worst elements from the newly reconstituted senate.
Her faith restored, Nellise Sanneman became the new head of the Church of Aielund. With compassion and humility, Nellise guided her wayward brethren back to the true purpose of the church. Though it took many years, the people of Aielund finally forgave the priesthood for the injustices some in their ranks had spread in the name of God. From time to time, Nellise disappears, often for many weeks. Rumour has it she travels to Heaven itself, though such rumours are often dismissed as sheer fantasy.
Aielund has seen more than its share of bloodshed and war in its history, but it now enters a new age - an age of uncertainty, but also an age of hope, free from the manipulation of the Saqarin. Guided by these unique individuals, the country begins to thrive, and prosper. Its greatness is only just beginning, and the sky, is the limit. - DM Savant.
*Cam now zooms out*

*Fade, credits roll*
And this concludes my recounting of The Aielund Saga in its entirety.
Thanks to Savant for authoring this epic NWN module that is worthy of being held in high esteem by the NWN community. And to Balkoth, for his many informed comments and technical insights along the way. Cheers guys!
THE END
And this concludes my recounting of The Aielund Saga in its entirety.
Thanks to Savant for authoring this epic NWN module that is worthy of being held in high esteem by the NWN community. And to Balkoth, for his many informed comments and technical insights along the way. Cheers guys!
THE END
| Aielund Saga Act 1: Nature Abhors a Vacuum | Aielund Saga Act 3: Return of the Ironlord |
| Aielund Saga Act 2: Defender of the Crown | Aielund Saga Act 4: The Fall of Aielund |
Quite a long update!
ReplyDelete"Oddly, she's been adjusted from Rogue (15) / Wizard (9) to Rogue (12) / Wizard (12). Dah fuq?"
As discussed, the idea behind her character is to be half rogue/half wizard...but there's probably a bug in the level-up code which simply makes her take only rogue levels after the initial leveling up. Would not be surprised if she only takes rogue levels from here on out, but that's not what's supposed to happen.
"Nellise definitely wins the MVH award (Most Valuable Henchman) so far in the Saga. It will be difficult if not impossible for any other Henchman to top her performances with only one Act remaining."
This is definitely interesting to read since it's actually been a while since I played Aielund with the companions. I did a solo run to see how it went and I've played through it like four or five times with friends in multiplayer...but been a while since a more traditional single player playthrough.
That said, I think there may be two companions who you wind up thinking are as useful or more useful than her. We'll see!
Criosa is indeed back to taking only levels in Rogue again...
DeleteHow did you play solo when some dialogues cut off without a Henchman (in my case Nellise or Criosa) being in proximity to interject with the NPC in question, I guess none of those are plot-critical or there are workarounds?
No dialogues cut-off without a companion if you don't have the companion in your party.
DeleteBeats me on the rogue only levels, will try to take a look.
DeleteI also found the EMS docs, though I don't think they're quite up to date with the newer version of EMS (at least I think it might be newer? Kind of hazy). Will upload tomorrow to Aielund Hak thing, can also email it to you if you drop me a line.
Maybe it's better we source the up-to-date EMS docs; I'll take a look around.
DeleteThe problem is Arquon (EMS guy) was trying to release an updated version of EMS...which never happened. Think he kind of vanished. So eventually Savant just took whatever the latest version of EMS that he had and sent it off in the updated Aielund. The read-me I uploaded should probably be at least 95% accurate, but it's possible a few things got changed since it was from the original (only?) release.
DeleteThanks for uploading, this is really really good stuff. Never knew so many spells were broken/wrong etc. Lots to read n learn about here.
DeleteOh yes, Bioware screwed the pooch on a lot of stuff.
DeleteNow, to be clear, EMS has some absolutely terrible things. For example, Premonition gives 2x caster level to physical damage immunity and immunity to sneak attacks. The former means you have 80% physical immunity as a 40 caster and the latter makes rogues a complete non-threat (which I think is a very bad thing). Another thing it does is have Stoneskin give Critical Immunity while active (and therefore Sneak immunity as well). I already think this is rather stupid (would rather it absorb more)...but even laying that aside it has another huge issue: the crit immunity is coupled with the reduction. Which means that if you're attacking with a +5 or better weapon, you'll ignore Stoneskin's DR (so it'll never go away) but your target is still immune to crits.
That said, it still does a lot of things much better than default and/or fixes things and has has many other ideas which, while good, could have been implemented better. List includes everything from ability stat buffs to Battletide to correct dispels to showing things like spell resist to making higher level spells worthwhile to auto-Empower, auto-Max, and then auto-Empowered-Max spells at high caster levels.
Overall I definitely prefer EMS to default, though it has a few issues that really need to be fixed like Premonition and Stoneskin.
"Overall I definitely prefer EMS to default, though it has a few issues that really need to be fixed like Premonition and Stoneskin."
DeleteWell, hop to it! *wink*
I'm used to casters being absolutely invincible (no exaggeration) in Baldur's Gate series, Icewind Dale series and Planescape: Torment (well, AD&D2 in general, I guess). In Baldur's Gate 2 you had stuff like Mirror Image, Stoneskin, Protection From Magical Weapons and others - you could very easily mitigate most damage just in the mid-levels...
I'm not sure I want to be fiddling with EMS. On the flip side, I'm not sure any other module uses it and the author has vanished, so making fixing a thing or two wouldn't be a bad thing. Even something like Premonition being caster level in damage immunity would be much better and remove the sneak immunity. Part of the problem is also scrolls -- don't want UMD to be even more powerful! Stoneskin also has the problem of being lackluster in general given how plentiful healing usually is. Why use a precious spell slot to absorb 100 damage when you could put up an Elemental Shield or Ice Storm an enemy group?
DeleteKind of sad to hear that about the other games. Meh.
I'm still reading through it, but it fixes a HELL of a lot by the looks of things. It really should be suggested for use in official campaigns and many or most modules, don't you think? Probably won't play without this now.
DeleteConsider this as merely one example (I'm sure you already have, just sayin'):
"AoE's work correctly. There is a known bug with ALL non-instant AoE's
in NWN where their SP, DC's, caster level, and metamagic can (usually, do)
become wrong as soon as any other spell is cast. For example, a Cleric
who casts Blade Barrier and then Turns Undead will suddenly discover
that the BB does 0d6 damage."
To play with it you'd need to get it installed into modules presumably, which especially if they're already using haks can mess things up. I have no idea what would happen if you tried to use it as an override. May work, may crash the game.
DeleteAnd while it does fix some stuff, it also goes beyond fixing stuff to radically changing how many spells work -- which leaves many people very unhappy because it turns into his version of magic versus just fixing bugged stuff.
Mind you, I don't object to that personally as long as I think the changes are good, but many absolutely loathe it because it's not either DnD rules or "official" Bioware changes.
Yeah, I'd have to infuse EMS with the module I wanted it to work in, I realize that.
DeleteNoted your other comments, too.
Nellise is the most useful because clerics are wtfomgbbq powerful in nwn :P
ReplyDeleteAnd she's still nowhere near as good as a human controlled cleric, that's the scary part.
DeleteShe's also good because of the spells you chose for her, and the "proactiveness" with which she casts them (and turns undead). She's amazing in combat, and a very likeable personality.
DeleteNo fair, man. My Nellise didn't help out in fights anywhere near as much as yours did. Didn't even try casting Implosion on anyone.
ReplyDeleteAlso in the room where you fight the Revenant, there's a secret door you either missed or forgot to mention. Gradius +3, two raise dead scrolls and a pile of gold.
Hmm. I lookted the Revenant guy's amulet but he never showed up to challenge me to round 2, 3, or 4
ReplyDeleteShe may not have been rested or her spells are off in dialogue.
ReplyDeleteThanks for the tip about the secret door. I guess I wasn't using Detect Mode.
So glad I put everything into discipline (Ranger) at levels 21, 22 and 24 (from 0 to 28). Those knockdown without immunity items would have been really bad…
ReplyDelete