Icewind Dale 1 Original Guide

Welcome to my Icewind Dale 1 walkthough guide. Released in 2000, Icewind Dale 1 is an AD&D 2nd Edition cRPG developed and published by Black Isle Studios. This guide is for the original and historically significant version of Icewind Dale.
Character Creation Icewind Dale 1

Icewind Dale 1 was the third AD&D 2nd Edition cRPG hosted on BioWare's proprietary Infinity Engine, an RTS-like engine upon which the seminal Baldur's Gate was built. I have already covered the ruleset implementation and 8-step chargen process in my Baldur's Gate Review, so I refer the reader to that for some basics. But, as mentioned above, the major difference in the chargen process is full party creation.

Creating all six characters from scratch can seem somewhat daunting and exhausting at first. But the virtue of full party creation is that it allows for greater flexibility in, and control of, party composition.
Want a holy party of Paladins & Priests to smite the undead legions lurking in the Vale of Shadows? Go for it!
Want an order of Druids & Rangers, out to protect Kuldahar against the monstrous hordes brewing in Dragon's Eye? You can do that, too.
However, new players are advised to adventure with a balanced, traditional party, but more on that later.
Yes, full party creation is also possible in the Bhaalspawn Saga but access to the option involved a clumsy workaround because it was designed for multiplayer only [1]. In IWD, full party creation is standard and the Party Formation menu is accessible in single-player mode from the Party Arbitration button nested at the bottom of the left sidepanel, allowing players to recompose their party, at-will, and at any point during the game.
This was great if you gimped your character and needed to replace them with another, or if you just wanted to try out something new, mid-campaign. But new additions to your party do not scale to the level of their companions (as BG companions did to a degree), so you will have to accept your first level scrubs and wait for them to grow, a process that can be sped up by training the party on respawning mobs, such as the cold wights in Dragon's Eye.

The "flaw" of full party creation is the lack of party personality, companion-based reactivity and intimacy of role-playing a singular protagonist. Many players find adventuring with mere "combat units" to be quite a dull experience without companion quests, histories, rivalries, friendships, banters and interjections to spruce things up [cf. companion-based reactivity]. If you've played Jagged Alliance 2, you'll know that a deep companion pool leaves full party creation in the dust.
The ability to write biographies for each combat unit (as IWD allows you to do) could never make up for that because it didn't affect what happened in the campaign; it was just fluff.
[1] I call it "single-player multi-player", a mode of play which also noticeably impacted game performance.
Icewind Dale 1 Best Party

Best Party Composition. The best party in Icewind Dale 1 is a warrior-heavy party consisting of:
- Dwarf Fighter (15): 18/91-00 - 17 - 19 - D - D - D
- Human Paladin (14): 18/91-00 - 18 -18 - D - D - D (wields Pale Justice)
- Human Ranger (14): 18/91-00 - 18 - 18 - D - D - D (wields Messenger of Sseth)
- Gnome Fighter Thief (13/14) multi-class: 18/91-00 - 18 - 18 - D - D - D. (Gnome for HotTD)
- Half-elven Cleric (11) / Ranger (12) multi-class: 18-91-00 - 18 - 18 - D - 18 - D
- Human Fighter (2) / Mage (14) dual-class: 18/91-00 - 18 - 18 - 18 - D - D
Format is Race / Class / Max lvl / Str / Dex / Con / Int / Wis / Cha
D = dump the stat (reduce it to its minumum)
The above party is extremely powerful. If you want a much more difficult game, don't min-max Str, Dex and Con for warriors. Go for Str 15, Dex 15 and Con 14 instead. Your warriors will not receive penalties, but they also won't receive bonuses. In short, THAC0 loses 3 points, damage per hit loses 6 points, AC loses 4 points and we miss out on 4 guaranteed HPs per level. Doesn't sound like much, but it's huge.
Also, roll with random hit die, not max HPs.
Icewind Dale 1 Experience Point Cap
The XP cap is 1,801,000. That means all single-class warriors can reach 14th-15th level which means they net the final ApR +½ at 13th level. It also means Fighters can achieve Grandmastery (at 12th level) in one weapon and High Mastery in one other or Specialization in two others.
It also means Mages, Clerics and Druids can break into 7th circle spells, and Bards can break into 6th. However, in 6-person parties it isn't likely that Mages will reach 14th level in IWD (1,500,000 XP). Thus, 7th, 8th and 9th circle spells can only be cast from scrolls found as loot.
Why so many warriors and part-warriors? Please refer to my ApR, Armor Class and THAC0. But basically, we don't want to get hit and we want to be hitting things hard and often. This is the truth of IWD: its combat encounter design almost entirely consists of swarming, tough monsters that are most efficiently dispatched by physical-based damage inflicted by buffed warriors.

In addition, IWD itemization is tailored to parties in which warriors are the mainstay; that is, it overwhelmingly consists of arms & armor that bestow powerful on-hit effects and perma-buffs to keep them on their feet and fighting for prolonged periods, without the need to rest.
Icewind Dale 1 Best Weapon
.
The best weapon in Icewind Dale 1 is the Static Two Handed Sword +4. cf. Best Weapon Icewind Dale 1. The best ranged weapon is Long Bow +4: Hammer.
But what about arcane bombardment? For the most part IWD hordes will laugh in the face of our limited ability to cast direct damage spells. The above party still has ample access to the arcane & divine spell ranges, but their true value consists in long-term buffing, debuffing & disablement [pic, pic] rather than direct, party-unfriendly bombardment.
Of note, too, is that arcane scrolls are stingily itemized; so much so, that pure Mages will break into higher spell circles but have only one or two scrolls scribed to them. There is also little point in having two Mages because there are not enough scrolls to go around.
That said, we certainly do have access to arcane and divine spellcasting, the buffs from which spheres are vital. But we don't need more than what we have.
Icewind Dale 1 Best Build
The best build in Icewind Dale 1 is the Fighter Mage dual-class, but we must contend with dual downtime. Dual-class FMs are also the best solo class in Icewind Dale providing the player knows the game well, and is prepared to grind for XP. If not, go with the multi-class variant.
- Elven Fighter Mage Multi-class (11/12)
- Human Fighter Mage Dual-class (9/14)
Over the multi, the dual gets +1 ApR and +41 HPs. Most notably, the multi gets arcane spell slots of 4-4-4-4-4-1 whereas the (Specialist) dual gets 6-6-6-5-5-3-2. If the dual dualed at 7th, they would still have those spell slots but not the +1 ApR because they wouldn't have attained Grandmastery.
Multi saves are 7-7-8-8-8 whereas 7th Dual saves are 10-7-9-11-8 and 9th Dual saves are 8-7-9-9-8.
Cleric Ranger Icewind Dale 1
The other contender is the Cleric Ranger multi-class or Ranger Cleric dual-class. This is mainly due to the Ranger's +1 ApR (see Ranger dual-wielding section below) and the spell range of Cleric Rangers who get both Cleric and Druid spells = 68 total spells.
- Half-elven Cleric Ranger Multi-class (11) multi-class (12/11)
- Human Ranger Cleric Dual-class (7/15)
However, they lack arcane spells (such as Haste), which are much more powerful than Cleric and Druid spells or even Cleric AND Druid spells taken together. In addition, the Cleric weapon proficiency restrictions prevent us from wielding some of the best weapons (two examples for which are posted above).
Unless dualed early at Ranger 7th, the dual isn't going to be viable within 1,801,000 XP. The dual has spell slots of 8-7-6-4-2-2 whereas the multi has spell slots of 8-8-7-7-4-2-1.
7th dual saves are 5-9-8-11-10 whereas multi saves are 6-9-8-8-10.
Recommended favored enemy: Skeletal Undead -- no contest.
Grandmastery Icewind Dale 1
Grandmastery, that is, five stars or "pips" in a weapon (*****), was not attainable under the 161,000 experience point cap of expanded Baldur's Gate. However, it IS attainable in base IWD1. And it is True Grandmastery, unlike the embarrassment that is BG2.
- Thus: +3 THAC0, +5 dmg, +1 ApR (TGM)
- as opposed to: +2 THAC0, +4 dmg, +0.5 ApR (NERF)
This is notable.
However, presumably for game balance reasons Black Isle decided to allow only Mastery in Bows, which I think is an unnecessary ruling in a campaign in which archery is not all-powerful and OP (as it was in BG1). Yes, the Messenger of Sseth is a guaranteed find that bestows +1 ApR; and yes, Acid Arrows remain unnerfed at 2d6 acid, but the number of enemies and their hit dice are majorly increased from BG1, and Acid Arrows are rarer finds (Lehland & Nym each offer 80 for sale whereas Halbazzer alone offers 420 in the base BG1 campaign).
Weapon Proficiency Icewind Dale 1
Weapon proficiencies have been expanded in Icewind Dale 1; f.e, Great Swords are separate to Large Swords. So what? Well, it means you need to spend more Proficiency points to cover large swords (if you want to).
Also, Bastard Swords fall under Great Swords rather than Large Swords proficiency. In BG1, all swords and even daggers were covered by just two groupings: Large Sword and Small Sword.
The best weapon proficiency in Icewind Dale 1 is Bows due to +ApR, the power of ammo and the guaranteed find that is Messenger of Sseth. However, the best weapon proficiency mostly depends on RNG (which weapons we actually find randomly itemized). Keep in mind, as well, that crushing weapons (flails, hammers and maces) inflict 100% damage on skeletal undead.
Unless you're going to save-scum (reload for favorable RNG), spread your proficiencies out among party members -- afterall, we don't know which weapons are going to drop in many cases.

Racial traits. Elven & Half-elven chance to resist sleep & charm negative status effects (90% & 30%, respectively) have been implemented as standard in IWD (they weren't in BG1).
Ranger Dual-wielding Icewind Dale 1
In order to simulate their ability to dual-wield weapons, Rangers receive an extra attack (ApR +1) if their shield-hand is free. This makes Rangers and Ranger Clerics better physical-based damage dealers than other warriors. Rangers also erroneously receive this bonus when wielding two-handed weapons such as Great Swords.
Icewind Dale 1 Changes to Baldur's Gate 1
- Summons are limited to six in total whereas BG1 summons were uncapped. Again, notable.
- The quiver capacity has been doubled (IWD: 40, BG: 20).
- Many new spells have been added. These are covered in each area write-up.
- YOU MUST GATHER YOUR PARTY BEFORE VENTURING FORTH has been muted.
- Rest Until Healed has been added as an option. This degenerate, newbie feature reduces the need for clerics & consumable use. Thus, I recommend not checking it to on unless you're a lamer.
- Accessing the area map does not pause the game. This was a ToB addition to BG2: SoA.
- The pathfinding routine has been greatly improved over BG and PS:T. Plus, area design has spared us from nightmares like the Firewine Ruins & Thieves' Maze.
- In a further improvement, combat units will bump each other out of the way in order to get where they need to go, without sticking together like in BG + PS:T.
- There are no overworld waylays. Sad.
- You can find a portrait for a female dwarf. In fact, there are two. Arguably three!
Please note that my killcounts (shown at the end of each section) do not count respawns provoked on-rest (because I'm only resting in proper rest areas). The quest experience tally also does not cover all possible reactivity since most of it is flavor-only.
Introduction Icewind Dale 1

The introductory FMV is presented in a combination of 3D prerenders, sketches and paintings. It is narrated by the late, great David Ogden Stiers. It doesn't get any better than this:
They say that history is the greatest of all teachers. And that tales of past deeds define who we are in the present, and what we shall be in the future. It is said that such tales shall, with each telling, illuminate us all with the light of truth. I shall tell you of such a tale. It is a tale quite familiar to me, for I have spent nearly a lifetime piecing it together and chronicling it here within this book. For years I have pondered its passages, studying every line, committing each word to memory. Perhaps now, in the telling of it, I shall at last find the answers I seek.

Our story takes place in the northern region of Faerûn known as Icewind Dale. It is a harsh, frozen land, cut off from the rest of the world by a wall of jagged peaks called the Spine of the World. For centuries, the icy plains of the Dale have been home to the barbarian peoples of the Uthgardt and Reghedmen.

Huddled together in small, closely-knit tribes, the barbarians lived simple lives: free, proud and fiercely independent. Until the day an Archmage named Arakon came to Icewind Dale.

With an army of mercenaries, Arakon sought to conquer the north and force the fierce barbarians into slavery. Long weeks of battle followed, and the scattered barbarian tribes suffered terrible losses. Defeat seemed inevitable.

In their darkest hour, a barbarian shaman named Jerrod came forth and demanded a council between all of the remaining tribes of the north. A respected warrior, Jerrod persuaded the council to put aside their differences and unite against Arakon. Strengthened by a new sense of purpose, the barbarians rallied behind their new leader. The combined might of the northmen proved more than a match for Arakon, who had counted on the division of the tribes.

Wave after wave of barbarian warriors tore into Arakon's hored army, forcing them on the defensive, and ultimately, into full retreat. As his army crumbled around him, Arakon had time for one last, desperate act before his enemies descended upon him. Drawing upon his remaining power, the Archmage breached the planar boundaries, tearing open a portal to the Lower Planes.

The foolish Archmage's cries of victory immediately turned to shrieks of terror as the hideous and twisted shapes of demonkind materialized from the portal and poured onto the battlefield. The sudden appearance of the demons drove the combatants, barbarian and mercenary alike, to turn to meet the new threat, side by side. The remaining warriors bravely charged the portal, to drive the hellspawn back... and were slaughtered by the hundreds. As his people fell around him, the barbarian shaman, Jerrod, looked up from the blood-drenched snow of the battlefield and caught sight of a lone figure high upon a ridge in the distance.

Jerrod immediately recognized this vision as an omen from his god, Tempos. And, in that instance, he knew what had to be done. Shouting cries to his god, he charged through the ranks of the demons and plunged into the portal. As Jerrod's blood fused with the energies of the portal, an explosion of white light engulfed the battlefield. When the light subsided, the demons were gone and the portal was closed. In its place, hovered a disk of solid stone. Frozen within the center of the disk was Jerrod's body, locked in his final moment of agony... in his final moment of triumph... for all eternity.

But that is not the end of our tale... it is... but the beginning.
Overview Icewind Dale 1

For Icewind Dale, Black Isle eschewed the deep role-playing and reactivity of their own Planescape: Torment of 1999, and the non-linear exploration and questing of BioWare's Baldur's Gate of 1998, in favor of a campaign focused on dungeon crawling & tactical encounters. The dungeons and their denizens will receive in-depth treatment in this retrospective.
In another shift from its predecessors, Icewind Dale features full party creation; that is, instead of creating one player character and recruiting companions into the party during the adventure, the player creates each and every party member that will constitute their party during the chargen process (there being no in-game companions to recruit). So yeah, there is no equivalent to the Nameless One or the Bhaalspawn in IWD; instead, the impersonal party of adventurers are the protagonist.
Player reception to these two shifts was mixed. On the one hand, many players branded IWD as a hack n slash affair cast in the mold of Blizzard's juggernaut, Diablo II, with which its release coincided. They disliked the concept of full party creation and the lack of exploration and role-playing choices offered to them. To these players, IWD was bland and lacking in depth. On the other hand, many fans embraced the focus on combat and noted that IWD was a polished, well-paced dungeon crawler that made no pretense of deep role-playing and storytelling.
Setting Icewind Dale 1

First, the name: Icewind Dale. What does it mean? Well, "a dale" is a broad valley but the Icewind part of the name comes from the eastern winds that bring in freezing air from the Reghed Glacier.
Icewind Dale is a barren and inhospitable polar region situated north of the Spine of the World, in the Frozenfar of Northwest Faerûn. So yeah, far, far north of the Sword Coast in which Baldur's Gate was set. Some parts of R.A Salvatore's Icewind Dale Trilogy of novels were also set in this region, but the events of the (non-canon) game take place in 1281 DR whereas those of the novel take place in 1350-56 DR.
Readers of R.A Salvatore's The Crystal Shard (1988) will know all about Crenshinibon: it is an evil, sentient power-obssessed artifact that dominates its possessor into doing its bidding [pic]. There are a couple of parallels that can be drawn between the novel and the game, such as Crenshinibon being employed in order to amass great armies with which to conquer the Dale, the heat of Crenshinibon causing avalanches, and the protagonists learning how to enter Cryshal Tirith, the crystalline tower created by Crenshinibon.
Despite its mid-range level cap the IWD campaign is epic and sweeping in scope. From humble beginnings in the quiet fishing village Easthaven, the party travels the length, breadth and depth of the Dale in search of the source of evil threatening the region:
- A shadowy vale and tomb of the spirit of a barbarian king
- The bowels of a volcano guarded by a Maralith demon
- The five-spired Seldarine fortress of a mad Baelnorn Archmage
- The sprawling Dwarven stronghold of Dorn's Deep
These are the highlights of IWD area and dungeon design. For reference, there are 128 unique areas in IWD. (Heart of Winter adds 24 and Trials of the Luremaster adds 21).
The heroic party battles all manner of powerful and exotic denizens, many of which are not only new or upgraded from Baldur's Gate, but also encountered in far greater number and represented by larger sprites; for example, yetis, trolls, yuan-ti, umber hulks and giants. But the TROLLS: so many people cried about them back in the day. Not to mention the Maralith & Baatezu bosses — Yxunomei, especially!

With a few exceptions such as the legendary Durlag's Tower (which is in a league of its own) and the Dead Nations, Drowned Nations & Warrens of Thought that comprise the Catacombs in Planescape: Torment, neither of the preceding Infinity Engine titles blew my hair back in regard to dungeon or encounter design.
What set IWD apart was its number of sprawling multi-level dungeons (which gave you the feeling of being deep down and far away from the comfort of town), the quality of their design, and the sheer number of enemy waves packed into them. For example, by mid-campaign we are not up against ogres and bandits but rather swarms of trolls and yuan-ti.
Ok, most of this walkthrough is to be given over to an area-by-area analysis that showcases IWD's dungeon and encounter design, itemization and reactivity (yes, there is some!); interspersed with pro-tips and random remarks on story, lore and aesthetics.
Easthaven

Welcome to Part II of my Icewind Dale walkthrough; this part, covering Easthaven.
Winter's Cradle Tavern: Easthaven
The travel-worn party begins the adventure warming themselves by the hearth in the Winter's Cradle Tavern, in the town of Easthaven. A scripted cutscene fires in which a veteran warrior from Hillsfar steps into the common room and introduces himself as Hrothgar. In tutorial-like tone he informs the party of his position as protector of the town and politely requests that they meet him at his lodge after they have rested and equipped themselves for adventure. So kicks off the main quest of the campaign...

Icewind Dale Equipment
Each member of the party begins with a trusty quarterstaff in hand and a nest egg based on their class, as per AD&D rules; e.g, the Warrior range is 50-200 GP. Collectively, this starting gold is enough to deck out traditional six-person parties at the emporium run by the pompous Calashite merchant, Pomab Ak'azmhir. See: Pomab's Emporium.
However, presumably due to the remoteness of Easthaven and the orc raid on the caravan from Caer-Dinival, both the quantity and quality of his stocks are low; e.g, only one Large Shield, one Composite Longbow, no Plate Mail, and nothing magical in nature on offer. In fact, it is quite possible that certain party compositions will venture into the orc-infested starter dungeon feeling a lil' under-equipped. And you know what? That's fine.
Already charismatic Mages who self-buff with Friends ensure a notable markdown on vendor wares (18 natural + 5 Friends = 23 Charisma). Take for example the Helm of the Trusted Defender, sold by Conlan's Smithy in Kuldahar and coveted by shorties for its AC +3 and immunity to sleep & fatigue: Cha 3 (11,730 GP), Cha 18 (9,931 GP), Cha 23 (8,758 GP). Unimpressed? Well, such discounts add up over the course of the campaign and are especially important in the early stages when party cash-flow is limited; so much so, that new players may feel the need to skin yetis and sell off their pelts to get some going. But due to the inventory management issues that entails, I prefer simply to haggle.
Already charismatic Mages who self-buff with Friends ensure a notable markdown on vendor wares (18 natural + 5 Friends = 23 Charisma). Take for example the Helm of the Trusted Defender, sold by Conlan's Smithy in Kuldahar and coveted by shorties for its AC +3 and immunity to sleep & fatigue: Cha 3 (11,730 GP), Cha 18 (9,931 GP), Cha 23 (8,758 GP). Unimpressed? Well, such discounts add up over the course of the campaign and are especially important in the early stages when party cash-flow is limited; so much so, that new players may feel the need to skin yetis and sell off their pelts to get some going. But due to the inventory management issues that entails, I prefer simply to haggle.
Icewind Dale Reputation
Reputation modified by alignment does actually factor into the reaction mechanic, but only for the first character created in chargen. So yeah, powergamers want this character to be of Lawful Good alignment. Apart from that you are unlikely to feel the effects of reputation because no quests yield bonuses, there is no "donate option" in temples, and most innocents can be killed without incurring a penalty. One exception that I can think of, off-hand: Orrick can be slain for a 5 point reputation penalty. The result is that other vendors jack up their prices - campaign wide, and irreparably.
Easthaven Quests
 |
| The Prologue hubs for Icewind Dale & Baldur's Gate |
As with Candlekeep, the starter-hub of Easthaven offers several introductory quests to ease new players into the adventure; namely:
- Clear out the beetles in the cellar of the Winter Cradle's Tavern, aka the obligatory "rats in the basement" (1,200 XP).
- Dispatch a stray wolf lurking in the scrimshander's shop (1,200 XP).
- Retrieve a fish for a boy from a pack of goblins: slay the goblin elite, loot the Knucklehead Trout from its corpse, and give it to Damien who is standing on the bridge (1,200 XP).
- Buy a bottle of wine from merchant Pomab and gift it to the fisherman standing in his ramshackle hut, or convince him to give up drinking with an intelligent and charismatic character (1,200 XP).

The quests are pretty standard fare, but they yield notable experience point rewards that put the party on-track to advancing to their second level.
There is also one quest that is particularly rewarding...
Blade of Aihonen
This well-written quest is quite simple to satisfy:
First, we talk to the weary fisherman, Jhonen, who is standing in the center of town, looking troubled. We learn that his sleep is plagued by dreams of a singing sea-spirit.

Next, we talk to the sea-spirit, Elisia, standing on the shoreline of the icy lake.

She hands us the Shattered Blade of Aihonen to gift to Jhonen, which was wielded by his dragon-slaying ancestor. The blade has lain dormant at the bottom of the lake for a full century, inside the heart of the last of the white wyrm matriarchs, Icasaracht.
Next, we gift the shards to Jhonen. Note the two options, here. Selfish characters may think to hold onto the shards in the hope the sword can be reforged by a smith, but this is not the case: it can only be reforged by Jhonen in his dreams. Image: Jhonen Dreams.
Finally, we return to Elisia and let her know that Jhonen has the shards. She will then disperse and bother him no more (+2,400 XP).
There is also some reactivity for Bards, who, upon their first meeting with Elisia, may communicate with her through song and convince her to sing from her heart (+2,400 XP). Image: Elisia dialogue Bard reactivity.
Here are the stats for the Restored Blade of Aihonen: 1d8 +1, +5 to-hit & +5 HPs within a dragon's flight of Lac Dinneshere, +25% cold & fire resistance.
It is possible that the party will have found superior wields than this over the course of the campaign, such as Pale Justice.
Everard, Battle-priest of Tempus
The Temple of Tempus is a holy site that marks the field where the barbarian shaman, Jerrod, sacrificed himself in battle against demonkind brought forth into the Prime by the evil archmage, Arakon. Everard believes that Jerrod's sacrifice was wasteful.

However, he changes his tune for the Finale and sacrifices himself just as Jerrod did. Image: Everard's Sacrifice and Jerrod's Stone.
Despite being a key player in the campaign the lengthy Prologue dialogue with Everard is not plot-critical. Besides, most of his lore-dump is covered in the opening FMV which consists of a series of artistic slides and is narrated by David Ogden Stiers.

There are a few flavor dialogues to be had in town, too. Here, my boorish dwarf confronts Erevain Blacksheaf, a noble elf from Evereska who also happens to be Xan's cousin. If you slay this elf - or, for that matter, any innocent of Easthaven - Hrothgar will come for you and you won't be able to kill him. So yeah, reload time. We'll find Erevain's corpse deep in Dragon's Eye, later in the campaign.

Hrothgar's Lodge
Armed, armored, and on the verge of gaining their second level, the fledgling party reports to Hrothgar in his lodge. He requests the party join him on a south-bound expedition to Kuldahar in order to investigate reports that evil is stirring in the Spine of the World. (This is a linear campaign: you either agree to join the expedition or disagree and live out your days fishing for knucklehead trout.) But first he requests the party scout out the hills west of Lac-Dinneshere for an overdue caravan, which is en route to Easthaven from Caer-Dinival. This brings us to the first dungeon crawl of the campaign...

Orc-raider Cave
 |
| Left: The tiny "hills" map from which the orc cave is accessed (right) |
The party leaves Easthaven by way of the south bridge and arrives in the surrounding snow-clad hills, the wind howling about them. The wolves would be howling, too - if the devs remembered to set their attack sounds. Having dispatched a pack of them the party arrives at the mouth of a cave, surprising a straggling orc who was rummaging through the wooden wagon abandoned just outside. This is the wagon we have been sent to look for. The orc quickly scurries into the cave to announce our presence to its clan. Image: Contract Orders for Balin from Ilmus Gallaway.
Now, there is an invisible trigger on the ground just here that, when crossed, actually allows us to return to Hrothgar and inform him that we found the caravan and no survivors or supplies, thereby bypassing the cave altogether. This yields 1,200 XP. But, if we make an effort to clear out the cave and locate the missing supplies, the quest yields double that. Plus, we can find the carvavan contract on an ogre's corpse and report the caravan's fate to Gaspar the fishmonger (in Easthaven) for a further 1,200 XP. Image: Casting the Sleep spell on Orcs.
The cave is teeming with orcs of the warrior, archer and shaman type; in fact, no fewer than 37 are on alert, all told. There is one elite, two shaman, and one hard-hitting ogre boss holding the caravan contract and guarding a chest at its deepest point.
Remember, the party is still only first level. One arrow in the guts and our mage is out for the count. A couple of lucky hits by the enemy and our Dwarven warrior is down, too. Such is the cruelty of the to-hit roll at first level.
About all we can do is take precautionary measures: squishy spellcasters and archers stay back to fire projectiles, at-will, and anyone attracting aggro is heavily armored and able to swing back hard. We can also flee and rest outside when things are looking bad and likely to get worse (there are no on-rest ambushes scripted in the hills).
As per Baldur's Gate, the first circle arcane spell, Sleep, is king against bottom-feeders. Here, our tanks lure a baker's dozen together and our mage puts each and every one into a comatose slumber with a wave of her hand. Hacking, chunking, and morale-failure ensues.
This is a stock-standard crawl with no traps, no puzzles and no dialogue whatsoever. Other than the sheer number of orcs to butcher, the only thing likely to surprise a player coming off Baldur's Gate is how one encounter tends to bleed into the other due enemy positioning, making it a lil' more difficult to cheesily creep forward, pixel by pixel, in order to lure them out from the fog-of-war in bite-sized chunks.
Below left: Battle in the central chamber. A shaman prepares to Curse the party, but the arrow trained on him causes his incantation to fizzle. One round later, his arrow-filled corpse flops to the floor.
Below right: Buffed with Bless, the party takes on the ogre boss backed up by several of its orc minions.

It won't be obvious at first, but one of the chests holds random treasure drawn from a pool of a few magical items. The item is set upon entry to the area so nothing is stopping cheaters from saving outside the cave and reloading until they net the desired item. But if you're going to go to such lengths you might as well just console the item in and be done with it. Both of these cheats take the enjoyment out of the game, so I advise against stooping to them.
The item code for the Girdle of Beatification is BELTBEA. The Girdle of Beatification is a coveted random item due to its perma-Bless (wearer only but that's still good). Note the lack of an accompanying sketch on the "examine object" screen. Black Isle cut some corners in regard to aesthetics, though the soundtrack more than makes up for it. Spell scroll itemization is limited to the (largely useless) Protection From Petrification and Horror, a fairly useful spell that I rarely cast because chasing down morale-failed foes is annoying.
Anyway, we report back to Hrothgar, inform him of the fate of the caravan, and gain our second level of the campaign. In the meantime, he has assembled the expeditionary force and is all but ready to embark on the journey to Kuldahar. We deliver a supply list to Pomab at Hrothgar's request (a simple FedEx quest) and make some last minute preparations before departing (e.g, stock up on ammo). As we file out of the village we lift our gaze to the storm-clouds gathering over the mountains of the Spine of the World. An ominous sign...
- Experience Points: 7,200 questXP + 1,750 killXP = 8,950 total XP.
- Killcount: 52.
*Fade to black. Cut to FMV*
So it was that the patchwork militia set off from Easthaven, bound for the troubled village of Kuldahar, with the party of strangers in-toe.

On they travelled, across the windswept tundra of the Dale, through the foothills of the Spine of the World, and upwards on the steep and treacherous trails of the Kuldahar Pass.

Eager to seek out the evil that threatened the Pass, they did not expect it to find them first. High upon the cliffs of the Pass, a band of Frost Giants had prepared an ambush... hurling boulders and dislodging massive outcroppings of rock and snow, the giants sparked an avalanche that thundered down the mountainside and crashed down upon the heads of the unsuspecting expedition.

Those fortunate enough to survive the avalanche pulled themselves free of the mountain of snow and bodies that now barred the way back to Easthaven. Battered, and disheartened by the loss of their comrades, the survivors had little choice but to continue on to Kuldahar... alone.

Kuldahar Pass Icewind Dale
The narration by David Ogden Stiers sounds epic in the above cutscene, however, the ensuing goblin-infested Kuldahar Pass in which the party finds themselves could not be in more opposition to that tone. Seriously, we have just taken out a clan of organized orc raiders and you are gonna pit us against a feeble rabble of mooks, now that we have doubled our hit point pools?
Anyway, the way back to Easthaven is snowed in and blocked. We won't be able to return there until end-game. The heroic Hrothgar failed his save vs. avalanche check and is now dead and buried under tons of rock and snow. In fact, the whole expeditionary force rolled badly yet our band of second level scrubs made it through, unscathed. This also amazes the hermit who force-talks us upon entry.

Much later, it is revealed by Brother Poquelin that he ordered the Frost Giants to cause the avalanche after he wasn't quick enough to freeze the Pass with Crenshinibon to prevent the expedition setting off in the first place.
The content in the Pass is completely optional and there is no lasting wealth or experience point penalty for skipping it, which is what I normally do. But for the sake of my claim to completeness I am compelled to make some remarks. Image: Goblin Horde.
All we need to do is make our way from our starting position in the west to the exit in the east in order to arrive in Kuldahar itself, slaying the goblin raiders who stand in our way. There are about 25 dotted over the map, led by one goblin marshal. As with the orcs in the cave their experience point yield is low even for this stage of the campaign (35 XP). The terraced terrain and fencelines play their part in making the archers - who are on higher ground and firing down on the party - more difficult to close in on. So our tanks just need to go the long way round to get in their face, hoping to deflect the arrows as we do so. It helps also to have our own archers return fire from behind the tanks, taking advantage of their 2 ApR.
Tank armor class should be as follows for this point of the campaign:
- Base AC: 10 (AC 10)
- 18 Dex: +4 (AC 6)
- Splint Mail: +6 (AC 0)
- Large Shield: +1 (AC -1)
Factoring in armor and shield modifiers we also have a two-point AC bonus versus piercing/missile attacks (AC -3). This is helpful.
Above: My battle-hungry Dwarf bites off more than he can chew.
Along with 28 HPs and a helmet to negate the double damage inflicted by crits, we feel pretty safe. The only danger comes from the on-rest spawns that consist of up to six goblin marshals of either melee or archer type. They are capable of stinging us for a max of 11 and 8 damage per hit, respectively. So yeah, nasty. Especially if they spawn on the party's flanks to focus on our squishy backrow.

Now, there are two or three buildings of mild interest in the Pass, all of which have been abandoned by the peasants who have fled to the safety and warmth of Kuldahar after Brother Poquelin froze the the passes in Icewind Dale with Crenshinibon.
Watchtower Icewind Dale
Inside is a non-hostile ogre who we can talk to, named Ghereg. Indicating an intelligence score of 3, he wants to pound his head into the wall to make his headache go away. Nothing is stopping us from slaying him on the spot, but there is some class-based reactivity here for Druids that allows a peaceful solution; otherwise, only Archdruid Arundel of Kuldahar can prescribe a remedy for the voices he is hearing in his head (again, emanating from the artifact known as Crenshinibon, wielded by Brother Poquelin).

Old Mill Icewind Dale
This building consists of three separate areas (ARs): mill, basement and loft. Upon entry we are confronted by the chief of the Bleeding Eye clan, Uligar, who demands we pay him tribute. He is very weak for a chief.

Of note, he drops the Blur scroll and the second random item of the campaign, again, drawn from a pool of three items. Glimglam's Cloak is the most coveted. The item code for Glimglam's Cloak is GLIMGLM.
Jermsy
Down in the basement, hiding in the closet from the goblins, is the little boy, Jermsy. We can rescue him for 2,400 XP and he will make a run for it back to Kuldahar. Note the dialogue for noble characters; but it's for flavor only.

There is nothing in the loft but a pack of goblins. Whoop-dee-doo.
Do you really want me to cover the beetle cave? Ok, it's a small, separate area that consists of a dozen or so goblins, a few of which are hacking up beetles for food. Beetle cave covered!
Ok, I'm getting impatient plodding through this Prologue. Let's move on to Kuldahar and Chapter One to see how the campaign shifts up a gear!
- Experience Points: 670 killXP + 3,600 qXP = 4,270 total XP (13,220).
- Killcount: 57 (109).
Kuldahar

Welcome to Part III of my Icewind Dale walkthrough; this part, covering Kuldahar.
The beautiful town of Kuldahar acts as the main hub for most of the campaign. Our adventuring party will return here time and time again over its course in order to sell off loot and rest safely. As such, we will become intimately familiar with its layout and fond of its unique and artistic hub design. Not many IE areas made me sit back and just enjoy the painting before me. But the whole of Kuldahar - interiors and exteriors - are just gorgeous, and the artists deserve to be commended.
Map of Kuldahar

The town of Kuldahar is built into the root-system of a gigantic oak tree that radiates enough warmth to melt the surrounding snow and create a comfortable climate for the locals, but its circle of warmth has begun to recede because someone, or something, is draining its life-force. In fact, we can see the encroaching snow line around the edge of the town.
Lots can be learnt about the town and what's going on around here just by talking to the generic townsfolk who are scripted to roam about. We learn that this current winter has been an evil one for Kuldahar; that, perhaps in connection with the great oak problem, townsfolk are also disappearing and there have been sudden storms and monster sightings. These are the reports that Hrothgar intended to investigate. But now, it's all up to us.
There is some reactivity with the above-mentioned townsfolk. One of the many inquiring dialogue threads allows us to ask them why they don't worship Ilmater, to which they respond:
There is some reactivity with the above-mentioned townsfolk. One of the many inquiring dialogue threads allows us to ask them why they don't worship Ilmater, to which they respond:
In response to that, Druids have the opportunity to champion the worship of nature and bestow a blessing. Image: The Druid's Blessing.
Both examples yield 1,200 XP. Of course, this is merely token reactivity and nothing like we see in Planescape: Torment or MotB, but at least Black Isle bothered to put some in there. And really, how many examples of reactivity can the reader think of in BG1 vs BG2?
Arundel: Archdruid of Silvanus

Arundel is the spiritual leader of Kuldahar and anchor for the first two chapters, telling us where to go and what to do. He was the one who sent a messenger to Hrothgar, appealing for assistance from Easthaven. Being a Druid, Arundel is a fan of balance. But not just any old balance:

The old druid describes the evils plaguing Kuldahar and gives us our first lead on a possible source of the evil: the Vale of Shadows, nearby. This is a non-trivial undertaking that has us exploring a series of undead-infested crypts, so we shall venture there only after we have scoped out the rest of the town for quests, vendors and any freebies up for grabs.
Below left: Some sweet interior artwork right here. Arundel's sprite is great, too.

The important vendors in town are pictured below. From left to right, they are: Conlan's Smithy, Orrick's Tower, Oswald's Airship and the Temple of Ilmater. Parties will pay them many visits during the adventure in order to sell off inventory clogging loot that can get really annoying even with a six-person party.
General note on vendors: Each vendor specializes in certain kinds of items and will cough up more gold for those items than other vendors. They may even turn their nose up at items that they don't deal in. This just means we have to shop around when buying and selling. Image: Helm of the Trusted Defender description.
Conlan & The Anvil's Twin
Conlan's Smithy is a priority visit due to the need for Plate Mail. We definitely want to snatch up a few sets for our tanks (672 GP ea with 23 Charisma). Also, the all-important Large Shields, Helmets and ammo. In addition, Conlan offers a range of magical weapons for the sale that are prohibitively expensive, and we will most likely come across superior wields in the general course of adventuring by the time we can afford the ones on offer. Moreover, discriminating buyers will really only have their eyes set on a couple of items at this point, wishing they could afford them: the Helm of the Trusted Defender and the Giving Star.
But the former can only be worn by halflings and gnomes and the latter can only be wielded by characters of non-good alignment. So, our need of even those items depends on our party composition. Most of the other stuff is over-priced and rapidly out-stripped by the dungeon itemization; e.g, the Lonesome Road +3 costs 50,000 GP? Please. Who can afford that? Besides, Chapter Two nets us the Battleaxe +2: Defender that bestows +2 AC and 10% missile resistance, and it isn't long before we find the Axe of Caged Souls +3 and the Celebrant's Blade +4. (This is without factoring in random drops.)
Of note, a thief character with borderline-maxed Open Locks skill (95%) can steal Conlan's Hammer from the locked chest in an adjoining room. Otherwise, the party must wait until they receive the key to the chest for rescuing Conlan's son, Sheemish, from the trolls in Dragon's Eye. The warhammer is notable due to its limitless enchantment for the purposes of to-hit, and its bludgeoning damage that is helpful in the skeleton-infested Vale of Shadows, upcoming. Image: Conlan's Hammer. The item code for Conlan's Hammer is ZZA7CH.
Orrick the Grey
Orrick the Grey is a reclusive mage who dwells in the tower overlooking the town of Kuldahar. He doesn't really care for the people of Kuldahar and doesn't want to get involved in the affairs of the townsfolk. Just like Thalantyr of High Hedge, he is aloof and only concerned with the acquisition of knowledge.

If by some miracle we happen upon mythal lore in the course of our travels, Orrick requests that we deliver it to him. He is convinced of the existence of an elven outpost somewhere in the Spine of the World; it's the whole reason why he has set up shop here. Image: Orrick the Grey dialogue.
It is not until Chapter Three that we are able to locate this lore from the library nested in one of the spires of the Severed Hand outpost, far to the south. Image: Mythal Theory. Upon delivering the Mythal Theory to Orrick we receive 24,000 XP and a magical artifact of great value, randomly drawn from a pool of three. The choicest of these is Mithran's Cloak which bestows +2 to all saving throws and +3 AC. Very, very cool. The item code for Mithran's Cloak is CLOAKMI.
Orrick the Grey Items
Orrick the Grey Chapter 1 Items
Upon arrival in Kuldahar, Orrick offers the following items for sale:
- Spell scrolls: Charm Person, Agannazar's Scorcher, Web, Mirror Image, Melf's Acid Arrow, Detect Invisibility, Chromatic Orb, Sleep, Shield, Magic Missile, Friends, Color Spray, Identify.
- Items: Clasp of Bron's Cloak (amulet, 5% resistance to slashing, piercing and missile attacks), Girdle of Gond (belt, +10% Open Locks, +5% Find/Remove Traps, Thief only), Robe of Enfusing (robe, AC +2, 5% MR, +1 first circle spell slot).
Orrick the Grey Chapter 2 Items
After reaching Dragon's Eye, Orrick offers the following items for sale:
- Spell scrolls: Emotion: Fear, Spirit Armor, Monster Summoning II, Dire Charm, Slow, Lightning Bolt, Hold Person, Decastave, Snilloc's Snowball Swarm, Charm Person, Agannazar's Scorcher, Web, Mirror Image, Melf's Acid Arrow, Detect Invisibility, Chromatic Orb, Sleep, Shield, Magic Missile, Friends, Color Spray, Dispel Magic.
- Items: Wand of Freezing Death (choice to cast Snilloc's, Icelance, Ice Storm, 11 charges), Pemby's Wand of Many Missiles (cast 3x Magic Missiles, 15 charges).
Orrick the Grey Chapter 4 Items
After reaching Upper Dorn's Deep, Orrick offers the following items for sale:
- Spell scrolls: Ice Storm, Shadow Monsters, Hold Monster, Shroud of Flame, Demi-Shadow Monsters, Emotion: Fear, Spirit Armor, Monster Summoning II, Dire Charm, Slow, Lightning Bolt, Hold Person, Decastave, Snilloc's Snowball Swarm, Charm Person, Agannazar's Scorcher, Web, Mirror Image, Melf's Acid Arrow, Detect Invisibility, Chromatic Orb, Sleep, Shield, Magic Missile, Friends, Color Spray.
- Items: Mantle of Hell's Furnace (cloak, cast Agannazar's Scorcher, Burning Hands, and Charm Elemental Kin).
The important thing to note here is that unpurchased scrolls and items do NOT carry over when Orrick's stock changes with Chapter progression; they are wiped clean. So, for example, if we don't purchase Dispel Magic before reaching Upper Dorn's Deep, then that spell is lost forever to our mage's repertoire.
In addition, you can see that many spell scrolls are offered more than once. What does that mean? It means that, providing we snap them up when they are on offer each time, we will have enough copies to support a second or third arcane spellcaster. The benefits of being able to unleash multiple Webs in short order should be obvious, especially when we consider the availability of Free Action status through 2x Ring of Free Action.
To explain, Free Action status is useful on both the offensive and defensive ends. There are two rings up for grabs in Kuldahar that bestow permanent Free Action when worn, both of which can be pickpocketed by thieves with decent investment in the skill (one from Orrick and the other from Arundel). In addition, Free Action is a 4th circle divine ward, Oswald offers Potion of Freedom x3 in Kuldahar, and there is a 33% chance of netting the Girdle of Labelas, post-Severed Hand.
On the offensive end, Free Action allows our warriors to freely wade into the AoE of Web IWD and auto-hit and cut down the immobilized enemies, whose AC is null and void. And on the defensive end, it wards off lethal forms of immobilization such as hold, slow, web, entangle and grease. It also erroneously wards off charm and some forms of stun. Make no mistake, Free Action is a HUGE perk. We don't go anywhere without it.
Oswald the Alchemist
With the exception of Mummy's Tea (ADISEASE) - which cures disease and is sold in unlimited quantities - the most useful potions offered at Oswald's Laboratory are sold in quantities of just three:
- Potion of Frost Giant Strength (POTN04)
- Potion of Heroism (POTN09)
- Potion of Invulnerability (POTN11)
All potions are prohibitively expensive until we are done with the Vale of Shadows and have accumulated some wealth, but Oswald may also be pickpocketed for a few potions and items; the most notable of which is a Ring of Protection +2 (RING07).
So, as we can see, having a thief character with the ability to open locks and pick pockets gives us a solid early boost:
- Ring of Free Action (x2)
- Conlan's Hammer
- Ring of Protection +2
Sister Calliana & Mother Egenia

Sister Calliana is the only priest vendor available until we reach the bowels of Dragon's Eye. She is acting as head priest of the Temple of Ilmater after Mother Egenia was abducted. We end up saving Egenia from a horde of trolls and evil priests in Dragon's Eye, but she never returns to the temple (oversight) and we only meet up with her again in the sequel, in spirit-form.
Calliana also mentions that another member of the Ilmaterian clergy, Brother Poquelin, recently passed through Kuldahar on pilgrimage to a monastery in Bryn Shander, where he sought to get help. It is later revealed that Brother Poquelin was merely the guise assumed by the devil, Belhifet, to make it easier to scour the region for lieutenants to lead his devil-army, with which he intended to conquer the Dale.
Eidan's Legacy Kuldahar

This is actually the only quest that is contained wholly in Kuldahar. The other four require extensive exploration, far and wide. On the top floor of the Evening Shade Inn we find a signet ring in a drawer inscribed with a message that clearly leaves the inn to the people of Kuldahar should the owner pass away.
When we present the ring to the Aldwin who is running the joint downstairs, we are able to expose him for a fraudulent claim on the inn. Note the amusing check on the Paladin class. The solution to the quest is binary: we either dob him in to the elders or get a free room to rest in for the remainder of the campaign (3,225 XP, either way).
Mirek & Yetis
Two rogue tundra yetis are scripted to attack the town from the path that leads into the Vale of Shadows. Having saved his ass, we accept Mirek's request to recover his family heirloom from within the restless Vale.

Ok, gather your holy warriors, get your plate mail on and break out the blunt weapons! In the next part we shall venture forth into undead territory in search of the source of evil plaguing the town!
Vale of Shadows
Welcome to Part IV of my Icewind Dale walkthrough; this part, covering the cRPG dungeons in the Vale of Shadows.
Having milked the Prologue, Kuldahar Pass and Kuldahar itself for experience points, the party has reached second level. Most notably, two of our tanks sport Free Action status, and our Mage has Web scribed to her spellbook.

Also notable, is that our gnome tank sports lordly Armor Class IWD of -4. What does that mean, though? It means that most monsters in the Vale of Shadows need to roll natural 20s in order to hit him (a 5% chance of scoring a critical hit).
Moreover, once we can afford to purchase it from Conlan (usually around the midway point of the Vale of Shadows), the Helm of the Trusted Defender results in - what is at that point (relative to enemy THAC0 IWD) - a fourth level supertanker (AC -7).


The Vale of Shadows is a snowy, yeti-infested canyon consisting of a series of centuries-old crypts infested with spectral, skeletal and cadaverous undead.
We are exploring the Vale of Shadows on behalf of archdruid Arundel, who has requested that we seek out the evil plaguing Kuldahar.

Yeti Pelts
En route to the crypts, the only enemies encountered are yetis and lesser shadows. Yeti pelts may be sold to Conlan in Kuldahar for 50 GP each. Bearing in mind that, after the first transaction, Conlan will only pay 20 GP each, it is best to fill our inventory slots with 16 pelts and flog them to him all at once (800 GP). It is possible to return to the Vale and farm pelts by provoking on-rest spawns, but it's just not worth it. Rapid accumulation of wealth comes from raiding the dungeons, anyway.
In the center of the map, slay the Yeti Chieftain, loot Mirek's Family Heirloom from its corpse and return it to Mirek in Kuldahar (2,400 XP).
Raid Vale Crypts for Keys & Artifacts
The crypts are raided as the heroes search for keys which in turn grant them access to a dungeon guarded by legions of undead commanded by the spirit of the Barbarian King, Kresselack the Black Wolf.
The Vale hosts three small crypts...

... and one larger, more difficult crypt...

... followed by a three-zone dungeon crawl that isn't going to be a cake-walk for new players.

Vale of Shadows Key Locations
- The Gate Key is found on an altar in Crypt AR3101. It opens the gate to Kresselack's dungeon. The item code for the Gate Key is KEYGATE.
- The Sanctum Key is found in a coffin in Crypt AR3301. It opens a door in Kresselack's dungeon Level 1. The item code for the Sanctum Key is KEYSANC.
- The Priest's Key is found in a sarcophagus in Kresselack's Dungeon Level 1 AR3501. It opens a door in Level 1. The item code for the Priest's Key is KEYPRST.
- Mausoleum Key is found in a sarcophagus in Kresselack's Dungeon Level 1 AR3501. It opens the door to Kresslack's Dungeon Level 2. The item code for the Mausoleum Key is KEYMAUS.
- The Holy Symbol of Myrkul is found in a sarcophagus in Kresselack's Dungeon Level 1 AR3501. It opens the door to Mytos. The item code for the Holy Symbol of Myrkul is HOLYSYM.
- The Plain Key is found on a table in Kresselack's Dungeon Level 2 AR3502. It opens the door to Kresselack's Dungeon Level 3. The item code for the Plain Key is KEYNRM.
- The Black Wolf Talisman is found on a corpse in Kresselack's Dungeon Level 2 AR3502. The Black Wolf Talisman activates a Switch on an upright, banner-draped structural pillar in AR3502 at exact location (x=930, y=890), which opens the door to Kresselack himself.
In five of those seven areas, mobs of undead swarm us upon entry. Some come in from the sides, too. So? Well, it means we can't just have our tank draw all the aggro. We need to adjust our party formation and do our best to keep squishy party members out of harm's way.
Obvious threat posed by the swarming undead aside (no fewer than 250, all told), it is hold and disease negative status effects that are deadliest. At this level, an immobilized or diseased character is a dead character. Which is why one doesn't simply enter IWD dungeons without Free Action status and Mummy's Tea.
Also deadly is a fireball trap that can turn fledgling parties into cinders, along with the stinking cloud unleashed by skeletal mages, and the magic missile spam unleashed by imbued wights. Nasty, nasty stuff.
 |
| Did I mention there were undead in the Vale? |
While several spell scrolls are found in the tombs, Haste is the most notable acquisition in that it doubles ApR for the entire party. The easily-missable Blindness comes in second. Also, magical weapons are vital because mid-tier undead such as wights and mummies are immune to non-magical ones. Luckily, these are readily itemized in the crypts.
Constituting 50% of all Vale enemies, skeletal undead also sport 50% piercing and slashing resistance, so crushing aka bludgeoning weapons are advisable wields.
Being primarily a series of combat zones populated by undead, there are logically not many dialogue opportunities in the Vale. However, similar to Black Isle's own Planescape: Torment, not all of the undead are mindless. In fact, some are not only capable of stringing words together but can also hold down a conversation.
Therik: Armored Skeleton
Armored skeleton Therik is the first crypt denizen that can be questioned:


Mmm... that didn't go down too well.


Mmm... that didn't go down too well.
Bone Dancer Mytos of Myrkul
Now in Kresselack's dungeon, let's see what we can get out of Bone Dancer Mytos, a servant of Myrkul:


This undead Myrkulite priest sounds a little more educated. We push a bit:

We are awarded 3,225 XP for trying to reason with Mytos. Of interest is that Paladins, Clerics and Druids can enter into a flavor convo about the Dark Art of Necromancy, which results in another 3,225 XP -- Image: Paladin versus Mytos -- but there is no way to bypass hostilities. It is now a matter of ploughing through scores and scores of undead, en route to Kresselack's tomb.
Kresselack Icewind Dale
Upon arrival in the bowels of the dungeon, the spirit of the Barbarian King is confronted:
Where and who, though?

Well, there is only one icy cave in the canyon. A yeti-infested one. And it is there that we find Lysan.
 |
| Kresselack is a demon knight sprite, made transparent. |
Where and who, though?

Well, there is only one icy cave in the canyon. A yeti-infested one. And it is there that we find Lysan.
Lysan, Priestess of Auril


We ask about the tenets of Lysan's faith...

... only to learn that she's a fundie who won't be content until Kuldahar is destroyed.

Lysan is pretty weak, and so are the yetis by this point.

Pre-Vale, Lysan can be spoken to as a barmaid in the tavern of Kuldahar. Paladins who cast Detect Evil will know her alignment but no option is given to investigate her motives. If we meet her pre-Vale then we can expose her in the icy cave immediately. At any rate, upon her death we can inform barkeep Whitcomb of her antics and receive her belongings which include a few scrolls and the Mantle of the Coming Storm (AC +1, Fire/Cold resistance +30%). Image: Whitcomb dialogue.
Lastly, it turns out that Lysan became the inspiration for three Auril Priestesses in IWD2.
***

... but he did tell us his story when we asked...

... and it was a pretty good one.

Plus, he allowed us to loot his sarcophagus:
 |
| Giant Two Handed Sword (random), Black Helm, Black Plate and Kresselack's Sword. |
Bad ass.
We report back to Arundel to inform him that the evil plaguing Kuldahar does not have its source in the Vale. The archdruid of Silvanus gives us our next lead, though: The Temple of the Forgotten God. Image: Arundel dialogue post-Vale.
- Experience points: 68,365 kXP + 28,975 qXP = 97,340 total XP (110,560)
- Killcount: 299 (408)
Party of heroes climbs to fifth level. Supertanker sports AC -9. Along with Web and Free Action, this is key when facing off against hard-hitting giantkin.
Vale of Shadows Itemization
Itemization is well-tempered. None of the static or random loot screams "over-powered". The Black Wolf Talisman is the most coveted static item for its AC +1/HPs +10 whereas the four random pools can most notably yield the Reinforced Large Shield +1 (AC +2, AC +1 vs. missile, 10% slashing resistance). This shield is actually the best on the Infinity Engine if we go by my armorset criteria. RLS+1 will remain useful throughout the campaign.
There are a couple of interesting random weapons, too, namely, Dazer +1 (5% on-hit 3-round Stun) and Diseased Halberd +1 (10% on-hit disease). On-hit Stun is no-save and MR/immunity-bypassing whereas the on-hit disease is deadly because it stacks, disrupts spellcasting, and does not stop eating away at the victim's HP pool. Remember, enemies do not have priests to cure them or Mummy's Tea to quaff. Thus, they are dead meat once infected. Of course, the halberd is not so useful in the undead-infested Vale but it can be useful in subsequent combat zones.
Most of the random items are useful and I like how some weapons have drawbacks. Take for example the Giant Halberd. It inflicts 2d8 raw piercing but penalizes THAC0 by one point, AC by two points, and requires 18 Strength to wield. Reckless, but damaging. And above all, cool.
I also like the randomness of IWD loot. Our lucky finds can change our warrior's proficiency allocations and even the way we play the game. Also, it facilitates replays.
Consumables (scrolls, potions and wands) are not thrown about like confetti though what is itemized keeps our party on their feet and fighting for longer periods, without the need to rest in order to heal up or refresh arcane and divine spell slots. Afterall, resting provokes respawns with a high percentage chance. If we use consumables in the zones in which they are found (instead of hoarding them to the point of clogging up our inventory because who knows, we might need them for end-game), the combat encounter design becomes somewhat easier. Which is the whole point.

Temple of the Forgotten God

Welcome to Part V of my Icewind Dale walkthrough; this part covering the Temple of the Forgotten God.
As is evident from the above screencaps of its four tiny areas, the temple constitutes a brief segment of the campaign. So yeah, this is going to be a very short write-up in comparison to the others.
The temple is located in another canyon to the east of the Vale of Shadows. We are here on behalf of Arundel in an attempt to recover the Heartstone Gem. This druidic artifact is needed in order to scry for the source of the evil plaguing Kuldahar.


The temple is located in another canyon to the east of the Vale of Shadows. We are here on behalf of Arundel in an attempt to recover the Heartstone Gem. This druidic artifact is needed in order to scry for the source of the evil plaguing Kuldahar.
Verbeegs
Stone statues of robed figures tower above the approach to the temple, blanketed with snow. Here the party bumps into Red Toe, a verbeeg fleeing the temple. The giant can be waved away, slain, or questioned.

So yeah, we learn only that "bad priests" have raided the temple and slain many within.
Acolytes of the Forgotten God
Anyway, we step inside the temple...
We are accused of being thieves and defilers by the surviving acolytes of the Forgotten God; who, it is worth noting, are evil-aligned like those who recently raided them (as are verbeegs according to the Monstrous Manual).

Thus, we should not have any qualms in ploughing through the place in search of the Heartstone Gem.
Map of Temple of the Forgotten God

As can be seen, the two combat zones are just a series of halls and rooms. There are no secrets to be found and no surprises in store aside from the odd verbeeg stomping in from a sideroom. A few traps are set about but only the sleep trap is hazardous. Unlike Kresselack's tomb, we don't need to find a single key. This is as straightforward as it gets though that's not to say that it's boring.
The survivors are non-trivial in number: no fewer than nine acolytes and sixteen verbeegs are getting about. The verbeegs sport 19 Strength and wield spears with great reach whereas the acolytes are divine spellcasters whose most effective spell is Entangle. In fact, it's their shtick though they also cast Static Charge, Flame Weapon and Spiritual Hammer. But we have Free Action status and something better than Entangle: Web. Why is Web better than Entangle? Yes, Entangle is an AoE in IWD, too, but webbed enemies cannot move at all whereas entangled ones can still attack with melee and ranged weapons.
Also, our supertanker sports -9 AC against the hard-hitting verbeegs. They cannot hit him except on a crit (a 5% chance). Of course, if he gets swarmed by several verbeegs then he is bound to be hit (and he's not yet a supertanker, HP-wise), but Web is pretty useful in keeping the mob immobilized for the most part. The point is, if one or two verbeeg's escape Web's embrace then our tank can stand against them without fear of being skewered by their giant spears.
In short, the temple acolytes and guardians are in for it. Of course, that's mostly because I know the game. Newbies will probably get a new asshole ripped for them.
 |
| Webbed verbeegs are dead verbeegs |
Solid Gold Pedestal
No survivors are found in the inner sanctum, though. Everyone's dead. And the Heartstone Gem has been taken from the golden pedestal!

Vial of Mysterious Liquid
The corpse of one of the raiders is spotted on the floor; his vestaments indicative of a priest of Talona. Thus, we know that Talonites raided the temple and slew the acolytes of the Forgotten God in order to steal the Heartstone Gem. A vial of mysterious liquid is looted from the Talonite's corpse, to be shown to Arundel upon our return to Kuldahar.
There is only one arcane spell scroll acquisition in the 1.06 temple, but it's a notable one: Skull Trap. This is a top-tier direct damage spell in BG, BG2, IWD and IWD2. In IWD, it's save vs. Breath or take 1d6 magic damage per caster level (save for ½). That's per enemy caught within the AoE. This is a vicious spell that sees a lot of use in the upcoming Dragon's Eye - and beyond. It is also cool in that it can be set as a stackable trap. Lay down several of these babies... enemy walks into them. Boom. It dies. We like that.
 |
| 25% chance to net one of these |
Some of the random items are quite powerful, too. They are all found in chests. Most notably, it is possible, though improbable, to come out with Long Bow +2 Defender, Greater Ring of the Warrior and Spiked Long Sword +1 along with Charged Battle Axe +2 or Two Handed Sword +1: Hammering.
Of those, Charged Battle Axe +2 and Two Handed Sword +1: Hammering are the most coveted. Why? 15% and 20% on-hit no-save, MR-bypassing Stun. Thus, I have ranked these two weapons equal-third in Best Infinity Engine Weapons. They're just that good. Arundel may not approve of their balance, though.
Overall, the Temple of the Forgotten God is an easier segment of the campaign, and potentially a very rewarding one in regard to items. Why the denizens of the temple had such an arsenal at their disposal - which they were unable to wield (being priests and giants) - is somewhat puzzling. It seems they were just dumb, and deserved to be massacred. Which they were. Twice. In one day. Hilarious!
Anyway, we return to Arundel in Kuldahar for yet another lead. Image: Arundel dialogue post-Temple.
By the way, a comparison shot of IWD and IWD2 Kuldahar shows us where the gem is supposed to be: nestled amidst mossy stone mounds, in front of the Archdruid's abode.

- Experience points: 10,500 kXP + 19,500 qXP = 30,000 total XP (140,560)
- Killcount: 25 (433)
It is important to remember that Orrick's vendor inventory changes at the commencement of Chapter Two. The details are covered but Slow, Spirit Armor and Dispel Magic are spells we don't want to miss. Especially Slow. See, Haste is great right? Doubles our party's ApR. But Haste inflicts fatigue when it wears off and Slow potentially affects more than six units. And it not only halves enemy ApR and movement rate but also inflicts a four-point penalty to their THAC0, AC and saves vs. Spell. Ideally, we cast Haste on ourselves and Slow on the enemy in order to gain a huge advantage, but I generally save Haste for the tougher combat encounters.
Dragon's Eye
Welcome to Part VI of my Icewind Dale walkthrough; this part, covering the first three levels of the Dragon's Eye cRPG dungeon.

Dragon's Eye is a dormant volcano located to the southeast of Kuldahar.

It is so-named because entrance is granted through the eye of a stone dragonhead carved out of the mountainside.

The party have journeyed to Dragon's Eye in order to track down the Talonites who sacked the temple and stole the Heartstone Gem. The recovery of the gem is key to the campaign. Without it, the source of the Evil plaguing Kuldahar cannot be divined.
The Dragon's Eye megadungeon consists of five distinct combat zones. Similar to Durlag's Tower, it is not easy to backtrack out of the volcano once we have delved deep. Thus, we tend to push on and tough it out all the way to its yuan-ti-infested bowels. This is one of my fave dungeons on the Infinity Engine. (Readers can compare the IWD version of the megadungeon with the IWD2 version.)
In its upper reaches, we begin battling packs of lizard men, trolls and spiders...

... and then face off against hordes of undead and yuan-ti in its lower reaches. Dragon's Eye culminates in a pitched battle against the Marilith demon, Yxunomei. This constitutes one of the best boss battles on the Infinity Engine (covered in Part VII).

What follows is commentary on each dungeon, focused on dialogue, itemization and combat encounter design.
Dragon's Eye Level 1: Caverns of the Lizard Men
The upper reaches of Dragon's Eye are populated by lizard men, spiders and bombardier beetles. The lizard men - who constitute 75% of all monsters on this level - come in three varieties: greenskins, toughies and shaman. Mostly, they feel like mooks - especially the greenskins which are barely worth swinging a sword at. They make funny noises, though, so they're fun to slay.

Lispen: Lizard Man King
Heading up the reptilian forces is Lispen the Lizard Man King. He speaks common with a hissy lisp:

I chose to screencap this dialogue path because there is mention of Yxunomei, the Marilith boss of Dragon's Eye. Lispen guards the upper reaches for Yxunomei because she allocates the lizard men food. Problem is, the food here referred to is actually the kidnapped people of Kuldahar. So yeah, this scaly abomination needs to die. Afterwards, the kidnapped people, who are found just to the south, are free to make their escape (30,000 XP).
The Serpent Statue flanking Lispen is holding a key arcane spell scroll, too: Fireball. This spell, which inflicts 1-6 fire damage per caster level (save for ½), is eminently useful against the trolls coming up in the next dungeon.
Erevain Blacksheaf
There is one other point of interest in this dungeon. Remember Erevain Blacksheaf? We met him in the Snowdrift Tavern in Easthaven before we set off on Hrothgar's expedition:

Well, his corpse is found in a spider lair to the south. Seems the elven hero got done in by spiders. Poor guy. But really, you'd have to be an idiot to come in here by yourself.
As we descend deeper, it becomes clear that we're talking about a pretty organized enemy here; essentially, an army.
Erevain's corpse holds a semi-useful sword, troll-bane ammo, and his journal. Image: Erevain's journal.(The Xan referred to in the journal was the pessimistic companion in Baldur's Gate.)
Just one last thing. There are x15 antidotes held in a chest in the north. They are potentially crucial later on.
Dragon's Eye Level 2: Tunnels & Trolls
The troll tunnels make the upper reaches seem like a cakewalk. While not the most prolific or the most dangerous of Dragon's Eye denizens, trolls are found in three of the five dungeons, and they are hard-hitting tanks that regenerate their hitpoints. As per Realmslore, and with the exception of the ice variant (encountered on the approach), trolls must be finished off by either fire or acid damage. Our ability to inflict such specific damage is granted to us by limited in-dungeon itemization (flaming oils and fire/acid arrows) as well as by the arcane and divine repertoire of our spellcasters (e.g, Melf's Acid Arrow, Fireball and Flame Blade). Moreover, in an oversight by Black Isle, trolls which have been immobilized or confused by on-hit effects/spells, may be utterly vanquished by raw damage if they were immobilized or confused at the point of their being knocked to the ground. This unforced exploit makes troll-slaying much easier and less tedious.

Basically, we can lure them together and employ our collective ApR in order to beat them down. Once down, it's best to finish them off with a fiery AoE such as Fireball.
Sheemish
As in Lispen's domain, there are citizens of Kuldahar to save in the troll tunnels. One of these is Conlan's son, Sheemish. We merely have to clean out the approach to his prison in order to save him and the other Kuldahar kids (24,000 XP). Back in Kuldahar, Sheemish hands us Conlan's Key which opens the chest holding Conlan's Hammer (infinite enchantment for to-hit purposes). Image: Sheemish dialogue.
Our thief could have also picked the lock to the chest in order to acquire this hammer for the Vale of Shadows (95% Open Lock required).
Bombardier Beetles
Another particularly nasty critter is the bombardier beetle. These tough buggers are found in Lispen's domain in small numbers, but here is found a veritable swarm. The beetles spit acid splash, eject a deafness-inflicting acidic vapor, and are capable of inflicting on-hit Stun (which Free Action status erroneously wards). It's worth noting that beetle acid splash can finish off knocked-down trolls, too.

The reward for fighting through this optional swarm is worth it. On a corpse we find the Battle Axe +2: Defender (AC +2) and the Long Sword of Confusion +2 (25% on-hit Confusion). These are excellent wields.
To no avail, this nameless hero came packing.
Talonite Priests
Finally, after a fierce battle against four Talonite priests and several of their troll minions, we can rescue the self-sacrificing Ilmaterian priestess, Mother Egenia (36,000 XP).

Mother Egenia
In Kuldahar, we learned from Sister Calliana that Egenia was missing. Calliana was acting as head priestess in Egenia's absence. Egenia now tells us what happened. Image: Mother Egenia dialogue.
Trolls were there. But in freeing Egenia we have freed her people, too. There is naught to do now but descend to the next level of Dragon's Eye.
(We meet up with Egenia again in the sequel, but only in spirit-form.)
Dragon's Eye Level 3: Lair of the Necromancer

Undead Lieutenants

We learn through these dialogues that Presio is an ally of Yxunomei, and that there is an ancient grudge between Yxunomei and Belhifet (the Old Enemy). Image: Presio dialogue.
Farming Cold Wights
The experience point yield for cold wights is disproportionate to their difficulty. They are pretty squishy for an enemy that yields 1,400 XP per. Cold wights - of which there are no fewer than 50 - can also be farmed ad infinitum by provoking them as respawns through repeated resting (1,500 XP). However, in this dungeon, warriors naturally reach 7th level for the ApR +½ breakpoint, so there is no reason to engage in such cheese.

Blast Skeletons
In addition, a total of one dozen Blast Skeletons are dotted about the zone. Upon being hit they detonate Snilloc's Snowball Swarm. Deadly.

Presio: Necromancer
Presio herself is holed up in a chamber to the southeast. Now, though, actions speak louder than words. Presio is flanked by a few imbued wights and one dozen poison zombies. Clearly, she's been busy animating dead. It must have taken a couple of years to amass such a force - one which we cut through in minutes. How disheartening it must have been for her. Still, she is a formidable foe.

Presio opens proceedings by casting Mirror Image and Protection From Normal Missiles followed up by the fifth level evocation, Cloudkill. The party don't gain access to Cloudkill until the Severed Hand in Chapter Three. Aside from inflicting damage-over-time poison (for 1 entire turn), Cloudkill is capable of insta-killing any party member (sixth level or below) caught within its AoE. Very, very nasty. After that, Presio doubles her undead's attack rate with Haste and then unleashes Flame Strike and maximum Magic Missile (5 missiles). She will finally Animate Dead, cast Cloak of Fear, and wade into melee to inflict on-hit 1-round Stun.
Presio's corpse yields two items of particular note: Presio's Dagger +2 (on-hit 9 points of poison, save vs. Death for none) and the Hammer Flail +2 (15% on-hit Stun).
Found in her heavily trapped laboratory (one trap triggers Death Fog) are four arcane spell scrolls of note: Confusion, Vampiric Touch and a second instance of Skull Trap and Haste. Nice. As well, Presio's War Journal gives us a breakdown on her enemies. Listed is who she suspects to be Belhifet's minions and lieutenants along with potential meddlers from Easthaven and Kuldahar. She does not know that Brother Poquelin is actually Belhifet.
The approach to the fourth level is laced densely with traps. Clearly, intruders are not welcome here. Well, we're pushing on anyway.
The party is currently 7th level. Breakdown of current AC sources for supertanker:
- Base AC: 10 (AC 10)
- 18 Dex: +4 (AC 6)
- Plate Mail: +8 (AC -1)
- Reinforced Large Shield +1: +2 (AC -3)
- Helm of the Trusted Defender: +3 (AC -6)
- Ring of Protection +2: +2 (AC -8)
- Black Wolf Talisman: +1 (AC -9)
- Girdle of Beatification: +1 (AC -10)
- Battleaxe +2: Defender: +2 (AC -12) (AC -15 vs. slashing)
Have fun missing 95% of the time, assholes. Supertanker AC improves a bit more than that as the campaign progresses, too. For example, Mithral Field Plate Armor +2 will add three points and Red Knight's Shield or Great Shield +3 will add four for AC -19 (-22 vs. slashing).
Arcane spellcaster (Fighter 2→Mage 7) has broken into 4th circle for access to Spirit Armor, Emotion: Fear, Confusion and Monster Summoning II. Ranger/Cleric is still stuck on 3rd circle but has access to Dispel Magic, Animate Dead, Glyph of Warding and Protection From Fire.
Thief has decent investment in Open Lock and Find/Remove Traps (important in the yuan-ti stronghold, covered in the next post).
- Experience points: 225,435 kXP + 90,000 qXP = 315,435 total XP (455,955)
- Killcount: 253 (686)
Yxunomei
Welcome to Part VII of my Icewind Dale walkthrough; this part, covering Level 4 and Level 5 of Dragon's Eye, as well as Yxunomei.
Might want to grab a cup of coffee. Herein I cover lore, reactivity, itemization and combat encounter design for the two best dungeons in one of the greatest megadungeons in cRPG history.

Having ploughed our way through mobs of lizard men, trolls and undead (over 250 enemies), we have finally arrived in the lower reaches of the Dragon's Eye megadungeon.
Yuan-ti Monastery & Yuan-ti Stronghold:
Yuan-ti Monastery & Yuan-ti Stronghold:

First, though, we need to talk a bit about what we're dealing with.

It is down in these lower reaches that our heroes face off against one of the more impressive monsters to appear on the Infinity Engine: the Yuan-ti. Primarily serpentine in appearance, though distant descendents of humans, these Chaotic Evil carnivores are cunning, intelligent and highly organized. Yuan-ti not only have their own religion, language and culture, but they have also built cities and nations in far-away tropical jungles such as those in Chult. Yuan-ti are adept at infiltration and stealth; their two secretive orders, Viper Fangs & Coiled Cabal, having infiltrated various levels of human society over the past millennia. Basically, at this point in the time-line (1281 DR), yuan-ti are getting ready to come out of hiding and announce themselves to the Realms.
As per Realmslore, Yuan-ti come in three castes: pureblood, halfbreed and abomination. Purebloods can pass for humans, halfbreeds generally have a human head (which allows for common-speech), and abominations are full-blown serpentine and are only interested in war. Contrary to popular belief, the yellow-skinned, bipedal histachii are not yuan-ti at all: like the lowly lizard men, they are yuan-ti creations. Histachii were captured humans that underwent alchemical transformation, and are now slaves.
IWD does not explictly mention any caste but, going from inference, the robed ones are clearly purebloods; the priest, summoner, ritualist, baptist and torturer are halfbreeds (since they speak common); and the greenscales and big heavily-scaled elites/champions are abominations. Yuan-ti are also represented in IWD2 and Storm of Zehir (and IWD2 also covers the transformation into histachii).

Sseth
In this AD&D 2nd Edition time-line of Realmslore, Sseth is the god of the yuan-ti whose avatar manifests as Priest (25) / Wizard (20) / Fighter (18). Originating in the jungles of Chult, Sseth was a winged yuan-ti abomination of wyrm-like stature who took over leadership of the yuan-ti, built up clerical cults for the purposes of histachii transformation (human enslavement) and forged the great nation of Serpentes - which he ruled for several centuries as god-king. One of Sseth's allies is the goddess, Talona, which explains why the Talonite priests were working with the yuan-ti before we came along and foiled them by ripping them a new asshole.
Stone statue of Sseth, rising out of a pool of poisonous liquid:

Ok, let's get into the area-by-area commentary.
Dragon's Eye Level 4: Yuan-ti Monastery

Eldathyn: Albion
Cloistered beneath the domains of lizard men, trolls and the necromancer, and just above a yuan-ti stronghold, is apparently an order of peace-loving, nature-worshipping Eldathyn. At least, that's what "Exalted Keeper" Albion would have us believe:


Exposing Albion in the above example requires a character with an Intelligence score equal to or greater than 15.
In addition, Paladins can expose him for the yuan-ti pureblood he is. Image: Paladin exposes Albion.
Either way, we receive 24,000 XP. However, logically, the entire monastery goes on high alert after we have exposed Albion. Plus, we miss out on content and vendored items so it is best to hold off for now.
While exploration is still largely restricted at this point, we can at least gain access to resting and healing through Sharra the Healer as well as three new spells through Geelo the Librarian: Blur, Flame Arrow and Ice Storm. Once done with that, we can expose the purebloods at our leisure; either with our Paladin/smart character (as above) or by anyone else providing we have first taken note of the exotic carpet in the south. Image: Ranger exposes Albion.
But there is also another way. Neutral-aligned characters with an Intelligence score equal to or greater than 12 may trick Geelo into leaving the library. Then, we must shut the door to the entry chamber and pick the lock to the pureblood's off-limits study. Inside, we find strange texts which we can quiz Albion about:

Waterdeep Adventurers
Blatant force-attack aside, the purebloods can also be made hostile by unlocking the central chamber. Inside, the yuan-ti have dumped the bodies of a party of adventurers hailing from Waterdeep, whom they presumed to be dead. But they weren't. They just pretended to be. After a brief exchange, these adventurers will charge out of the chamber to fight for their freedom. While we forego 24,000 XP (and may lose some kill XP, too) the battle is made more manageable when these allies are involved.

But if we've already cleared the monastery of yuan-ti...

Either way, the Waterdeep party will watch over us as we rest (there otherwise being no way to rest in this dungeon or the next). Finally, we can slay them with impunity and loot their corpses for a few handy weapons, armors and items.
Overall, it is good that Black Isle put several options on the table in regard to putting the monastery on alert. But what happens once the monastery turns hostile?
High Summoner & High Ritualist

Well, a fierce large-scale battle plays out with the party going up against 50-odd yuan-ti. The pureblood force is a baker's dozen in strength, and there are six elites getting about as well. But they're not really the problem. The real problem is the high summoner and the trolls he keeps summoning along with the fact that most enemy units zero-in on our position no matter where we are in the dungeon. This is good combat encounter design. So, what we want to do is cut down whatever gets in our way as we bee-line to the summoner and two priests.
After that, we can take out the high ritualist and the eight greenscales backing him up (who don't turn hostile until we trigger the ritualist's dialogue). Image: High Ritualist's dialogue.
So much for the monastery. We've wiped out the pureblood caste and put a dent into the army. The key looted from Albion's corpse grants us access to the final dungeon which is teeming with serpentines headed up by the Marilith Tanar'ri, Yxunomei.
Dragon's Eye Level 5: Yuan-ti Stronghold

The yuan-ti stronghold constitutes the fifth, final and deadliest level of the Dragon's Eye megadungeon. We've come a long way. We've decimated the armies of lizardmen, trolls and undead, but now it's time to take it to the yuan-ti army. This is a fitting finale to Dragon's Eye and one of the best dungeons on the Infinity Engine. Also, the battle music is one of Jeremy Soule's best compositions; it's awesome.
Note the yuan-ti architecture: the layout of the dungeon itself is snake-like. We start off at its tail and confront Yxunomei at its head.

There are some grizzly placeable descriptions in the torture chambers, too.

The huge stone statue of the winged Sseth does not have a lore description, though. Sad.
Yuan-ti Traps & Tricks

There are over one dozen proximity traps cunningly placed in the dungeon by yuan-ti tacticians. Infinity Engine traps have both Detection and Removal difficulty ratings, but all traps in this dungeon are either 50/50 or 60/60 (cf. Durlag's Tower). Triggered traps do not disarm; they stubbornly remain a threat until they are dealt with by a thief with solid investment in the skill, Find/Remove Traps.
There are three main types of yuan-ti trap: poison needle, paralysis and confusion. These are DEADLY. Without the likes of antidotes, Neutralize Poison and Dispel Magic (which we may not have), a careless party is in for a world of hurt. I'm not overstating the lethality of these traps. Let's break it down.
 |
| No antidote? Dead. |
First, allow me to note that save vs. Death or Spell is, generally speaking, 50/50 for 7th level parties. It depends on race, class and equipment. That means we have a 50% chance of resisting the negative status effects inflicted by the following traps; it's touch and go.
- So, why is save vs. Death or poison needle deadly? Because PN inflicts 28 poison damage per round. And that poison does not "wear out": like its infamous cousin, disease, poison eats right through us no matter how deep our hitpoint pool is. As it should do.
- Next, why is save vs. Death or paralysis deadly? Because immobilized combat units are sitting ducks. They also have no AC and that means there is a 95% chance they get hit while immobilized.
- Lastly, why is save vs. Spell or confusion deadly? Because the affected combat unit either runs around like an idiot, stands there doing nothing, gets itself killed or - worst of all - turns on the party. Imagine that AC -12 tank of ours suddenly switching sides to wave their weapon at us? Hate.
You know, there is a reason I have ranked weapons sporting such on-hit effects as all-time greats: it's because such effects are DEADLY.
There is one other trap of interest: the Death Fog Hallway Trap. Limited to one instance, this proximity trap has been set on the floor of a hallway with a door at each end. Once carelessly triggered, both doors slam shut and the sixth circle AoE, Death Fog, is released. Sounds nasty? Not really. Death Fog is pretty tame in that it only doubles the acid damage up to 8 points before plateauing out. Though if the entire party gets trapped inside then the acidic plumes can be difficult to avoid within such restrictive confines. But the doors open up too soon so it's basically just a scare.

This involves fighting room to room and hall to hall. Yuan-ti are tacticians. They don't just charge forth like lizard men, trolls and other comparatively mindless monsters. They remain in their chambers or behind their traps, waiting. Yuan-ti formations are usually spread out, making it less easy to AoE them (Web/Fireball). Archers stand back against the walls, where they cannot be flanked. They switch to melee if we get close and back to ranged if we retreat. If we flee entirely, they slither back against the wall and wait again.
Yuan-ti come in melee, ranged and spellcasting variants. The several types include greenscales, elites, champions and priests as well as uniques such as the baptist, torturer and high archer. With the exception of champions and the single high archer, all yuan-ti yield 1,400 XP, and there are no fewer than 80 defending their stronghold (+20 histachii). Yuan-ti are no joke. They hit accuately, hit hard, hit fast, and are able to soak blows. Champions can hit for 18 dmg and crit for 36, histachii inflict on-hit disease, priests attempt immobilization, and so on.

Adding to the difficulty, many yuan-ti are placed behind the proximity traps referred to above. It all adds up to "nasty".
 |
| Yuan-ti High Torturer & Baptist |
Remember my supertanker? Well, the yuan-ti high archer has a 10% chance to hit him and Yxunomei herself only 15%. Everything else? 5%. Check out that tanking on the right! Bad ass.

High Torturer
Dialogue is limited. This is not a diplomatic or stealthy infiltration (cf. Serpent Lair Temple) but rather an all-out assault. The high torturer only talks to us because he mistakes us for purebloods. Image: High Torturer dialogue.
High Baptist
... and the baptist wants to enslave us through histachii transformation:
Odd Little Girl
In addition, Yxunomei teleports about the zone in the form of a little girl. Her comments are cryptic nonsense and the responses on offer are inane or go unanswered.

The iron doors to Yxunomei's sanctum are guarded by no fewer than ten yuan-ti. Note the trap density in front of the doors (cf. pic & pic).

Yxunomei Icewind Dale: Marilith Tanar'ri
Having slain the yuan-ti forces and picked the place clean of treasure, we can now face off against the Marilith Tanar'ri with some confidence.

Yxunomei is found standing in the center of her sanctum, still in human form. She is flanked by two priests and four elites.

Wow, look at all those options. But most of them are BioWare-ish in that the choices are flavor-only. At least, I could find no examples of reactivity in the threads. Anyway, all but the sixth choice leads to a discussion about the Heartstone Gem. And all discussions on the Heartstone Gem result in hostilities, as with option 6 (which is the short-cut back to the battle, after a reload).
Much of the dialogue is silly; the writing is poor. The thread I have quoted in full is the best one, with no pop culture references or obnoxious attitude present. Image: Yxunomei dialogue.
Basically, Yxunomei is in possession of the Hearstone Gem and she isn't about to just hand it over, is she. I mean, she's a snake-like, six-armed General of the Blood War. Why is she even bothering to talk to impudent interlopers such as ourselves? It's not like she's got anything interesting to say, anyway. And nor do the protagonists, for that matter. Waste of time.
While the dialogue sucks, the pitched battle against Yxunomei is great. I remember getting butthurt trying to beat this demon back in the day. You know, back when we had to figure things out for ourselves? Those were the days... but what am I talking about? A large potion of my blog is dedicated to spelling things out and putting too finer point on things...

Anyway, the main thing about Mariliths is that they are immune to weapon enchantment levels below 2. That throws a spanner in the works for those who failed to loot the - several - or so +2 weapons up to this point.
Mariliths also sport MR 70% and there is no way to debuff it, so spellcasting is unreliable. They are immune to mind-affecting, too. And poison. And sport 50% resistance to fire and cold.
To open proceedings, Yxunomei drops Cloudkill on herself as a defense mechanism (she is immune to its poison and potential insta-kill). At this point, though, we also cannot be insta-killed by Cloudkill (we are >6th level). Thus, our supertanker can charge in, endure the poison-plumes, and start tanking her ApR 5 like a boss, while the rest of the party deal with the yuan-ti and any undead summoned by Yxunomei.
Two good weapons to wield against Yxunomei would be the Charged Battleaxe +2 and Hammer Flail +2 for their on-hit Stun. Nothing resists on-hit Stun because it is erroneously MR-bypassing and no-save. The two physical-based damage dealers wielding these weapons should be hasted for 4 ApR each, of course. This makes short work of the Marilith.
Other +2 weapons will do the job, too, such as the Messenger of Sseth loaded with +2 arrows (both itemized in the dungeon). Of course, Web does work. With MR checked on a round-by-round basis even 70% isn't going to ward off three or four castings of Web. It is no surprise that the best arcane spell on the Infinity Engine is devastating in this battle, too.
 |
| A whopping 46,000 XP is awarded for slaying Yxunomei. |
Heartstone Gem Location
Looted from Yxunomei's wrecked frame is the ancient druidic artifact known as the Heartstone Gem.
Finally! We have ploughed through no fewer than seven dungeons and 400 enemies in search of this!
With the glowing gem in hand, the heroic party return to Arundel's abode in Kuldahar, hoping that he will be able to scry for the source of Evil plaguing Kuldahar.
 |
| Abode of the Archdruid: ground and first floors. Lovely artwork. |
But to our dismay, in our absence, Brother Poquelin (Belhifet) has mortally wounded Arundel and assumed his form. Image: Poquelin posing as Arundel.
Having thanked us for taking out Yxunomei, Brother Poquelin teleports away. Upstairs, Arundel beseeches us to seek out Baelnorn Larrel in the ancient elven fortress of the Severed Hand; Larrel being the only loremaster remaining who is capable of scrying with the Heartstone Gem. After that, Arundel becomes fertilizer for the Great Oak that towers over Kuldahar. Image: Arundel passes away.
No doubt, a well-balanced fertilizer.
This concludes Chapter Two
***
Itemization-wise, the Red Knight's Shield (AC +4)...

... and Messenger of Sseth are most notable.
The Red Knight's Shield is randomly itemized in a "shield pool", and all three of the shields are good. AC-wise, only the Great Shield +3 matches RKS. The Messenger of Sseth is statically itemized; found on the corpse of the yuan-ti high archer. Black Isle stupidly disallowed Grandmastery in bows so this sort of makes up for it. As can an even better +ApR bow, randomly found later.
On the other hand, arcane spell scroll itemization is underwhelming in comparison to what we already have: Ghost Armor, Dimension Door, Icelance and Non-Detection. Icelance does potentially stun the enemy for 1-4 rounds, though.
Oversights. Mother Egenia does not return to the Temple of Ilmater in Kuldahar. She should. Also, we cannot tell the Waterdeep party that the yuan-ti threat has been neutralized. Why are they still standing around stinking corpses? Lastly, with the exception of Sheemish, none of the kidnapped people despawn from Dragon's Eye and return to Kuldahar.
- Experience points: 213,290 kXP + 37,000 qXP = 250,290 total XP (706,245)
- Killcount: 139 (825)
Severed Hand

Welcome to Part VIII of my Icewind Dale walkthrough; this part covering the main towers of the Severed Hand cRPG dungeon.

Severed Hand Location
The Severed Hand is located far, far to the south of Dragon's Eye. It rises out of a massive valley at the foot of the Spine of the World.
A creation of Black Isle with no direct parallel in Realmslore, the Severed Hand is so-named because its towers are like the fingers of a hand extending upward. The severed part of its name comes from one of the subtowers having been destroyed. The tower is also known as the Shattered Tower. In its glory days it was known by the elves as the Hand of the Seldarine.
 |
| (cf. IWD2 version.) |
The party have journeyed to the Hand in search of the Baelnorn Archmage, Larrel, who, with the tragic death of Archdruid Arundel, is the only one left capable of unlocking the secrets of the Hearstone Gem; the ancient druidic artifact we pried from the cold dead hands of Yxunomei in the bowels of Dragon's Eye.
Severed Hand Approach & Main Tower

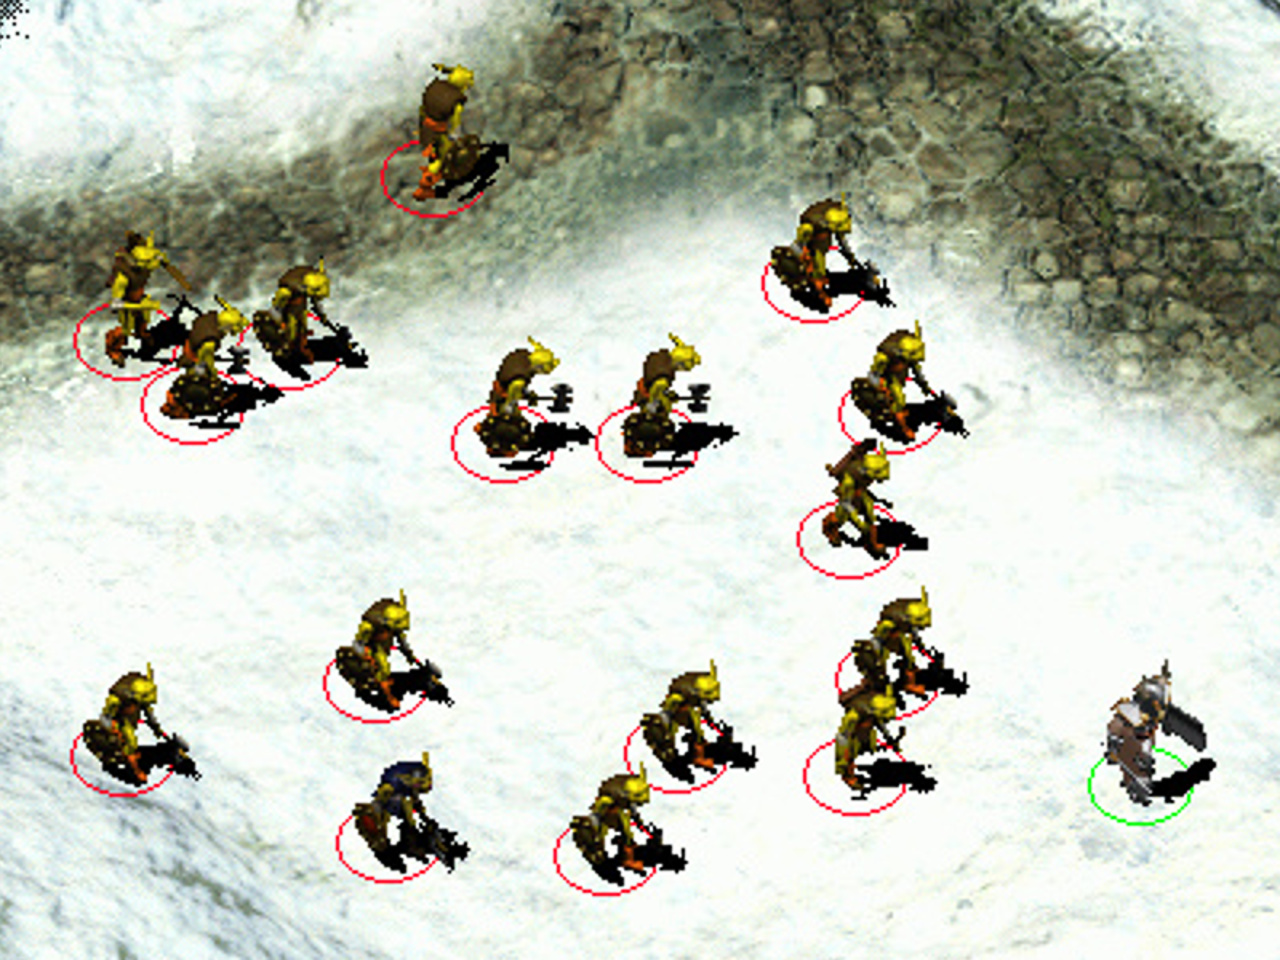
Larrel's Sending
Upon arrival to the Hand's approach, Larrel's Sending is observed fireballing a squirrel which it mistakens for a Dwarf. It entirely ignores the heroic party curiously looking on, turns on its heals, and shuffles off back into its tower.

Severed Hand Layout
The layout of the tower is complex and non-linear. As a result of devastating elven magic unleashed hundreds of years ago, the tower is a ruin and its structural integrity has been compromised. Some walls and staircases have collapsed and blocked off corridors and chambers. As a result, not all parts of a given level are accessible right off the bat. We need to think of the tower as a whole rather than as separate parts with no relation to one another.
The main tower or "palm" consists of four levels two of which are partitioned down the center. On its fourth level the Hand branches off into four sub-towers or "fingers" - Labelas, Solonor, Corellon and Shevarash - which themselves consist of a few levels. The fifth finger or Sehanine tower has been destroyed. Moreover, the first level of Labelas has been destroyed and can only be reached via a bridge that connects it with the third level of Shevarash. This sort of thing makes for interesting area design. The subtowers are named after members of the elven pantheon. Click on the links above for in-game lore on them.
Atmosphere in the tower is solid. The lack of background music allows the ambient effects to stand out. The tower creaks and groans as the wind howls through it. Very well done.
A picture says a thousand words so let's showcase the tower with heavy reliance on screencaps and annotations, shall we?
First up, the first level. As can clearly be seen, it is partitioned down the center due to rubble and ruin. This is indicated by the white line I have drawn. I have also greyed-out the eastern side of the level for clarity: it is currently inaccessible. The yellow line indicates our progression-critical exploration only. As can be seen, there are two ways to ascend to the second level, either by ramp in the north or stairs in the south. However, in this case it doesn't matter which exit we take.
 |
| First Level: West (cf. IWD2 version.) |
Now, most people are going to want to explore every nook and cranny in search of items and crap to kill. Well, not only are there some cool items drawn from random pools but there are over 200 spectral and skeletal undead to destroy in just the first three levels of the tower. Upon entry, the party is assailed by spectral undead in the form of shadowed orcs of grunt, archer and shaman kind. Being undead, they may be turned by Clerics. Because the sprites are semi-transparent to reflect their spirit-nature, they can be difficult to see on the playing field (in un-paused mode, anyway). We will learn why the undead are here in Part IX.
Note the "Ambush" annotation above. There are invisible polygons on the floor which when triggered (walked over) cause spectral undead to spawn in non-trivial numbers. Suffice it to say that, when flanked in such a manner, it can be difficult to keep our squishy party members out of harm's way.
Image: Ambushing goblin pack. Note how semi-transparent sprites make them difficult to pick out against the backdrop.
Ok, let's take a look at the second level. It is similarly partitioned as the first though different in layout. The two ambushes are a step up from the one on the first level. It's not just shadowed orcs but also goblins, worgs and ogres that we're up against. The goblins come in grunt, archer, marksman, trainer and warrior variety. The marksmen are crack shots. As can be seen, there are again two ways to ascend to the third level: up another ramp or up the central stairs.
We take wheelchair access to arrive on the third level. Ok, here we see a different kind of partitioning. A potentially deadly one. The party emerges from the ramp and tries to whack a goblin pack. But the cunning goblins run off down the hall. As the party gives chase they suddenly start getting stung by goblin snipers on the other, unreachable side of the partition. Thus, the party must draw out their ranged weapons and unleash ranged spells in order to neutralize the threat. After that, they continue their pursuit of the goblins only to be ambushed by a dozen orcs and ogres that flank from the north and pin them down at the dead end in the south. This is good combat encounter design.
 |
| Second Level: West (cf. IWD2 version) |
We take wheelchair access to arrive on the third level. Ok, here we see a different kind of partitioning. A potentially deadly one. The party emerges from the ramp and tries to whack a goblin pack. But the cunning goblins run off down the hall. As the party gives chase they suddenly start getting stung by goblin snipers on the other, unreachable side of the partition. Thus, the party must draw out their ranged weapons and unleash ranged spells in order to neutralize the threat. After that, they continue their pursuit of the goblins only to be ambushed by a dozen orcs and ogres that flank from the north and pin them down at the dead end in the south. This is good combat encounter design.
 |
| Third Level: West (cf. IWD2 version) |
The ambushers include two ogres, two shaman and many orcs headed up by their chieftain. Note the snipers and the area-division.

Bleeding, butthurt and mumbling something about "undead goblins", the party head back down to the second level and prepare to take the central staircase back up to this third one.
And here we are on the third level but this time in its south.
 |
| Third Level: East (cf. IWD2 version) |
This side of the third is teeming with skeletal and spectral undead in the form of shattered souls and armor and bladed skeletons. The above-annotated ambush trigger spawns one of three burning skeletons in the Hand; nasty, because they unleash fireball immediately. There is also one serrated skeleton that drops random loot upon being destroyed. On top of their general immunities and resistances as a result of being skeletal undead, these boneguards also sport immunity to +1 weapons along with missile damage immunity. Image: Serrated Skeleton.
Stairs lead up to the fourth level but first we take the mechanical lift that descends to a previously inaccessible portion of the second.
 |
| Second Level: East (cf. IWD2 version) |
There is not much to do on this side of the second level other than battle more undead and find random loot. Note the amount of undead lurking here, though.

Having vanquished them we take the central stairs down once more to arrive on the eastern side of the first level, previously inaccessible.
Severed Hand Machine Parts Location: Piece of Broken Machinery
The Piece of Broken Machinery is found in the northeastern corner of the eastern chamber on the first level of the Severed Hand.
 |
| First Level: East (cf. IWD2 version) |
As we find out when we finally catch up with Gelarith in Part IX, this is one of four plot-critical items that we need to find so that he can repair his Astrolabe and awaken Larrel so that he can scry with the Heartstone. The other Pieces of Broken Machinery are found in Solonor, Corellon and Shevarash subtowers, which is covered in Part IX.

Below: Skeletons and souls headed up by a severed soul that inflicts vampiric touch and drops random loot.

With the first piece of the puzzle in hand, we backtrack to the third level and this time go upstairs to arrive on the fourth and highest level of the main tower wherefrom the Hand branches into its four remaining finger-towers:

(cf. IWD2 version.)
There are many elven spirits getting about on the fourth level. They are non-hostile and most of them are just going about their business eating, drinking and merry-making - as if nothing is wrong. But something is wrong: they're all dead. And they need to be put to rest. A few named spirits can be spoken to and a couple of those are aware of their undead status.
Telanis Songbender
First up, we have the Bard, Telanis Songbender. We learn from him that some kind of magical spell - cast by Larrel - inadvertently slew the elves, not just the orc-horde. Later, we learn from Denaini that the spell was a mythal. Image: Telanis Songbender dialogue.
The songs actually do not reveal very much. There is barely any lore in them, they are not particularly well-written, and so I won't go to the trouble of quoting them. Basically, Larrel was a hero, the greatest of elven wizards, who founded the Hand as a home for the elves after he got tired of kicking ass everywhere. In regard to the dwarves, it is about how the elves felt betrayed by the dwarves when the dwarves apparently sold weapons to orc-kind. We learn a lot more about this later.
Tel'Quessir Bladesinger, Lethias
Next up, the spirit of the Tel'Quessir Bladesinger, Lethias, is far more interesting. Having told us of Larrel's probable whereabouts (the Labelas tower), Lethias goes on to tell us a tale about his great sacrifice as part of the destruction of Sehanine tower. Image: Lethias Bladesinger dialogue.
Lehland, on the other hand, speaks as if the tower never fell to the dark horde of the North (200 lingering ghosts of which we slew en route to this level being part of that force):

He is like directory assistance:
Then, Corellon...
... Shevarash... (incorrect spelling by Black Isle)
... Sehanine...
... Labelas...
... and Solonor:
Acid Arrows
A mechanical lore-dump, but informative. Lehland is also a merchant. Most notably, x80 Acid Arrows are up for grabs (+2d6 acid damage).
These are the best general purpose arrows in BG and IWD. There are not as many in IWD as in BG, and so they should be snapped up now.
Which brings us to itemization. Check out the arcane spell scrolls we netted: Emotion: Hopelessness, Emotion: Courage, Emotion: Hope, Animate Dead and Cone of Cold.
Emotion Spells
While all of those spells are useful, Emotion: Courage and Emotion: Hope take the cake. Why? Because taken together they bestow THAC0 +3, damage +5, +2 saves and +5 HPs for five delicious turns; that is, 50 rounds or 5 mins of game-time. Not bad. The Emotion line in general is good, actually.
| Emotion: Courage, Hope, Fear & Hopelessness |
Righteous Wrath of the Faithful
Also not bad is that clerical Bless, Chant, Prayer, Recitation and Righteous Wrath of the Faithful stack as well for THAC0 +7, damage +4, saves +6, ApR +1 and +1-8 HPs but only for 1 round per level of the caster for a max of 13 rounds. Of course, we haven't broken into RWotF yet, and these are not even items, but I just thought I'd mention it because buffing is important in IWD.
Note that RWotF stacks with itself, but we only get two castings at max level, so it's not a big deal.
As for arms & armor, it is possible we netted some good stuff from the random pools of the serrated skeleton and severed soul. Their drops are themed in that the boneguard drops bone-related items and the shadow drops shadow-related ones. Take for example:
... the Serrated Bone Blade (THAC0 +3, 20% on-hit 1d10 cold)...
... Shadowed Robe (AC 4, +15% MR)...
Damage Resistance
... and the Bone Marrow Belt (+50% slashing resistance, -15% crushing resistance, AC +1, -2 Cha):
Damage resistance sources stack. For example:
Bone Marrow Belt (+50) + Studded Leather of Resistance +3 (+15) + Long Sword of Action +4 (+15) + Great Shield +3 (+15) + Clasp of Bron's Cloak (+5) = 100% slashing resistance.
Notably, because 100% resistance constitutes an immunity, the strikes upon us do not even land so there is no sprite animation delay. It's just like when we try to hit an NPC flagged as immortal. At this point in the campaign it is only possible to sport 70%. And that would require getting lucky on two random drops. Thus, it is unlikely.
Other good items include the Great Shield +3 (AC +4, +15% slashing, crushing and piercing resistance, THAC0 -2) and the Two-Handed Sword +2: Hammering (20% on-hit Stun). Again, both are randomly itemized.
***
So there we have it. The main tower in a nutshell. Excellent area design, great artwork, good atmosphere, inventive combat encounter design and interesting itemization. No quest experience at all, though. That's coming up.
In the next post the party catches up with Larrel and explores the four remaining subtowers of the Hand in search of three more missing parts to his Astrolabe.
- Experience points: 197,600 kXP + 0 qXP = 197,600 total XP (903,845)
- Killcount: 205 (1030)
v1.06 notes:
• "Sheverash" should be "Shevarash". See: TSR's Demihumans & Deities for proof.
• Lethias may be force-attacked and damaged but he cannot be vanquished. Lethias sports ApR 4 and AC -4.
• Bone Kris of Black Ichor does not inflict poison damage.
• Description for Serrated Blade: "player" should be "victim".
Welcome to Part IX of my Icewind Dale walkthrough; this part covering the subtowers of the Severed Hand, and Larrel.
Severed Hand Subtowers
Having thoroughly explored the main tower or palm of the Hand, we must now explore its four extant subtowers or fingers.
|
| (cf. IWD2 version) |
This can be done in any order; thus, exploration is non-linear as per levels 1-4 of the palm.
While not the most efficient mode of progression through the tower, finding Larrel is certainly the most logical and pressing. At this point in the proceedings we don't know anything about the piece of broken machinery. And, above all, we need Larrel to scry with the Heartstone.
 |
| Labelas first level, torn asunder (cf. IWD2 version). |
Lethias mentioned that Larrel dwells in the Labelas tower. But there is a problem: ascension through that tower has been made impossible by Larrel's willful destruction of its first level. Now, all that remains are huge chunks of rubble suspended in mid-air. A short cutscene showing his Sending makes it clear that Larrel destroyed the level in order to prevent the horde's assault on the subtower as he prepared to cast the mythal.
Sheverash Tower

This tower is named after the demipower of Arborea and Limbo, Shevarash the Black Archer (cf. Lehland). It consists of four combat zones the third of which grants access to a bridge leading to the second level of Labelas tower.


Kaylessa
Warming herself by flickering flames on the first level is the non-hostile spirit of the elven warrior and weapon master, Kaylessa.

We inquire into Larrel's whereabouts, learn of his Astrolabe, and find out that Kaylessa has one of the machine's missing parts in her possession. Image: Kaylessa dialogue.
But she won't give it to us until we have granted her warriors eternal rest.

Thus, it is a matter of storming the second and third levels of Shevarash tower in order to vanquish 25 shadowed elven forces of swordsman and archer kind. This is pretty straightforward though barricades and tanks are employed to make it more difficult to get at the crack-shot snipers.

Having granted her warriors eternal rest we return to Kaylessa for 52,500 XP. She requests one final thing of us...
... and we oblige. We now have a second piece of broken machinery in our possession.
Labelas Tower

As mentioned before, there is an exit on the third level which grants us access to a bridge leading to the second level of Labelas tower. In attempting to cross we are assailed by shadowed swordsmen and archers along with one cleric and one web-casting wizard.

Housing living quarters, library and astrolabe, this tower is named after the intermediate power of Arborea, Labelas Enoreth (cf. Lehland). It's cool how we can catch a glimpse of the destroyed first level from a hole in the floor on the second.


The living quarters of the second level are guarded by three wizards, one cleric and two swordsmen. This combat encounter can be brutal especially for those who failed to scout the place out beforehand. The enemy spellcasters are "suicidal" in that they drop immobilization and direct damage AoEs on themselves such as Web, Stinking Cloud and Ice Storm.
Diary of Evayne
The diary of Larrel's daughter, Evayne, is found in her bedroom along with a random item and arcane scrolls Greater Malison and Improved Invisibility. Image: Diary of Evayne.
A library is located on the third level the caretaker for which, Custhantos, is oblivious to being dead. Much research on elven lore can be conducted through the many tomes on offer. These are added to our inventory as items and may be perused at leisure. Image: Custhantos on Elven Lore.
Of particular note is the book on Mythal Theory.

This can be delivered to Orrick who requested it when we first met him.

The reward is 24,000 XP and one of these items. Nice. Mithran's Cloak is clearly the most useful of that pool.
However, it's about one dozen area transitions from here to Orrick so it's better to wait until Larrel can teleport us out of the Hand.
According to Custhantos, Maiden Ilmadia - who it turns out is one of Brother Poquelin's lieutenants - came to the Hand and took two of the tomes: Ecology of the Unicorn and Elameth's Compendium. He notes that she was loud and rude and did not bear the emblem of the Hand. We won't come across the elven maiden or find out why she wanted those books until we reach Lower Dorn's Deep in Part XII.
Larrel: Astrolabe
We now finally catch up with Larrel in his Astrolabe. As his Sending has suggested to us twice already, Larrel is addled in the head. He doesn't even acknowledge our presence. However, he does hint at what needs to be done:

Translation: "Grant the spirits of the elves eternal rest (and in so doing find the missing parts to the Astrolabe, that it may be repaired). Then, I will awaken and talk to you."
Gelarith
Flanking Larrel is the spirit of the engineer who designed and built the Astrolabe, Gelarith. This grump makes it clear that more parts need to be found. Image: Gelarith dialogue.
So now it's time to pull our finger out and acquire the other two parts. Where are they, though? Well, they must be in the two other subtowers: Solonor and Corellon.
Solonor Tower

This tower is named after the intermediate power of Arborea, Solonor Thelandira (cf. Lehland).


Denaini
Standing in the cold windy shrine of the first level is the non-hostile spirit of the elven priestess, Denaini.

Denaini is the most informative of elven spirits. She gives information about the Hand, Larrel and the Mythal. Image: Denaini dialogue.
We won't get better exposition than that until we awaken Larrel (and, by then, we're done with the Hand).
As with Kaylessa, she requests that we grant her underlings eternal rest...

... But she also hints that holy water could be used to purify the shrine-pools.

Thus, it is a matter of storming the second, third and fourth levels of Solonor in order to vanquish 30 or so elven clergy spirits consisting of acolytes, clerics and one tougher priest.

The undead clergy can be troublesome due to their repertoire of buffs, debuffs and immobilizers such as Strength of One, Recitation, Entangle, Silence, Miscast Magic, Mental Domination and Cloak of Fear. The pulpits and pews (highlighted in the above and below screencaps) serve as physical barriers to mobbing the clerics. There are also two instances of clerics spawning on the perimeter as a result of invisible proximity triggers. These I have annotated as "surprise spawns."

Along with a random pool that potentially yields a sexy set of elven chainmail, a cylindrical piece of broken machinery is found in a chest on the priest's pulpit of the third level. In the priest's quarters on the fourth and highest level, holy water is found.
The reward from Denaini for delivering the holy water and vanquishing the undead clergy is 52,500 and 24,000 XP respectively. The material rewards are static and not notable in comparison to what we already have.
Ok, moving on to the final tower:
Corellon Tower

This tower is named after the intermediate power of Arborea, Corellon Larethian (cf. Lehland).


Unlike Shevarash and Solinor, there is no dialogue to kick us off in Corellon. We must simply fight through 30-odd shadowed forces of wizard, cleric, swordsmen and archer kind headed up by several tougher officers. The first and second levels have invisible triggers on the floor which, when crossed, spawn flankers and aggro on both sides. These battles are pretty easy, however.
Valestis
Standing forlornly in the arboretum of the fourth and highest level of Corellon is Valestis.

Valestis tells us some history and offers a quest similar to Denaini. Image: Valestis dialogue.
Restoring the Arboretum
The items needed for restoration of the arboretum include seeds, a cage of exotic birds, a cage of squirrels and a barrel of pure water. These items do not exist in the Hand: perhaps ironically, they are found in the subterranean Upper & Lower Dorn's Deep --

-- Which we are going to be en route to now because we have the four missing parts. We now return to the Astrolabe in Labelas for one of the best chapter transitions in cRPG history...
Larrel IWD

Larrel Dialogue
Now the Astrolabe is functioning and so are Larrel's mental faculties.
At our request, the polite and clear-voiced Baelnorn Archmage tells us of the time of Prosperity...
... and of the time of Darkness.
This is really good stuff. The character of Larrel is well-written.
In regard to the Betrayal, cf. Evayne's Journal and Norlinor (Chapter Four). We won't learn who was responsible for arming the dark-horde orcs until we reach Lower Dorn's Deep in Chapter Six (cf. Nym).
The Heartstone Gem is now handed to Larrel...
... and awesome narration by David Ogden Stiers - the best ever - ensues:
Larrel: Scrying of the Heartstone
Freed from the shackles of his tormented mind, the cursed elven lord was at last able to assist the heroes in their quest. Handing over the Heartstone Gem, the party stood back and watched Larrel begin his divination.

With the artifact raised before him, clutched tightly in his skeletal hands, the undead sorcerer peered intently into the gem as he whispered a series of strange chants and incantations.

A spark of light briefly flashed within the gem as if a ray of sunlight had caught upon its surface - and suddenly, reflected in the mirrored facets of the stone, there appeared an image of a statue. The statue was clearly a monument of sorts, depicting an elf and a dwarf, sitting side by side on a dual-throne.


Thus, the evil plaguing Kuldahar has its source in Dorn's Deep. Finally! We slew 1000 monsters in no fewer than 30 dungeons in order to get this information.
At this point we can hand over Evayne's diary to her father, Larrel. Image: Larrel receives Evayne's Diary.
However, inquiring into her fate only brings him pain. We will need to show Larrel her journal, which we won't find until we reach the Hall of Heroes in Upper Dorn's Deep. Perhaps then, Labelas will allow him to leave this world for Arvandor...
And this concludes the wonderful Severed Hand portion of the campaign. And, what may be surprising, is that the campaign actually manages to get better than this (though the character of Larrel may highlight the best of IWD's writing).
Larrel can now teleport us to Kuldahar or directly to Upper Dorn's Deep. Recommended progression is:
- Travel to UDD first in order to trigger Chapter Four
- Immediately return to Kuldahar to purchase Orrick's updated vendor inventory
- Return to UDD
Experience points: 148,550 kXP + 271,000 qXP = 419,550 total XP (1,323,395)
Killcount: 112 (1140)
The following arcane spell scrolls were found in the subtowers of the Hand: Beltyn's Burning Blood, Greater Malison, Improved Invisibility, Protection from Normal Missiles, Remove Curse, Minor Globe of Invulnerability, Cloudkill, Otiluke's Resilient Sphere, Stoneskin and a second instance of Icelance.
Of those, Improved Invisibility is most useful in that it effectively grants us -4 AC along with a four-point bonus to saves. Stoneskin is most useful to arcane spellcasters in that it basically makes us immune to raw damage for 1-4 attacks + 1 attack per two levels of the caster. It does not protect us from on-hit elemental or on-hit magical effects. Mirror Image protects against the former but not the latter.
Otiluke's Resilient Sphere is a cheesy spell in most D&D-based games in that it makes the recipient completely impervious to damage. The downside of the recipient being unable to move is barely an issue when one considers the tanking power afoot coupled with extra-dumb AI. I never use this spell.
Lastly, MGoI is underrated. Immunity to spell circles 1-3 is no joke.
In regard to items in general there is not much to write home about. Not compared to what we already have, anyway. Though Elven Chainmail of the Hand +3 is nice for its decent AC and facilitation of arcane spellcasting. Kaylessa's random drops are mostly nice, too. She also potentially drops elven chain but hers grants Dex +1 in addition. Her bow is solid (Dex +1, THAC0 +3, dmg +3), her ring is useless and her gloves are the pick of the pool (Dex +1, AC +1).

She also statically drops the Boots of Speed: one of the most coveted items on the Infinity Engine.
The party is currently 8th level. Breakdown of current AC sources for supertanker:
- Base AC: 10 (AC 10)
- 18 Dex: +4 (AC 6)
- Plate Mail: +8 (AC -1)
- Red Knight's Shield: +4 (AC -5)
- Helm of the Trusted Defender: +3 (AC -8)
- Mithran's Cloak: +3 (AC -11)
- Black Wolf Talisman: +1 (AC -12)
- Girdle of Beatification: +1 (AC -13)
- Kaylessa's Gloves: +1 (AC -14)
- Battleaxe +2: Defender: +2 (AC -16) (AC -19 vs. slashing)
- Prayer + Recitation: +3 (AC -19)
- Defensive Harmony: +4 (AC -23)
- Improved Invisbility: +4 (AC -27)
cf. pre-Hand AC.
Of course, once we reach supertanker AC it is possible to sub out a few items in order to make the combat unit slightly more efficient in offense or more resistant to the elements (and still maintain crit hit-only defense). It is also more sensible to share the AC around a bit. Well, if we have a few physical-based damage dealers in the party, that is. No point leaving our other two guys at AC -3 when we can get them both to -7 and still have our supertanker embarrassing enemy THAC0.
Welcome to Part X of my Icewind Dale walkthrough; this part covering the Upper Dorn's Deep cRPG dungeon.
Upper Dorn's Deep IWD

As with the Severed Hand of the elves, the dwarven citadels of Upper and Lower Dorn's Deep fell to the dark horde of the North hundreds of years ago. However, Upper Dorn's also suffered from a lich taking up residence, and this lich represents the main barrier to progression in Upper Dorn's.
Upper Dorn's Deep Location
Taking in three entire chapters, Dorn's Deep constitutes the meat and potatoes of the Icewind Dale campaign. Our adventuring experience has broadened considerably since our arrival in Kuldahar, and, while our travels have already spanned the length and breadth of the Spine of the World, we have not yet delved its depths. Thus, the time has come to delve Dorn's Deep all the way down to Durdel Anatha.

Neo Orogs
The snowy approach to Upper Dorn's is guarded by packs of neo orog avengers. Hidden among the stone-wall nooks, they come out in force upon catching sight of us. Neo orogs come in four kinds: avenger, marauder, general and Chieftain (Krilag). Orogs in general are basically orcs but perhaps with ogre blood in them. We learn soon that these orogs were created by the Red Wizard of Thay, Saablic Tan. Image: Neo Orog Avengers.
So much for the avengers. They avenged nothing.
Cave Complex: Upper Dorn's Deep
We take the entrance into the upper reaches of the Deep:

Elf- & Dwarf-lord seated upon a Dual-throne
The focal point of this complex, as divined by the Heartstone Gem and as recognized by Larrel, is a monument depicting an elf- and dwarf-lord seated upon a dual-throne.
There is some pretty detailed area design in this subterranean complex, complete with height-mapping, pockets of pitch-black darkness and luminous mushroom colonies. It's impressive:

Myconids
While orcs, orogs and hard-hitting ettins are lurking in the caves, the most troublesome battles are against the blue myconids getting around the greater cavern. One score in number, these Fungus Men spray spores that inflict confusion, panic, stun or berserk upon a failed save vs. Death or failed MR check. Image: Myconids.
Under such annoying affects combat units either run around like idiots, stand there doing nothing with no AC to speak of, get themselves killed or - worst of all - turn on the party. Imagine that AC -16/ApR 4 tank of ours suddenly switching sides to wave their weapon at us? Hate.
Free Action and mindshield status wards off such effects though Clerics - assuming we have one - may not yet have broken into the fifth circle for Chaotic Commands (which opens at ninth level or 225,000 XP). However, quaffing Potions of Clarity serve the same purpose and Dispel Magic also brings affected combat units back on-side, but prevention is the best cure.
There are six orogs in the orog cave, six orc elites in the orc one and four ettins in the ettin one. "Wait, orcs? They only yield 35 XP each! That is pathetic for 9th level!" Yes, it is. But then, putting a few mooks into the middle of a campaign allows the player to gauge their power progression. An enemy we formerly needed to take seriously [recap pic] now invokes laughter on-sight. Plus, it's realistic to have mooks getting about. And besides, this is balanced against the ten ettins yielding 3,000 XP each.

Razorvine Extract Location
The skeleton of Bandoth's assistant is found in the ettin cave. It is holding a container of razorvine extract.

Bandoth: Dwarven Watchtower
Who is Bandoth? A mage of no small standing, Bandoth has set up shop in the dwarven Watchtower that overlooks the entire cavern.
 |
| Look at that artwork! |
Heat emanates from the outpost due to the furnace that is ablaze inside. It seems Bandoth likes to keep warm in the Frozen North. Don't blame him. Bandoth is a solitary researcher much like Orrick. However, he is evidently much more adventurous than the grey mage of Kuldahar.

We can inquire into the whereabouts of Larrel's missing daughter, Evayne...
... ask him about Dorn's Deep in general...

... ask him about what's below the Dwarven Compound...
... and even find out how to get there after giving him the razorvine extract (42,000 XP).
Bandoth is also an arcane vendor. On offer are Summon Shadow, Feeblemind and Conjure Earth, Fire and Water Elemental. The elemental summons are particularly powerful due to their immunities and general tanking power. Hasted, they are dervishes of destruction. As a test, we summon a few forth and order them to rip Bandoth a new asshole. And a new asshole he was ripped. Image: Bandoth bites the dust.
So that's that, then! Having cleared the cave complex of its 50-strong aggro, helped out an adventurous mage and stocked up on some useful arcane spell scrolls, the party now crosses a bridge over a chasm and enters the Dwarven Compound in the southeast. We shudder to think what awaits us within.
Dwarven Compound Upper Dorn's Deep
This is one of my fave areas; mainly, because I like its initial ambush, the drow encounters, and the deadly circle of runes puzzle.
Dwarven Compound Map

Under the effect of invisibility we scout out ahead to see what we're up against. It seems to be some sort of welcoming committee...

... but it's actually an ambush consisting of orc elite archers, neo orog marauders and drow spellswords headed up by Mirror-Imaged drow sorcerers that Haste their minions and cast maximum Magic Missile not once, twice or three times but four times each. Of course, that MM spam assumes we are tactically inept and get pinned down on the bridge. But still, it's potentially very nasty. In addition, we are flanked by phase spiders.
Another thing to watch out for is our blood-thirsty party members chasing morale-failed orcs into adjacent rooms populated by packs of neo orog marauders headed up by generals of which there are five. This can result in us getting in over our head.
Drow Spellswords, Sorcerers & Vanguards
Deeper into the compound still, more drow spellswords, sorcerers and crossbow-wielding vanguards await our approach.
The vanguards are particularly nasty in that their bolts inflict stackable 14 poison damage per round on a failed save vs. Death. If no antidote is quaffed then that poison will eat through even the deepest hitpoint pool in short order. And yes, these drow sport 66-68% MR as per Realmslore (50% base + 2% per level). We find out later that Malavon is responsible for sending the drow forces to Upper Dorn's.
All in all, we face off against 70 enemies in this one middle-sized dungeon alone.
Mithral Field Plate Armor Location
See that pic on the right with the drow standing in front of a great furnace? Behind the sorcerer there is an easy-to-miss axe on the floor which is actually a pile of loot that yields Mithral Field Plate Armor +2 - the best armor in Icewind Dale. By virtue of having great AC, being itemized twice in the campaign, and being erroneously flagged as non-magical, I have ranked this armor fifth all-time on the Infinity Engine.

Saablic Tan: Red Wizard of Thay
The exit to the north leads to a very dark natural cave in the upper reaches of the Deep. It is infested with orogs and ettins.

Herein we encounter Saablic Tan, a Red Wizard of Thay specializing in the transmutation school. The wretched Saablic has been turned into a loathsome Umber Hulk by the drow sorcerer, Malavon. It is ironic that Saablic is threatened by his own creations in this very dungeon.

Krilag Badge Location
In short, Saablic wants us to dispose of neo orog chieftain, Krilag, who is guarding these upper reaches. This is easy-peasy because Krilag is just a brute.

The reward? 56,000 XP. Saablic takes his leave only to eventually be slain by the IWD2 heroes.
We also get 36,000 XP for retrieving Krilag's badge. Now, we won't know it yet but the "the six" referred to by Saablic are actually the six lieutenants of Brother Poquelin. Each of them carry a badge, a black steel plate, engraved with a sigil reflective of the carrier - and these badges are plot-critical in that they are keys that grant us access to Brother Poquelin himself.
The note to Krilag from Poquelin suggests the importance of the badges and also hints at who we should hunt down next. However, the badges may be acquired in any order. Even Krilag's badge can be acquired last (which would be after we have conquered Chapter Six & Dorn's Deep).
The reward? 56,000 XP. Saablic takes his leave only to eventually be slain by the IWD2 heroes.
We also get 36,000 XP for retrieving Krilag's badge. Now, we won't know it yet but the "the six" referred to by Saablic are actually the six lieutenants of Brother Poquelin. Each of them carry a badge, a black steel plate, engraved with a sigil reflective of the carrier - and these badges are plot-critical in that they are keys that grant us access to Brother Poquelin himself.
| Badge of Krilag (open palm with levitating sphere), of Joril (double-bladed axe), of Marketh (miner's pick), of Ilmadia (unicorn head), of Malavon (unsleeping eye) and of Perdiem (dove) |
The note to Krilag from Poquelin suggests the importance of the badges and also hints at who we should hunt down next. However, the badges may be acquired in any order. Even Krilag's badge can be acquired last (which would be after we have conquered Chapter Six & Dorn's Deep).
Lastly, the corpse of Kalabac is found in the southwest. Kalabec's journal mentions a secret door and a puzzle that grants access beneath the Dwarven Compound. Thus, we return to the Compound and make our way to the meeting hall.
Circle of Runes Puzzle Upper Dorn's Deep
Inscribed on a round table in three concentric circles are three dwarven symbols or runes. We need to take note of the symbols in each of the circles and then make our way into the adjacent puzzle room wherein we need to physically stand on three pressure plates related to the symbols in the order in which they appear in the concentric circles on the table (from outer to inner).
The order of the symbols is: Hammer & Anvil, Crossed Axes and Interlocking Rings. Stepping on an incorrect pressure plate results in non-trivial electrical damage; in fact, it's lethal. Once the pressure plates are set in place there will come a sound from the compound indicating the need to pull the handle on the statue in the round-table room. Once this is done there will come a sound from the puzzle room indicating that a retractable staircase has appeared there (56,000 XP).
There is naught to do at the bottom of the staircase but admire the artist's depiction of the gearworks that power it -- Image: The Great Gearworks -- and avoid the fireball trap that slew Dver, who left a note behind. Image: Dver's note.
Temple of Moradin Upper Dorn's Deep
We now enter the Temple of Moradin; its focal point a monument representing dwarven mastery of metallurgy. Image: Temple of Moradin.
Norlinor
The temple is dead-cold and its forge lifeless at present. We find out what's going on from the only sentient dwarven spirit in Dorn's, Norlinor.

That is the problem in a nutshell: there is a lich down here that must be dealt with. However, Norlinor has tales to tell:
Terikan Lich
Terikan lurks in the Tiers of the Dead and his phylactery is located in the Hall of Heroes. These are two separate areas. What we need to do is loot the key from the sarcophagus in the Tiers, enter the Hall, find the phylactery in one of the tombs and take the phylactery into Jamoth's tomb in order to utterly vanquish the lich (52,500 XP). However, this is made more difficult by the undead hordes and Terikan himself, who, providing his phylactery is intact, is immortal, hot on our heels, and mad as hell.
Tiers of the Dead Map
 |
| Tiers of the Dead |
Upon entry to the Tiers undead swarm immediately (30 enemy units). However, they are actually a step down from the Severed Hand in power [recap pic]. Indeed, relative to our level, some of the undead encounters in the Vale were tougher than this [recap pic]. We should really be going up against mid-tier undead at this point. Though I guess Black Isle thought that Terikan is tough enough to beat down as is, and also respawns indefinitely, so players may be overwhelmed. All in all, though, I think this lich encounter could have benefited from coming later in the campaign. This would have involved a higher level Terikan sporting a spellcasting repertoire more befitting of a lich.

So, of what does Terikan's repertoire consist? Well, he casts a souped-up version of Animate Dead to bring forth wights, ghasts and armored skeletons (3-6 per casting). Then, he follows up with Globe of Invulernability, Horror and Fireball. He is capable of casting Animate Dead without limit, is proactive in resummoning, but he can only call forth a maximum of six at any given time.
Terikan's Phylactery
Also in the Hall, the flamestrike-casting greater mummy can cause heartache for the party as well.

The cool thing about this area-spanning encounter is that it attempts to represent a genuine lich encounter as per Realmslore. Once the phylactery is taken into Jamoth's Tomb the lich is utterly vanquished. Otherwise, it is immortal. Full stop.
Let's quote the AD&D 2nd Edition Monstrous Manual:
In all cases, a lich will protect itself from annihilation with the creation of a phylactery in which it stores its life force ... In order to ensure the final destruction of a lich, its body must be wholly annihilated and its phylactery must be sought out and destroyed ...
There are no if, buts or maybes there. While Terikan lacks spellcasting as an 18th level caster along with a fear aura and on-hit paralysis, Black Isle got the main thing right. Besides, a reason is given in Terikan's journal as to why he lacks power (highlighted in the link).
Whereas no reason is given by BioWare as to why their liches lack phylacteries in Shadows of Amn and Throne of Bhaal. Which is basically what defines a lich encounter and makes it unique. We just have to assume that they were lazy or uninformed in this regard.
Anyway, having vanquished Terikan, granted peace to the dead dwarves and got the forge flowing with molten metal, we can return to Norlinor for 84,000 XP.

Note the visual change to the area (cf. earlier). The artist has recolorized the backdrop and added an animation to represent the flowing metal. Nice.

The key to the Wyrm's Tooth glacier is found in the forge's receptacle.
Evayne's journal can be delivered to Larrel at any time after reaching the glacier [pic]. The reward is 56,000 XP.
- Experience points: 190,381 kXP + 329,500 qXP = 519,881 total XP (1,843,276)
- Killcount: 100 (1240)
The randomly itemized Bastard Sword +2: Conflagration is interesting with its on-hit 10% chance of Fireball. Coupled with 10 ApR that would be pretty devastating, right? However, it doesn't work like the Club of Detonation +5 in BG2. Instead, when the fireball triggers the combat unit stops attacking in order to literally cast the spell. There is no other weapon on the Infinity Engine that does this except for IWD's own Demon's Breath warhammer (20% chance). While nowhere near as useful as instant on-hit fireball, it's still pretty powerful. Of course, the wielder and any party members within the vicinity would want to have fire resistance...
As for arcane spell scroll itemization, I already covered the summon elemental spells. The other spells found were Feeblemind, Monster Summoning III, Antimagic Shell, Chaos and Domination.
Feeblemind is powerful. It fully immobilizes the enemy and reduces its Intelligence score to 3. Not that you need the latter when you have the former. Assuming no Dispel Magic the effects are permanent, too: a party member inflicted by Feeblemind remains a gibbering idiot even after resting.
Antimagic Shell - our first 6th circle spell - grants us immunity to magic but we can't cast magic while under its protection. This is a cheesy spell but there are not many rival mages in IWD to cheese.
Chaos is an upgraded Confusion in that it disallows saves for mooks and demands a save vs. Spell at -4 on anything else not immune to its effects. Strong divide & conquer spell.
Domination is like Charm Person except it lasts for 12 hours instead of just 2 turns. Thus, we can rest for 8 hours and our dominated minion remains under our control.
Monster Summoning III... what would we rather summon: squishy lizard men, spiders, beetles and neo orogs or tanky earth, fire and water elementals of the same circle? Useless spell.
Summon Shadow calls forth up to six shadows that look like severed souls (three per casting). The shadows inflict on-hit disease but it is HP-draining, not Strength-draining. Cool! Summon six, haste them and then go for Strength drain kills! No. the Strength draining stops at a score of 1. Thus, pretty useless.
Welcome to Part XI of my Icewind Dale walkthrough; this part covering the Wyrm's Tooth Glacier.
Wyrm's Tooth Glacier

Wyrm's Tooth Glacier Location
The world map shows Wyrm's Tooth Glacier situated between Upper & Lower Dorn's Deep.

Badge of Krilag (open palm with levitating sphere), of Joril (double-bladed axe), of Marketh (miner's pick), of Ilmadia (unicorn head), of Malavon (unsleeping eye) and of Perdiem (dove):


Marketh is one of Brother Poquelin's six lieutenants. No matter how we reply, Kerish is convinced that we have been sent by "the master" (Poquelin) to check up on him.
We can ask about who Kerish answers to and from that learn of Joril's betrayal of his father, Kreg. This allows us to trick Joril later.

(cf. Note to Kerish from Joril.)

He tells us how the slaves revolted, who led the revolt, and how the slaves may be freed. Image: Gareth dialogue.
In short, we need to acquire a key from Kerish. Also, a woman named Vera led the revolt. Gareth thinks she is dead but she is actually alive and well, hiding out in the museum above.


(60,000 XP.)
... or betray her to the guard.

After speaking to Vera (assuming we didn't dob her in), it is best to tell Gareth that she's alive:

(60,000 XP.)
Then, we can get the key from Kerish...

(60,000 XP.)
... and deliver it to Gareth. The slaves then run out of the basement, into the adjacent temple, and then up the stairs to the unguarded approach, to their freedom.

(60,000 XP.)
We can then return to Vera and tell her the slaves are free:

(80,000 XP.)
Finally, to conclude proceedings in the museum, we wipe out Kerish and the 50-strong frost salamander force:

Note that Kerish can drop the Potion of Life Transference (USPOT4B: permanent Str +1, Con -1).
On the other hand, if we betrayed Vera to the guard we instead return to Kerish to tell him she's dead:

(60,000 XP.)
He then requests we bring the slaves back to the museum or slay them...

... but the slaves would rather die than become slaves again:

Thus, we slay the slaves in order to resolve the quest in an evil manner:

(60,000 XP.)


It is best to speak to Joril with a Paladin because they have solid Charisma scores and there is a Paladin-only dialogue check.


So concludes Chapter Five and Wyrm's Tooth Glacier.
• Scaling to 12-72, Chain Lightning is our electric-based AoE damage spell to match Fireball and Cone of Cold. Strong.
• OFS inflicts 3-6 cold damage per caster level on a single target. Strong, too.
Lastly, we also found a barrel of pure water - one of the items required for the restoration of Valestis' arboretum. The other three items are found in Lower Dorn's.
Party is currently 10th level. No resting to provoke respawns (farming XP) has been conducted in this run.

To recap, we are searching for the six badges held by the six lieutenants of Brother Poquelin. We have already acquired the badge of neo orog chieftain, Krilag, so, in this post, we're going to hunt down and slay frost giant, Joril, for the badge he is carrying. Then, we need to push on into Chapter Six and Lower Dorn's Deep in order to locate the four other lieutenants.
At this point in the proceedings the Icewind Dale campaign opens up in respect to non-linear questing and exploration. Unlike Upper Dorn's Deep in which exploration was gated by Terikan Lich, there is no such gated exploration from now on. In fact, immediately upon our arrival to Wyrm's Tooth Glacier, we can advance to Lower Dorn's Deep and Chapter Six by simply taking the southeast transition at the Wyrm's Tooth approach.

Of course, we need to acquire Joril's badge in Wyrm's Tooth at one point or another (and Krilag's in Upper Dorn's if we don't yet have it), but I just want to make it clear that Lower Dorn's Deep - and all it entails - is open to us right now.
A Degree of Non-linearity to Consider
Are there any power-/meta-gaming advantages to prematurely pushing on into Lower Dorn's Deep, though? Depending on party composition and number of party members, conceivably. For example, Mages may like earlier access to new and higher level arcane scrolls (this is potentially very notable) and Paladins may like to acquire Pale Justice earlier in order to extend its wield-time (not so notable, but cool). For whatever reason, pushing on would be a case of duck in, get what we need and duck out: it is not advantageous to attempt a full clear-out of Lower Dorn's before cleaning out Wyrm's Tooth because the latter's questing yields great quest experience point rewards. How much quest experience points are we talking about? In excess of 1.3 million. To put that in perspective, that is twice the amount of quest experience yielded in the first four chapters taken together. Plus, it's dead-easy to get.
***
Museum of Dugmaren Brightmantle Wyrm's Tooth Glacier
Dominating this sprawling glacial zone is an impressive example of dwarven architecture: the Museum of Dugmaren Brightmantle, designed by Alkonos the Visionary.

Broken Bridge Wyrm's Tooth Glacier
The broken bridge over the chasm (annotated above) is the barrier to acquiring Joril's badge. This must be repaired in order to reach the frost giant caves wherein Joril and the frost giants reside. To do that, we need to enter the temple, head to its basement library and request an engineering manual from a guy named Soth. Then, we need to fix the bridge by referring to the manual, raid the frost giant caves, and acquire Joril's badge. That is the minimalist approach to Wyrm's Tooth.
However, there is much more content offered in Wyrm's Tooth so let's break it down from beginning to end, shall we?
First of all, the height-mapped exterior of Wyrm's Tooth is littered with dead bodies of human villagers. We learn later that these were escaped slaves who were slain by the patrolling snow and greater ice trolls. It is best that we lure the snow trolls together, pound them into the snow with our collective ApR, and then finish them off with Fireball. In fact, fire-based spells and on-hit fire works very well against the Wyrm's Tooth mobs: they are cold-based and therefore take +fire dmg. On the flip-side, attempting to inflict cold damage on such mobs is unwise.
 |
| Cf. Dragon's Eye Trolls / BG2 trolls |
There are also yetis and glacial yetis getting about led by a chieftain hanging out on the roof of the museum. As well, a lone ettin guards the temple roof. This is stock-standard stuff and amounts to nothing more than mook-slaying for tenth level adventurers.
Museum of Dugmaren

Frost Salamanders
The interior of the museum is controlled by a force of frost salamanders about 30 in number. These are backed up by no fewer than 16 greater ice trolls and seven winter wolves. The freeze aura sported by frost salamanders is no joke. Anyone in close proximity takes 1-6 cold damage. If mobbed, this becomes non-trivial. However, the entire interior force is initially non-hostile. But still, that freeze aura affects us so we keep our squishies out of the AoE when exploring or engaging in dialogue.

Kerish
Upon entering the museum through its main entrance we are immediately approached by a frost salamander guard who promptly escorts us to his leader, Kerish.

Marketh is one of Brother Poquelin's six lieutenants. No matter how we reply, Kerish is convinced that we have been sent by "the master" (Poquelin) to check up on him.
We can ask about who Kerish answers to and from that learn of Joril's betrayal of his father, Kreg. This allows us to trick Joril later.

(cf. Note to Kerish from Joril.)
We inquire as to why there are so many dead bodies strewn about the place. Image: Kerish dialogue. In short, the slaves revolted and humiliated Kerish. For vindication, he wants the leader dead and the remaining slaves returned to him.
Gareth
Descending to the basement we find one dozen human slaves hiding out; their speaker a slave named Gareth.

He tells us how the slaves revolted, who led the revolt, and how the slaves may be freed. Image: Gareth dialogue.
Vera

Now, just up the hall is a frost salamander guard that is hearing noises from Vera's location. We can protect Vera at this point...

(60,000 XP.)
... or betray her to the guard.

After speaking to Vera (assuming we didn't dob her in), it is best to tell Gareth that she's alive:

(60,000 XP.)
Then, we can get the key from Kerish...

(60,000 XP.)
... and deliver it to Gareth. The slaves then run out of the basement, into the adjacent temple, and then up the stairs to the unguarded approach, to their freedom.

(60,000 XP.)
We can then return to Vera and tell her the slaves are free:

(80,000 XP.)
Finally, to conclude proceedings in the museum, we wipe out Kerish and the 50-strong frost salamander force:


(60,000 XP.)
He then requests we bring the slaves back to the museum or slay them...

... but the slaves would rather die than become slaves again:

Thus, we slay the slaves in order to resolve the quest in an evil manner:

Engineering manual: Soth
We can then wipe out the frost salamander force as per the good option. As can be seen, the good option to the quest yields more quest experience than the evil one. It's also important to get the engineering manual from Soth (a slave) before giving Gareth the escape key or before slaying the slaves. Otherwise, we miss out on a whopping 112,500 XP.

So, just for this segment, assuming we took the good route and milked what was on offer, we slew 87 enemies and yielded a whopping 609,780 XP. But we're only half way through Wyrm's Tooth...
Frost Giant Caves

Having optionally freed the slaves or slain them, we can now fix the bridge using the engineering manual. We simply need to have the manual in our inventory as we attempt to cross the bridge (60,000 XP).
Now, if we thought quest experience was "easy money" in the museum, we've seen nothing yet.
As we can see, this frost giant-controlled dungeon is partitioned into western and eastern portions, the latter of which is accessed by small tunnels in the north and south. Initially, some monsters are hostile and others are made hostile by freeing the slaves that are holed up in the center of the cavern.
Frost Giant Caves Map

The object here is twofold:
1. acquire Joril's Badge and
2. free the slaves
The order matters because freeing the slaves first turns Joril hostile and we therefore miss out on 260,000 quest experience points from his dialogue.
Joril

With a Charisma score equal to or greater than 11, and having spoken to Kerish beforehand about Joril, we may bluff Joril out of his badge:

(80,000 XP.)
Finally, our Paladin demands the release of the slaves:

(80,000 for retrieving the badge + 180,000 for the Paladin check.)
The western portion of the dungeon is then cleared of one dozen frost giants, 15 winter wolves and five white wyrms. This is an epic battle against super-hard-hitting giants sporting a Strength score of 24.
These guys will pummel anything into the ground that doesn't have great AC. Best way to handle them? As per verbeegs: Web!

Frostbite
The speaker for the slaves, Davin, is found imprisoned in the slave pens to the north of Joril's throne. He requests that we slay a white wyrm to which slaves have been sacrificed on a daily basis.

This yields a whopping 420,000 XP from Davin. 420k for slaying a flapping thingamajig. Ok, there are five but technically only Frostbite needs a new asshole ripped. And relatively speaking, it's not even on par with a BG wyvern. It's a mook.
Kontik the Auril Priestess
Then, Davin requests we clear out the smaller, eastern portion of the dungeon. While this only requires that we slay Gorg the frost giant guard and Kontik the Auril Priestess, there are also 15 trolls, several yeti and five black ice knights (backing up Kontik). Nothing liberal castings of Web followed up by Fireball won't make easy, though.
This yields a further 180,000 XP from Davin though the slaves could have made their escape via the tunnels that pass Joril's throne, too. It doesn't matter.
Well, both routes to the exit have been cleared so take your pick, Davin. Scram.
So concludes Chapter Five and Wyrm's Tooth Glacier.
- Experience points: 388,680 kXP + 1,352,500 qXP = 1,741,180 total XP (3,584,456)
- Killcount: 149 (1389)
So, as we can see, Wyrm's Tooth Glacier is very lucrative experience point-wise. It represents nearly 50% of all experience gained up to this point. And triple of what the previous Upper Dorn's Deep yielded which was less than what its subsequent Severed Hand yielded, yet what we did in those chapters was more epic than what we achieved in this doddle. It is unfortunate that our experience gain did not feel proportionate to what we actually achieved; it was way over the top. Take the slaves for example. Freeing three groups of slaves in Dragon's Eye yielded 90,000 XP total, but freeing the two groups here? 740,000 total. Plus, relative to our level, equipment and spells, the freeing of Wyrm's Tooth slaves was much easier than the freeing of Dragon's Eye ones.
It is possible, I guess, that Black Isle threw XP around like confetti in order to facilitate party composition changes through the arbitration menu, since it is conceivable some players may run into difficulty if they lacked party composition balance or gimped one or more of their characters. This would allow them to bring in a first level character at the beginning of Wyrm's Tooth and quickly have them leveled to the point of usefulness. For example, even with a six-person party, it is possible to bring in a first level Fighter at the beginning of Wyrm's Tooth and have them leveled to 9th by the end of it. At any rate, I'll throw that out there.
That said, I've never particularly liked Wyrm's Tooth in general. The almost entirely irrelevant museum segment takes the steam out of things. And I would have much preferred a super-delve from Upper to Lower, with no relief to the world map from an approach. Some aspects of the campaign would need to be redesigned around such a change, though. Also, the dialogue is flat, characterless. Kerish's nervousness is well-written, Joril is passable, but everyone else? Forgettable. And in most cases, PC response options are flat, too. A Paladin finds out that slaves are being fed to white wyrms and he or she replies, "The slaves are to be freed, Joril". What is that? It's flat. Even a generic, "As a Paladin, I will not stand idly by while you sacrifice innocents!" would be better, but a creative writer should be able to much better for a line that precipitates an epic battle with a dozen frost giants.
WTG is also lucrative itemization-wise. Not only did we net a second set of Mithral Field Plate (the best armorset in IWD), but we also netted a Ring of Wizardry for our Mage and a Ring of Holiness for our Cleric, both of which grant bonus spell slots. There is tons of loot found in the frost giant caves but most of it is garbage compared to what we already have; it's mostly just inventory-clog for sell-off.
Chain Lightning, Globe of Invulnerability and Otiluke's Freezing Sphere were also acquired in Joril's domain. These three are of the sixth circle and quite useful though we never gain many 6th circle spell slots under an XP cap which limits Mage advancement to 14th level.
• GoI is a step up from MGoI in that it wards against fourth circle spells in addition to first through third. 4th includes Ice Storm, Confusion, Emotion: Fear and Emotion: Hopelessness. Rock solid.
• Scaling to 12-72, Chain Lightning is our electric-based AoE damage spell to match Fireball and Cone of Cold. Strong.
• OFS inflicts 3-6 cold damage per caster level on a single target. Strong, too.
Lastly, we also found a barrel of pure water - one of the items required for the restoration of Valestis' arboretum. The other three items are found in Lower Dorn's.
Party is currently 10th level. No resting to provoke respawns (farming XP) has been conducted in this run.
Lower Dorn's Deep
Welcome to Part XII of my Icewind Dale walkthrough; this part giving covering Durdel Anatha of the Lower Dorn's Deep cRPG dungeon.


Durdel Anatha
We have finally arrived in the ancient dwarven citadel of Lower Dorn's Deep (LDD); specifically, the vast entry-zone known as Durdel Anatha. Down here, molten metal gurgles in cauldrons, ironworks can be heard off in the distance, and svirfneblin aka deep gnome slaves toil under the gaze of the guards stationed in the watchtower overlooking the entire zone.
This is the hub from which merchants, healing and resting are accessed (deep gnome camp) as well as the main districts of LDD. However, the districts also link to one another independently of the hub. Exploration and questing is almost entirely non-linear. With but one exception (the deep gnome camp), we can go to any of LDD's 16 areas straight out of the blocks. And we can gain access to the deep gnome camp very early providing we untertake a couple of quests for the deep gnomes, first.

Of course, we know the dark-horde orcs overran LDD hundreds of years ago.
Thus, this is no longer the mighty dwarven citadel that existed during the golden age of the time of the cooperation between elves and dwarves. Just as with the Seldarine of the Hand, no living dwarf remains. But the orcs have long since gone, too, and a new force has moved in and taken full control of the conquered citadel. In fact, it is an army amassed by Revered Brother Poquelin (RBP) aka Belhifet. This is the source of all of the problems plaguing Icewind Dale, as scried by Larrel in the Silvanite Heartstone.
Poquelin's Lieutenants
We've already taken out two of Poquelin's lieutenants and acquired their badges (Krilag & Joril). The four remaining lieutenants are holed up in LDD. Each commands an army, each has carved out their own base of operations within LDD, and each is thoroughly evil with the exception of Brother Perdiem (who has been dominated by Poquelin). The length, breadth and depth of LLD must be explored in order to hunt down each of the lieutenants. In addition, fierce battles in lead-up zones usually precede confrontation with them.
The following gives an overview of the lieutenants as understood upon our conquering of LDD. This information has been drawn from previous chapters (letters, dialogues and item descriptions) as well as this one, and distilled.
Just so we know what we're dealing with:
Marketh
 |
| Miner's Pick |
Marketh is usually the first to be confronted in Lower Dorn's Deep. He has taken up residence in Old Dorn's Palace. Taking the role of thief and assassin, he used to be an adventurer himself. But when opportunity knocked he turned on his party and murdered them in order to ally with Poquelin. Now, he is full of himself in that he calls himself "Lord Chamberlain" and calls his slave camp "New Dorn's Deep". Along with Malavon, Marketh enforces and oversees the enslavement of the svirfneblin for Poquelin.
His closest advisor is the halfling thug, Seth, who captured the deep gnome ruby priest, Guello, and enslaved him under Shikata which fire salamander also answers to Marketh. Slaver Marketh is not respected by Ilmadia or her fire giant force; they consider him weak.
Most despicably, Marketh beats his drow concubine, Ginafae (Malavon's sister), hobbled the deep gnome gemcutter, Norl, and cut out the tongue of the gnomish girl, Fengla. Basically, Marketh is a cruel bastard. He doesn't like ethics getting in the way of wealth and power. But when push comes to shove, he is a coward. If not slain, he drops his badge and runs off with his tail between his legs at the first sign of trouble.
Below: Second level of Old Dorn's Palace. Marketh and his enforcer, Seth, dwell here. Many assassins and fighters must be battled en route.

Maiden Ilmadia
 |
| Unicorn Head |
Ilmadia is a fierce elven maiden who rules the Great Forge of LDD and its fire giant force with an iron fist. She was appointed by Poquelin to take over the operation when fire giant King Thargren was slain.
Ilmadia is currently engaged in dismantling the Great Forge in order to repurpose its metal towards the construction of an immense longboat which she intends to have her fire giants row down lava rapids and propel into a cavern wall, spilling lava down into the city of Rilauven and annihilating its drow, who, with the notable exception of Malavon and his faction, refused to ally with Poquelin. Not a bad idea, that.
A traitor to the Tel'Quessir, Ilmadia stole Seldarine artifacts from the Severed Hand and also took two tomes: one on unicorns and the other on artifact enchanting. With knowledge gained from the tomes, access to Saablic Tan's Red Wizard formula, and assistance from Malavon, Ilmadia intends to create black unicorns from native ones lured into capture by virtue of her virginity. Not a bad idea, either. It's probably why Poquelin appointed her as tactician. Unlike Marketh, Ilmadia won't back down. In fact, she draws steel first.
Below: The Great Forge. We must battle through the mines in order to arrive here. Salamanders, elementals and fire giants are the mainstay. Note the epic viking ship.

Malavon Despana
 |
| Unseeing Eye |
Malavon Despana is a drow sorcerer exiled from the subterranean city of Rilauven. He is the creator of the umber hulks and the one who took over from Red Wizard of Thay, Saablic Tan, whom he transformed into an umber hulk and banished to the upper reaches of Dorn's Deep.
Malavon, whose domed lair is located in the Artisan's District, is busily manufacturing vibration-detecting umber hulks in order to hunt down the svirfneblin who resist divination by magical means, and who are hiding in the secret deep gnome encampment beneath Durdel Anatha. Of those captured, he has cut out their eyes and forced them into slavery within his dome. They tend to his mushrooms colonies and myco-hulk pods.
Malavon also constructed iron golems as personal bodyguards, and he is responsible for sending the drow forces to the dwarven compound in Upper Dorn's Deep.
Because she is pro-Rilauven and used to beat him with her snake whip, Malavon abducted his sister, the drow priestess of Lolth, Ginafae, and placed a curse upon her that effectively imprisons her in Marketh's palace. If she attempts to leave, the contingency-curse will remove her innate drow magical resistance and then extinguish her life-force. Malavon also cut out the eyes of Rilauven's drow priestesses but left his sister's eyes intact so that she could "see Marketh leering over her".
As if it isn't clear already, Malavon is a psychotic and also an arcane practitioner of no small standing.
He has developed simulacra and other spells of his own such as Malavon's Rage and Malavon's Corrosive Fog. By a long shot, Malavon is the most formidable of Poquelin's lieutenants. Like Ilmadia, he won't go down without a fight. A two-phase fight.
Below: Malavon's Dome. An army of minotaurs and umber hulks are encountered in the Artisan's District, from which the dome is accessed.

Brother Perdiem
 |
| White Dove |
Brother Perdiem is usually the last to be confronted. By will, the Ilamaterian priest is not a lieutenant of Poquelin. He and his Illefarn congregation were actually infiltrated by Poquelin and then brainwashed by his charismatic sermons after the latter read the former's mind and gained a deep understanding of Ilmater and how to manipulate their tenets.
As a result, the priests abandoned their monastery for Lower Dorn's Deep and left the sick and dying to their fate. Many died along the way, but those of the congregation that survived the arduous journey ended up in the Temple of Berronar Truesilver, where those who resisted Poquelin's golden idol were turned into powerful undead to guard what is now the Fallen Temple, and those who didn't were dominated and enthralled.
Once the undead army has been vanquished and the golden idol shattered, the heroic adventurers (that's us) can save the repentant Perdiem and then discover an invisible barrier blocking access to a stairwell that leads to Ascension Cave and a showdown with Poquelin himself. The invisible barrier is removed by placing each of the badges into their corresponding slots seated at the foot of the spiral stairwell.
Below: The Fallen Temple. One of the largest forces of undead seen on the Infinity Engine must be vanquished in this combat zone.

In addition to the non-linear main quest of acquiring the remaining four badges, LDD offers non-linear subquesting that usually involves exploration of more than one district. Thus, it is likely that players will move between districts several times in order to satisfy subquest parameters. While most of these subquests are simple FedEx, they make sense and are quite flavorsome and rewarding. There are also opportunities to purchase powerful items and even craft an item from the shell of a monster, and subsequently enchant it. The writing also improves in this Chapter: there are some well-written dialogues and quite a few flavorsome or funny responses for us to choose.
The rest of this post is given over to combat encounters of the exterior of Durdel Anatha.
Fire Salamanders
There are only two enemies patrolling the entry-zone: Fire salamanders and tarnished sentries. As with the frost salamanders of Wyrm's Tooth Glacier, the fire variant sports an aura that inflicts non-trivial damage to all those in close proximity. This aura of fire can actually slay the svirfneblin slaves as they wander by. If mobbed, party members lacking FR may also be fried by the stacking auras.
Tarnished Sentries
The tanky tarnished sentry golems can also be problematic in that they sport ApR 4 (from range or in melee), 80% missile resistance and 50% slashing and piercing resistance along with 25% MR. Their fire immunity exceeds that of fire salamanders in that fire damage will actually heal them. So yeah, unless we're going to roll our sleeves up and take them out conventionally, for these mobs we want to break out arcane spells such as Cone of Cold and Otiluke's Freezing Sphere.

Watchtower
The Watchtower to the south is interesting. As mentioned before, it overlooks Durdel Anatha and keeps an eye on the slaves. Presumably, any deep gnome slaves caught trying to escape are shot and killed. There are undetectable and therefore non-disarmable traps surrounding its base. An attempt to mimic the firing of arrows downward from the arrowslits built into its walls, these inflict 3-12 physical damage when crossed. Unfortunately, there are not enough triggers for the damage to be scary. And it really should be round-by-round damage because archers won't stop firing at us just because we're standing still. In fact, they'd pick up the pace on unmoving targets. However, this is a cool concept.
Impregnable by conventional means (thief Open Lock skill), we can cast Knock on the iron gate or acquire the key to the watchtower from a gnomish girl nearby, Fengla. Inside, to no surprise are stationed several archers who immediately fire their composite longbows loaded with Arrows of Piercing. Nasty, in that composite longbows grant THAC0 +1 and dmg +2, and piercing arrows grant THAC0 +4 and dmg +6. Nastier still because the transition requires that our whole party enter. Still, not nasty enough. Not for a tenth level party. Killing the crackshot guards quickly yields 120+ piercing arrows. Once cleared, Fengla - who has had her tongue cut out - enters to shake our hand for freeing her (80,000 XP). We can also freely rest within the Watchtower's loft.

Norl
- Experience points: 125,000 kXP + 80,000 qXP = 205,000 total XP (3,789,456)
- Killcount: 37 (1426)
Welcome to Part XIII of my Icewind Dale walkthrough; this part covering the Deep Gnomes, Old Dorn's Palace cRPG dungeon and Marketh.

Deep Gnomes
The ruby-loving deep gnomes aka svirfneblin are stealthy demihumans of the Underdark. Most notably, deep gnomes aka svirfneblin sport innate non-detection and immunity to illusions along with level-scaling MR and AC bonuses. However, those perks along with their flinging of 1d4 +6 stun darts are not implemented in IWD. Instead, slaves or not, they wield miner's picks.. and fists.
Like the drow, who are their enemies along with kuo-toa and mindflayers, deep gnomes not only have their own religion, language and culture but have also forged great cities such as Blingdenstone, Corundruby and Mycaern culminating in the legendary Vault of the Star Ruby, a Callarduran "city of temples" tunnelled out deep beneath the seabed, whose existence is unknown to surface-dwellers.
The deep gnomes in IWD worship the intermediate power of Bytopia, Callarduran Smoothhands, whose avatar manifests as Earth Elementalist (33) / Illusionist (33) / Fighter (30) / Cleric (23) / Thief (20). In fact, a temple dedicated to the Deep Brother exists in their secret camp but their ruby priest, Guello, has been captured and enslaved. It is possible to find and rescue Guello before entering the camp, but the reward cannot be collected until two other quests, offered by Tarnelm in the oubliette, have been satisfied.
The Infinity Engine's portayal of deep gnomes seems inaccurate to me: they are actually supposed to be "wiry and gnarled" as per Realmslore.

As is clear from my overview of Marketh and Malavon, many of the deep gnomes of Durdel Anatha have been enslaved by order of Revered Brother Poquelin, aka Belhifet. As if slavery itself wasn't bad enough, the above two lieutenants have cruelly cut out the eyes or tongues of many slaves who are busily gem-mining, gemcutting or tending to myco-hulk pods under the watchful eyes of fire salamanders and umber hulks.
The thing is, though, the raw hand dealt is soon to get worse because Malavon is currently busy manufacturing vibration-detecting umber hulks in order to pinpoint the location of the uncaptured deep gnomes and their secret camp (the innate MR and non-detection of the free deep gnomes blocking his ability to magically divine their location).
Upon arrival to Durdel Anatha, it is recommended to prioritize questing for the deep gnomes. This is because they offer info on Poquelin's lieutenants as well as access to merchants, crafting, resting and clerical services. New players may feel miffed if they only discover the secret camp after taking out two or three lieutenants... but that's the way the cookie often crumbles. In fact, some players might not find the camp at all. And that's good design. I like missables.
Oubliette: Tarnhelm
The first and second of three deep gnome quests is offered by Tarnelm. He is found in the oubliette which is accessed via a chain-driven lift located in the north of Durdel Anatha.

Tarnelm is understandably stand-offish and, indeed, downright rude. At this point some players may wish to aggro and slay the slaves, though this is inadvisable since the secret camp is forever cut off, and we forgo 478,000 quest experience points.
 |
| "Back off! Yer kneecaps are at me mercy!" |
Tarnelm gives us some info on Marketh, Ilmadia and Malavon. Then, he requests that we procure food supplies before the deep gnomes starve to death. The sprites of some slaves in the oubliette are prone and unconscious because the gnomes are overworked and malnourished. Image: Tarnhelm dialogue.
Slaying the fire salamanders near the lift is not acknowledged by Tarnelm, though a possible location for their origin is given:
Note how, for now, Tarnelm hesitates to reveal Beorn's location (the secret camp).
Rhinoceros Beetles
In spawns of three each, two notable monsters are getting about in the oubliette: rhinoceros beetles and umber hulks. The former are just tanks but the latter hit hard, hit fast, and their gaze attack inflicts Confusion on victims that fail their save vs. Spells, lack MR or are not mind-shielded (Chaotic Commands, Potion of Clarity).
 |
| Cf. BG2 umber hulks |
These monsters drop shells and hides which, as per yeti pelts, can be sold to Conlan in Kuldahar for 500 and 20 GP each. However, they are heavy at 85 and 25 lbs and such chump change is hardly going to impact our cash-flow at this stage of the campaign, so it's just not worth it. In addition, the shells may be crafted and then enchanted once we gain access to the secret camp.
Anyway, the food supplies are found in Marketh's Palace. We know this from the gnomish girl, Fengla, who gave us the key to the watchtower. She was bringing food out for the slaves.
Seth
Entry to Marketh's Palace is guarded by the halfling thug, Seth.
Bluffing Seth and gaining non-violent admission to the palace requires an Intelligence and Charisma score equal to or greater than 12. But we still need to answer a few questions, and knowledge of the Kraken Society comes from the Secret Societies tome found in the secret library of the yuan-ti monastery.

However, even the dumbest halfling in the world gets in easily:

A token but welcome example of race-based reactivity there.
Otherwise, we're ambushed by several thieves with triple backstab modifiers. Mirror Image, rated by me as the second best Infinity Engine spell, confers good protection against acute physical-based damage.

Note that no experience points are awarded for bluffing our way past Seth yet 2,000 XP is awarded for each thief slain. Hate.
Old Dorn's Palace

The first level of Old Dorn's Palace is just a garden [pic] which has as its focal point a statue of Marketh; the original statue of the dwarven founder of Dorn's Deep, simply named Dorn, having been torn down. We know nothing else about Dorn, though. There is no lore on him at all. Just a single reference to one "Creed Dorn" who was slain by elves in Kuldahar Pass but resurrected with the Staff of Moradin's Breath. In fact, we know little of the dwarves that lived here because there is no literary lore to explore, and the placeable descriptions are generic in nature.

Callard
Once cleared of one dozen red myconids and eight shriekers along with their summoned aggro (a mixed bag of blind minotaurs, boneguard skeletons and fire salamanders), we can speak to the deep gnome sculptor, Callard, and receive from him a portrait of Marketh painted by Flozem, in which the former slavelord is depicted as "an elegant statesman." Image: Callard dialogue.
The second level of the palace is where we want to be, and the kitchen is holding a bag of potatoes, not turnips, which is what we want for Tarnelm and the starving slaves.

The halls, however, are guarded by eight backstabbing thieves. As in the Seth encounter, the thieves are initially under the effects of stealth, but they should have been given an invisibility potion to quaff as that would have allowed for a second backstab attempt. This is just too easy, a doddle.
There are three bedchambers of note on this level: the suites of drow priestess, Ginafae, and of Marketh's two bodyguards, the brothers Fleezum & Flozem.
Fleezum & Flozem
Assuming we didn't slay his brother Fleezum, there is some class-based reactivity in regard to Flozem. Bard-only:

Thus, Flozem drops his arms & armor before taking his leave of Dorn's Deep in order to pursue a career as an artist (60,000 XP).
For two reasons, I doubt many players have seen this: First, because Bards are fifth wheels in IWD 1.06; Second, because Fleezum is likely to be encountered first, he will turn hostile after a short dialogue, and Flozem turns hostile because we killed Fleezum.
Girdle of Stromnos
Most notably, Flozem drops one of the best belts in the game: the Girdle of Stromnos. Other than potions of Strength, this is the only item in Icewind Dale that sets Strength to a superhuman score. Other items increase our Strength but they only add one <18 Strength point or bump us up one percentile point range.
That means that, if we have Strength 17 then our Strength is upped to 18, but, unlike BG and BG2 perma-Strength boosts which bypass percentile ranges, if we have 18/01-50 percentile Strength then our Strength is only upped to 18/51-75.
Which means, for these items, we need 18/00 Strength (a 1% chance to roll in chargen) in order for our Strength to be upped to 19. Now, 19 Strength only confers +1 dmg over 18/00 (+100 lbs carryweight and +5 lock-bashing power), right? But then we can stack, say, the Ring of Dwarven Bone, Ring of Strength and Large Shield of Strength for Strength 22 total (THAC0 +1 and dmg +3 over 18/00).
Order of equippage matters, too: since the girdle sets Strength then that means we must equip it first followed by the additive rings and shield. Plus, not everyone min-maxes: this belt turns any weakling into a hard-hitter. Thus, only one other belt can contend with the usefulness of Stromnos (+50% slashing resistance).
Fleezum & Flozem are worthy tanks to face off against in a duel though with power-gamed supertanker AC of -19 vs. slashing [pic of breakdown of sources], they're only going to hit on a crit (5% chance per swing).
 |
| Bathed-in-Blood (AC -1), dueling the brothers, Stromnos (Str 19) |
Ginafae
Ginafae is a little more complicated. She is a drow priestess, the sister of Malavon and currently - see here - imprisoned in the palace as Marketh's concubine.

We won't be able to release her until we acquire the Oil of Null Effect from Malavon's personal chambers. And, somewhat arbitrarily, we won't be able to free her if we slay Marketh.

Basically, Ginafae doesn't want us to kill Marketh, so, if we do kill him, she becomes upset and the dialogue option to free her simply does not present itself. So that means we have to let Marketh skedaddle if we want to rescue Ginafae; let Marketh, who is a slaver, torturer and murderer... go free?
Anyway, nullifying Malavon's contingencies by means of the oil releases Ginafae and results in 80,000 XP.

Marketh Location
The third level of the Marketh's palace is straightforward. There are no locks or traps at all and that's just pathetic for a den of thieves and assassins. Having taken out 20 thieves led by the halfling, Seth, we confront Marketh in his cosy chambers.

There are two ways to handle Marketh: slay him on the spot...

-- (flavor-based Paladin reactivity) -- Shock horror: The "Lord Chamberlain" is a cheater with ApR 3 and MR 80% --
... or allow him to leave after handing over his badge. It is also possible to demand he hand over his ApR +1 sword and AC 4 armor as well as his badge. This requires an Intelligence score equal to or greater than 13, though. Image: Marketh dialogue.
Force him to hand over the ring and he plays a dirty trick on us: the ring is cursed, and turns the foolish wearer to stone (petrification).
So much for Marketh. We now have three of the six badges.

The sack of potatoes are delivered to Tarnelm back at the oubliette (80,000 XP). Then, a second quest is given:


... in three waves of three:

The sack of potatoes are delivered to Tarnelm back at the oubliette (80,000 XP). Then, a second quest is given:

Umber Hulks Icewind Dale 1
Invisible proximity triggers are now activated in the northeast. Once crossed, Malavon's umber hulks spawn to simulate their burrowing into the oubliette...

... in three waves of three:

Pretty cool.
It is all but impossible for six 10th level party members to consistently make their save vs. Spell against such gaze spam. Thus, it is best to just send the tank in warded by Chaotic Commands or a Potion of Clarity.
Having delivered the potatoes and triggered the umber hulk attack, we can now take the resultant tunnels into the secret camp!
Deep Gnome Secret Camp

Beorn
The secret camp is a small area but it offers access to merchants, crafting, resting, lore and clerical services. Upon entry we are approached by Beorn, priest of Callarduran:

Really flat writing, there. In fact, I've got to say it: it's sleep-inducing twaddle on par with my blogposts.
Over at the temple dedicated to Callurduran, Beorn requests that we save ruby priest Guello from his enslavement in the mines. Image: Beorn dialogue.
This quest, which results in 80,000 XP and upgraded clerical services, will be covered in the next post. How are clerical services upgraded? Guello offers Resurrection whereas Beorn only offers Raise Dead. Whoop-dee-damn-doo.
Nym
The drow, Nym, is far more interesting than Beorn and Guello. Image: Nym dialogue.
cf. Larrel's of the time of Prosperity, of the time of the Betrayal, Norlinor and Evayne's journal. But no, we are unable to tell Larrel about Nym. By employing Chromatic Orb: Stun or Web, it is possible to immobilize and then slay Nym before he can teleport away (7,000 XP). Good luck bypassing his drow MR and saving throws, though.
cf. Nym's Exotic Goods (Nym's Store) and IWD2 Nym.
Dirty Llew
Dirty Llew, a duergar merchant and blacksmith, can craft the rhino beetle shield out of their reinforced exoskeletons. This costs 10,000 GP for males and 5,000 GP for females. It is all but useless with its paltry AC bonus of 1, but Nym can then enchant the shield for 30,000 GP (AC +3 and token fire resistance). Looking in the TLK file, it seems that Orrick was supposed to be able to enchant the shield to +4, but this option was omitted. Thus, the Red Knight's Shield and Great Shield +3 remain the best shields. Plus, they were free.

The hides of umber hulks may not be crafted but Umber Hulk Hide armor is sold, pre-made, and makes for the best Druid armor (AC 2). Cf. Ankheg Plate Mail craftable by Thunder Hammer Smithy.
Overall, the items offered by the merchants are uninteresting and underwhelming. How is Nym's arcane spell scroll selection, though? Well...
• Invisible Stalker: 6th circle conjuration that summons an invisible stalker for 2 hours. Borderline useless summon. Hits like a kitten. Conjure Earth, Fire and Water elementals are much stronger, and one circle lower.
• Lich Touch: 6th circle necromantic that bestows immunity to paralysis and inflicts on-touch 1d10 cold and paralysis on a failed save vs. Spell. This is quite powerful because the on-hit paralysis duration is one round per caster level for a maximum 14-round duration. That is long enough to slay the victim 20 times over.
• Stone to Flesh: 6th circle evocation that permanently [*] petrifies a single target on a failed save. This is powerful but we forego loot and kXP [*] Countered by Stone to Flesh.
• Monster Summoning IV: Wow. A 6th circle conjuration that summons 1-2 ghasts, yetis or ogres. Paralysis/disease of ghasts aside (33% chance), it's garbage.
• Prismatic Spray: 7th circle cone-shaped conjuration AoE that inflicts Blindness on <= 8 HD victims along with random effects that target different saving throws, such as 20, 40 and 80 HPs of damage, and petrification, insta-kill poison or "insanity". Strong, but cone-shaped spells are unwieldy in their targeting.
• Acid Storm: 7th circle evocation and Acid's answer to Fireball, Cone of Cold and Chain Lightning. Damage-over-time AoE that could be useful against already-webbed enemies. Duration scales, not damage. Good if you like to watch things slowly die.
• Monster Summoning VI: Wow. An 8th circle conjuration that summons 1-3 carrion crawlers or fire salamanders. The former don't even sport on-hit paralysis. Piss-poor. We never reach 8th circle spellcasting under the 1.06 cap, so this spell can only be cast twice from the two scrolls on sale.
• Mind Blank: Disappointing, caster-only 8th circle abjuration that wards against the gamut of mind-affecting negative status effects. The divine fifth circle Chaotic Commands is not just caster-only and grants the same benefits as Mind Blank for one turn per level of the caster, which, in a campaign like IWD, is just as good as the day-long MB. Again, can only be cast twice from the two scrolls on sale.
Again, not exactly blowing my hair back. Parties who want to prioritize arcane spell scroll acquisition are better off bee-lining to Malavon's Dome.
Finally, we may purchase from Nym two items for the restoration of Valestis' arboretum in the Severed Hand: birds and squirrels. We acquired the pure water from Wyrm's Tooth, and the seeds are found in Malavon's Dome.
Experience points: 192,840 kXP + 450,000 qXP = 642,840 total XP (4,432,296)
Killcount: 73 (1499)
Credit to the writer for making me laugh:
Welcome to Part XIV of my Icewind Dale walkthrough; this part covering the Great Forge cRPG dungeon and Maiden Ilmadia.

Acquiring Ilmadia's unicorn badge is pretty straightforward so this post will be a short read. There are no tricks, no traps and only a few dialogues. All we need to do is crash through the mines and then crash through the Great Forge in order to face off against the elven maiden.
The lead-up mines are a doddle for 10th level parties: there are only nine fire salamanders to slay. Nine! I mean, come on, are you for real? There were 23 in the entry-zone of Durdel Anatha!
Anyway, the salamanders are overseeing the deep gnome slaves as usual.

Guello
Guello is a deep gnome ruby priest from the secret camp under Durdel Anatha. He has been captured by umber hulks and enslaved by the fire salamander king, Shikata. Naturally, he requests that we free him.

There is an inconsistency afoot in that Beorn, another priest of the deep gnome camp, says Guello was captured by Seth, Marketh's halfling enforcer (citation).
Shikata, Salamander King
Anyway, Shikata the salamander king is found just to the north of Guello, overlooking the mines and guarding the entrance to Marketh's palace. His faction of fire salamanders are allied with Ilmadia.

See my Paladin's response? I like those kinds of responses. They keep me awake while reading the dialogue.
Anyway, we rip Shitkicka a new asshole and return to Guello, who is now free:
The reward for saving Guello is given back at the secret camp.
THE GREAT FORGE
Visually, the Great Forge is one of the most striking examples of area design on the Infinity Engine. Streams of lava cascade from cauldrons and there are huge vats of fire and water which are actually portals to the elemental planes - the source of the forge's power in the days of Dorn. Looking like a massive viking warship, a fire giant longboat is docked on the shore of a lake of lava, preparing for its assault on the drow city of Rilauven. It's epic stuff, and we have now delved to the depths of the Dale, having already adventured across its length and breadth.

All this zone needed was something like the Conan-esque track that plays in the Marching Mountains of ToB.
There are six rogue fire salamanders, eleven elementals and a nine-strong fire giant force led by Ilmadia Bariel, elven lieutenant of Poquelin. The party is confronted by a fire giant upon entry:
Responding provocatively results in the forge going on high alert: Ilmadia and her hulks turn hostile and we miss out on dialogue with Ilmadia completely. Not recommended.
At this point we can freely explore the forge and take out some sundry trash that is separate from the Ilmadian forces. This includes a faction of salamanders who have broken off from Shitkicka and Ilmadia as well as water, fire and earth elementals. In order to avoid being mobbed by such tanky foes, terrain-based tactics can be employed by virtue of height-mapping and overpass placement.

Ilmadia
Maiden Ilmadia is found in one of the ramshackle buildings overlooking the longboat and lava-lake. She is a fierce elven maiden who rules the Great Forge and her fire giants with an iron fist.
Ilmadia is currently engaged in dismantling the Great Forge in order to repurpose its metal towards the construction of an immense longboat which she intends to have her fire giants row down lava rapids and propel into a cavern wall, spilling lava down into the city of Rilauven and annihilating its drow, who, with the notable exception of Malavon and his faction, refused to ally with Poquelin.
Note the gender-flavor:

Not a bad idea, that. This is imaginative writing, too. A pity we couldn't have been part of such epicness.
A traitor to the Tel'Quessir, Ilmadia stole Seldarine artifacts from the Severed Hand [pic & pic] and also took two tomes: one on unicorns [pic] and the other on artifact enchanting [pic] (we learned that from Custhantos in the Severed Hand). With knowledge gained from the tomes, access to Saablic Tan's Red Wizard formula, and assistance from Malavon, Ilmadia intends to create black unicorns from native ones lured into capture by virtue of her virginity.

Not a bad idea, either. Ilmadia seems to have everything in order. It's a pity that we've come along to spoil it all, isn't it.
Pleased with our enthusiasm for her strategies, and also impressed by our slaying of Marketh and Malavon (if, indeed, we did so before encountering her), Ilmadia goes on:

How do we get to respond after all that, though?
And how does Ilmadia respond to either of those?
Weak. Flat. Low-energy writing to precipitate a battle. Thus, we're better off interrupting her halfway through with something like:

Ah, that's better.
The following race-based flavor remark also elicits the same response...
... a response that results in aggro. We now face off against Ilmadia and nine fire giants. The full force of her hulks zone in on us from afar, and that is good combat encounter design. No matter where we run to, they follow - hot on our heels and mad as hell.

Ilmadia is a fast, accurate and hard hitter. Her Haste + Storm Giant Strength insta-buff sort of helps with that, and against supertanker AC of -19 [pic] she lands hits 60% of the time at ApR 4½ for up to 28 damage per hit (56 max crit). In fact, only Belhifet contends with Ilmadia's output of physical-based damage dealing. How about the fire giants, though? Answer: 5% to-hit chance, max 25 dmg, ApR 1. In other words, pathetic. But there are nine of them [pic] so that somewhat makes up for their individual feebleness relative to our tanking prowess.
Of course, Ilmadia and her hulks are outgunned by parties consisting of six 10th level heroes. We have access to arcane spells, divine spells and all the buffs, debuffs, immobilizers and direct damage that such an expansive repertoire brings to the table. What does she have? Nothing but the mundane. What I mean is, perhaps Ilmadia should have been a Fighter/Mage or something? Then, she could at least have access to Mirror Image and Stoneskin.
Black Swan Armor
Ilmadia's Alamion wield is not particularly impressive, but she also drops the beautiful Black Swan armor which she stole from the Hand:

(AC 1, Cha +1, rainbow resistances).
Argent Shield
As well as the stalwart Argent Shield, also stolen from the Hand:
(3-point AC bonus & MR +25%).
Longbow +4: Hammer
In addition, two receptacles flanking Ilmadia hold items drawn from random pools. We have a 20% chance of netting what is, at least power-wise, the preeminent ranged weapon on the Infinity Engine:
• Long Bow +4: Hammer. Bow, THAC0 +5, piercing dmg +4, sets ApR to 4 and stacks with other ApR sources. cf. ApR write-up.
Static Two Handed Sword +4

We don't let that lazy-ass, generic lore description fool us:
• Static Two Handed Sword +4: Hammering. Great Sword, THAC0 +4, 1D10 +4 slashing, 25% on-hit MR-bypassing, no-save Stun, 50% +2d3 electrical.
The above is a step up from Hammering +1 and +2 not just in enchantment and +electrical, but also in its probability of inflicting Stun (+5%). It is supremely badass.
Also randomly itemized in the same pool as the Hammering +4 is the best +ApR melee weapon: Long Sword of Action +4. Large Sword, THAC0 +4, 1d8 +4 slashing, ApR +1, AC +1, 15% slashing resistance (lazy-ass, generic lore description).
Netting even just one of these weapons would be cause for celebration, for ApR and the hammering property are King in Icewind Dale.
Of course, we also net our fourth badge (225,000 XP).
Experience points: 183,500 kXP + 225,000 qXP = 408,500 total XP (4,840,796)
Killcount: 27 (1526)
Malavon's Dome
Welcome to Part XV of my Icewind Dale walkthrough; this part covering Malavon's Dome and Malavon Despana.
Malavon's base of operations is a glass-domed building located in the Artisan's District of Lower Dorn's Deep. This district was where the smiths, gemcutters and stonemasons lived and worked in the days of Dorn. In numbers of 18 and 16, the approach to the dome is guarded by blind minotaurs and an enemy Malavon is currently busy manufacturing in his dome: the umber hulk.
Note the Pale Justice location:

Malavon's Umber Hulks
At the risk of repeating myself, umber hulk gaze inflicts Confusion on victims that fail their save vs. Spells, lack MR or are not mind-shielded (Chaotic Commands, Mind Blank, Potion of Clarity). Why does Confusion suck so much? Because combat units so-affected either run around like idiots, stand there doing nothing, get themselves killed or - worst of all - turn on the party. Imagine that AC -19/ApR 10 tank of ours suddenly switching sides to wave their weapon at us? Hate.
Unlike with BG2 umber hulks, IWD umber hulks pulsate round-by-round Confusion even when they don't know we're there. Thus, under the effects of stealth or Invisibility we can still be adversely affected.
Newbies may like to scout the place out first - under the effects of stealth or Invisibility - disarming any petrification-inflicting unseeing eye traps (TDD 90/TRD 90) as they mark the location of the beasts. Veterans, however, will most likely prefer to just ward themselves with mindshield, aggro the beasts area-wide, and then employ their arcane AoE of choice to annihilate them in one big pack.
In the following example, we lure a mega-mob together, immobilize it with Web, and then drop Cloudkill. The result? One dozen insta-dead minotaurs. The dozen or so umber hulks were slain by virtue of Cloudkill's damage-over-time plume of poison.

Malavon Despana Battle
Having swept the streets clean of trash we now enter the dome to face off against the most formidable of Poquelin's lieutenants: the drow sorcerer, Malavon Despana (quick overview).

Myco-hulk Pods
The deep gnome slaves are tending to Malavon's mushroom colonies and myco-hulk pods (capsules in which the umber hulks are grown).

However, under the effect of Invisibility, we can see that Malavon is hiding behind a group of slaves in his throne room. Not only that, but he is also flanked by two iron golems and four umber hulks.

Malavon isn't much of a talker. This is the lengthiest dialogue we can get out of him, which doesn't really reveal much other than his lunacy. Image: Malavon dialogue.
It doesn't matter what we say or do: Malavon commands his golems to eject their poison-plumes, thereby insta-slaying the deep gnome slaves. He is then scripted to retreat to his throne, where he turns back around to face the party in order to unleash Fireball and Haste followed by max Magic Missile x4.

The iron golems can be problematic in that they sport immunity to magic, the elements, mind-affecting and immobilization (with the notable exception of on-hit hammering) as well as weapon enchantments of 2 points and lower. Not only that, but their fists hit for a max of 40 damage at 2 ApR.
Malavon's Simulacrum
Once cut down, we discover why Malavon was so squishy and useless: it was only a simulacrum.

(cf. Saablic in Upper Dorn's Deep.)
So begins phase two of the best battle in IWD:
Wisely pre-buffed with Stoneskin, Mirror Image and Globe of Invulnerability, the real Malavon opens proceedings by unleashing a custom AoE spell called Malavon's Corrosive Fog.
A highly mobile caster similar to Davaeorn BG1, Malavon then teleports about his dome (Dimension Door), blanketing three of its platforms with both Web and Cloudkill.
Next, he retires to his sanctum in order to summon meatshields by casting Monster Summoning VI followed by Conjure Earth Elemental x2.
Then, he casts another custom spell called Malavon's Rage x2 and eventually exhausts his repertoire after unleashing Flesh to Stone x3, Dire Charm x3, Finger of Death x2, Slow, Icelance, Cone of Cold and Magic Missile x4. That said, he's usually dead before he unleashes that last barrage (see below).
As is clear from his extensive repertoire, the battle against Malavon can be quite difficult. From its eastern to western wing, the dome is seething with noxious clouds, fogs and webs, potentially hindering party mobility.

There is no "easy kill" on Malavon and Web cannot be employed due to his GoI ward. His spells also cannot be disrupted due to GoI also warding against Magic Missile (which brings down Mirror Image quickly). Besides, as a high level drow he sports 86% MR and we have no way to nerf that. However, Hasted, the collective ApR of physical-based damage dealers usually does the trick: we just lock on and watch our warriors automatically pursue the drow about his dome, burning through his Stoneskin and Mirror Image as they go. In this way, the drow usually drops like a sack of potatoes.
Malavon's death yields a wholesome 50,000 kXP, and acquiring Malavon's Badge yields a whopping 337,500 qXP.
Disappointing omission. Notably, "command words" for the golems were omitted from the game. These could potentially have saved the slaves. With an Intelligence score equal to or greater than 16, it was supposed to be possible to utter "Kalam, Met" and command the golems to turn on Malavon; with a score in the range of 9-15, it was supposed to be possible to utter "Met" and temporarily shut down the golems; and with a score of less than 9, it was supposed to be possible to utter "Stam" and have the golems attack the party.
Poor design. In an attempt to save the slaves from being gassed, I tried crit-backstabbing Malavon's simulacrum, pre-dialogue. However, this locks up the game because the dialogue is still triggered but there is no Malavon. This greys out not just the portrait bar but also the left sidepanel, preventing even a reload [IWD1 Bug].
This means we have to alt-tab out of the game and shut it down through the Task Manager. Piss-poor design by Black Isle, right there. Seriously, what nonsense. There is no reason why an instant-slay could not have bypassed the dialogue and spawned his real form in the other chamber.
Anyway, we now have our fifth badge. Just one more to go.
Oil of Null Effect Location
With the oil of null effect and seeds found in the dome, we can free Ginafae and restore the arboretum in the Severed Hand (438,000 XP).
No fewer than 16 arcane spell scrolls are itemized in the Artisan's District and Malavon's Dome. The standouts are undoubtedly Tenser's Transformation and Mordenkainen's Sword.
The other spells are:
These last three spells can only be cast from a scroll in 1.06. In other words, once. They are more useful in IWD 1.42/HoW.
Remember that IWD is non-linear upon our arrival in Wyrm's Tooth. Thus, if we bee-line from there to Malavon's Dome, and then employ stealth or Invisibility within the dome, it is possible to loot Malavon's sanctum of all of these spells - unbeknownst to him - (except for Malavon's Rage, which can only be looted from his corpse) and potentially get more use out of them or put them to better use.
The only weapon of note is Pale Justice. This holy avenger is only itemized if there is a Paladin in the party upon entry to the Artisan's District. Pale Justice is covered in my holy avenger comparison.
- Experience points: 218,000 kXP + 337,500 qXP = 775,500 total XP (6,171,796)
- Killcount: 43 (1569)
Welcome to Part XVI of my Icewind Dale walkthrough; this part covering the Fallen Temple cRPG dungeon, Brother Perdiem, Ascension Cave and Brother Poquelin.
Fallen Temple

The sins of the flesh must be purged. Purged on an altar of fire!
With your blood and bones, we will build an empire of living pain!
Come! Come to the hallowed temple of suffering! - Brother Perdiem.
The Fallen Temple was known in the days of Dorn as the Temple of Berronar Truesilver. Long past its glory days, the temple is now teeming with undead led by the Ilmaterian priest, Brother Perdiem. However, Perdiem is not a willing lieutenant of Poquelin. He and his Illefarn congregation were infiltrated by Poquelin and then brainwashed by his charismatic sermons after Poquelin gained a deep understanding of Ilmater, and how to manipulate their tenets, by reading Perdiem's mind. As a result, the priests abandoned their monastery for Lower Dorn's Deep and left the sick and dying to their fate. Many died along the way, but those of the congregation that survived the arduous journey ended up right here, where those who resisted Poquelin's golden idol were turned into undead, and those who didn't were dominated and enthralled.
Brother Perdiem

Brother Perdiem is found standing by the Truesilver throne and protected by a force-field that makes him all but immortal. He has been dominated by Poquelin. Image: Brother Perdiem dialogue.
The only way to break their domination and enthrallment is to shatter the golden idol.
Problem is, there is an undead horde to contend with. We're up against two dozen boneguard skeletons, nine zombie lords and - worst of all - five greater mummies. The mummies are particularly problematic because they are able to cast their spells without limit (innate spells).
One of the spells they cast is the immobilizing 1-turn duration Symbol of Hopelessness aka Emotion: Hopelessness. MR and saves ward off its crippling effect, but, to my knowledge, only Chaotic Commands, Globe of Invulnerability and Pale Justice grant us guaranteed immunity to this nasty immobilizer.

Golden Idol
The golden idol is responsible for transforming the congregation into undead form. Guarded by a quartet of greater mummies, this nasty ornament is problematic as well in that it casts Finger of Death, Power Word: Kill and Flesh to Stone. FoD can be warded by a shield named Mystery of the Dead (a guaranteed find), PW:K is only deadly if we have fewer than 60 HPs, but FtS can only be warded by chance-based MR and saves. FoD and PW:K actually chunk our characters from the portrait bar, meaning we can't resurrect them. And if our petrified characters are hit while petrified then they are chunked into shards of stone and also gone for good. The idol sports 120 HPs and AC -7 so it's best to have our THAC0 and damage lords rush in and mob it.

Upon shattering the golden idol, any extant undead are instantly vanquished, area-wide, and the force-fields around the priests are dispelled. Perdiem is repentant and informative. Perdiem dialogue.
As are the other priests. Perdiem hands over his badge (150,000 XP), and now we have all six of them.
Now, what to do with them? Well, in this temple, there is an invisible barrier blocking access to a stairwell that leads to Ascension Cave and a showdown with Revered Brother Poquelin himself. The invisible barrier is removed by placing each of the badges into their corresponding slots seated at the foot of the spiral stairwell [pic].
Ascension Cave

Revered Brother Poquelin
We finally confront Revered Brother Poquelin in Ascension Cave. Oddly, he is surrounded by cats, bears, wolves and chickens. Along with his bloodied vestaments and lack of weapon, this is part of his Ilmaterian priesthood act.

... but he soon bathes the cave in fire and foes. First, though, the fully-voiced dialogue:

The conversation is quite lengthy, but here it is quoted in full:

He then goes on:

And on...

And on...

And on...

Crenshinibon Lore
Readers of R.A Salvatore's The Crystal Shard (1988) will know all about Crenshinibon: it is an evil, sentient power-obssessed artifact that dominates its possessor into doing its bidding, sort of like The One Ring in The Lord of the Rings. There are a couple of parallels that can be drawn between Salvatore's novel and Black Isle's game, such as Crenshinibon being employed in order to amass great armies with which to conquer the Dale, the heat of Crenshinibon causing avalanches, and the protagonists learning how to enter Cryshal Tirith, the crystalline tower created by Crenshinibon.
The events of the game take place in 1281 DR whereas those of the novel take place about 70 years later, in 1350-56 DR [1].
Revered Brother Poquelin turns hostile after the conversation ends. The animals drop dead as a result of Heavenly Inferno (a fancy name for Flame Strike) which Poquelin quickly follows up with Symbol of Pain, Creeping Doom and Fire Storm even as a motley mob of monsters close in from all around. The object is to simply beat up on Poquelin because the spells are unleashed, and the mobs summoned, without limit.
Poquelin sports AC -8, 250 HPs and Strength 20 fists that whale away at ApR 3. Being infernal he sports 100% fire resistance but also 50% cold and magic resistance. He is vulnerable to acid, electrical and all three forms of physical-based damage dealing (slashing, piercing and crushing/bludgeoning).

Once we have beaten up Poquelin enough - he is not yet vanquished - Crenshinibon auto-teleports everyone away to Easthaven, and the following FMV plays, narrated by the late, great David Ogden Stiers:
In the heat of the battle the twisted priest of Ilmater stumbled, gripping his chest as if mortally stricken.

A faint glow began to emanate from the crystal that hung around his neck. Suddenly, the entire cave was engulfed in an explosion of blinding light.

When the light finally died, the party discovered that they were no longer in the dark passages of Dorn's Deep. As they struggled to regain their bearings, they realized that they had been returned to the town of Easthaven. But this was not the sleepy fishing village they had left so long ago...

An enchantment had fallen over the town, encasing what remained of the shattered homes and buildings, in a prison of solid ice.

At the center of the destruction, upon the very spot where the Temple of Tempus once stood, rose a massive tower of crystal...

This gentleman's voice (David Ogden Stiers) could make even my blogposts sound good.
- Experience points: 209,000 kXP + 150,000 qXP = 359,000 total XP (5,755,296)
- Killcount: 49 (1618)
[1] Salvatore's Icewind Dale Trilogy is a good read; I recommend reading it if you haven't already. I don't get why Baldur's Gate fans have criticized Salvatore so much over the years. Sure, he isn't on par with Tolkien or Howard, but his writing remains superior to BioWare and Black Isle.
That is, of course, par for the course in novels vs. games, but I just think it's odd to see Baldur's Gate fans criticizing a successful novelist like Salvatore, and yet giving Infinity Engine writers a free pass.
It's funny how Baldur's Gate fans post enthusiastically about the romances of BG2, and about Irenicus, but when it comes to literature only James Joyce is good enough for them. Or so they'd like us to believe: judging by the literacy levels of members of the Baldur's Gate "community", they couldn't possibly have read Ulysses or Finnegans Wake.
Salvatore is a good writer, and the character of Drizzt did a lot to popularize D&D. Credit where it's due.
From the IWD credits:

I have commentated a little writing in story cRPGs. Before I wrote this retrospective, I said that only IWD can compete with the Realmslore flavor and quality of BG's writing (as exemplified in its critical path and Durlag's Tower)...
... But I think I may have to take that back: while some of IWD's writing is excellent (Larrel), it is also uneven, at times flat, and reads as much more modern than BG1 whose prose is rarely flat or clinical and employs a rich, late-80s Realmslore flavor. Still, IWD's prose is better than the twaddle found in BG2.
Easthaven Revisited

Having explored the length, breadth and depth of the Dale, and vanquished tons of evil along the way (no fewer than 1,600 foes), we finally come full-circle to arrive back in the town of Easthaven, where our adventures began.
Poquelin wasn't bluffing back in Ascension Cave: In our absence, and without Hrothgar or any defence force, Easthaven has been decimated by Belhifet's army. For comparison purposes I have placed pics of both versions of Easthaven, side-by-side:

As can be seen above, most of the buildings have been destroyed or frozen over. In fact, the entire town is ice-encased and enveloped by shadow. Even the Temple of Tempus has been enveloped by the crystalline tower known as Cryshal-Tirith. This is all due to the sentient artifact known as Crenshinibon. Poquelin/Belhifet really just serve the will of Crenshinibon, which artifact is the true source of the evil plaguing the Dale.
Amounting to naught but mooks at this point in the campaign, there are eight hostile cyclopses lumbering about town. Once these meatheads have been dealt with, we can find and free the people of Easthaven who are locked up in make-shift slave pens in the center of town.

Everard
One of the prisoners is Everard, priest of Tempus [recap]. He informs us that Poquelin is within the tower, attempting to open Jerrod's Stone, a portal to Baator aka Hell. He also reveals how to get into the tower.

(280,000 XP.)
Jhonen
Opening the tower (breaking its glyphs) is simply a matter of learning the ritual required to get into it. Then, a transitional cursor indicates that we may enter. So yeah, the tower is now accessible but there is one important thing to do before heading inside: we should speak to Jhonin in order to take advantage of the far-reaching reactivity which I have already covered. He is standing by the shore of the icy lake, where Elisia stood.
Restored Blade of Aihonen
This results in receiving the Restored Blade of Aihonen along with a second lot of 280,000 XP.

Enchantment-wise, RBoA is the best weapon in the game after Pale Justice. However, providing their enchantments are of +3 and above, ApR weapons are almost always superior to both, and weapons sporting on-hit Stun are superior, too.
Cryshal Tirith, Crystalline Tower

There are five small levels to Cryshal-Tirith, and getting to Belhifet doesn't take long:
Comparison shot of the Temple of Tempus and Cryshal-Tirith entry chambers:

It is in this entry chamber that Everard catches up with us.

It is now a matter of simply ascending the tower while Everard searches for Jerrod's Stone.
Pomab Ak'azmhir
The only thing standing in our way is the pompous Pomab Ak'azmhir, formerly the proprietor of the emporium in Easthaven. Back in the prologue this self-important shopkeeper, whose lack of conscience and competence reminds me of Akar Kessel in Salvatore's The Crystal Shard (1988), claimed to be:
"The Third Cousin of the Pasha of Calimshan, Royal Diplomatic Envoy of Calimshan and Appointed Overseer of the Northern Caravan Routes".
Now, he considers himself Master of Cryshal-Tirith and Appointed Ruler of Easthaven itself. Image: Akar Kessel dialogue.
"Pasha" is probably also a nod to the character of Pasha Pook in Salvatore's The Halfling's Gem (1990).
False Pomab
Once battle gets underway, Pomab employs powerful illusions known as projected images in order to elude us. This can be a chaotic and, indeed, quite an amusing or annoying combat encounter. Technically, we need to find the True Pomab among the clones and hit him repeatedly in order to dispel the illusions or False Pomabs. The True Pomab can be differentiated by watching the feedback window for "Pomab" and "False Pomab". But really, we can just Haste our physical-based damage dealers, attack whatever we see, and watch as the collective ApR eventually hits the real Pomab.
The cryshal sentries are not immortal: as per trolls, they can be knocked down but not vanquished utterly unless they were immobilized (or phased) at the point of their being knocked down. Again, on-hit hammering, ftw.
 |
| Cf. Tarnished Sentries of Durdel Anatha. |
Crenshinibon Location
The final chamber before Belhifet contains the unattainable Crenshinibon and a magical mirror. These objects are drawn from Salvatore's The Crystal Shard (1988).

The magical mirror is actually a door that teleports us to the final battle, staged beneath the tower.
Jerrod's Stone

Jerrod's Stone seals the portal to Baator. It was created when the legendary barbarian shaman, Jerrod, sacrificed himself in order to save the Dale against Arakon's devil-horde [cf. Everard lore-dump].
Not known for originality, Poquelin wants to reopen the portal and call forth a horde of devils once more. His ultimate goal? Conquering the Dale and adding the souls of the dead to his army.

Arbitrarily, there are three separate dialogue threads that don't feed into one another. This is the best thread because it references Crenshinibon:

Regardless of the thread chosen, however, Poquelin throws open the portal in preparation for the baatezu invasion:

However, Everard appears on the staircase and bravely confronts Poquelin:

Awestruck by the sight of Jerrod's Stone, the old warpriest approaches the portal to the Hells and sacrifices himself in order to reseal it:

Poquelin tries to stop him, but cannot.
Belhifet

Annoyed by the delay caused by the sealed portal, and no longer masquerading as an Ilmaterian priest, Poquelin's true identity becomes apparent --

-- a huge, horned baatezu that dual-wields great falchions - Belhifet.
 |
| cf. Marilith Tanar'ri, Yxunomei [pic]. |
Upon transformation, this final boss unleashes an area-wide dispel magic even as two iron golems close in from the sides to eject their poison-plumes. Thus, it is useless to buff the party before entering the chamber. Moreover, the area is laced with non-disarmable dispel magic traps which makes post-dialogue buffs more difficult to maintain.
Belhifet can only be hit by +3 weapons and greater, sports 25% resistance vs. physical-based damage (and 50% vs. missile), and also sports 50% cold resistance, 50% MR and fire immunity. Moreover, he is the only enemy immune to the on-hit Stun of the hammering property.
How to Kill Belhifet
Belhifet is a highly mobile juggernaut capable of teleporting about the chamber - at-will - all the while unleashing Fireball, Fire Storm and infernal conveyance (Flame Strike). He also summons 1-5 shadows every now and again. Melee-wise, Belhifet is also destructive: confident in his 350 HPs and AC -12, he frequently squares up to dual-wield his 1d10 +5 greatswords - with Strength 25 - at 3 ApR. Finally, as a THAC0 Lord Belhifet is able to hit Armor Class -19 with a 70% chance.
All that being said, the battle is not difficult for melee-heavy parties as outlined in Part I. Everyone is going to have at least one, but more likely two or three, physical-based damage dealers. If not, they would have struggled to get to this point and will struggle all the more now. Haste is not required: the collective ApR of three such combat units wielding weapons equal to or greater than +3 enchantment is what's most important. If AC is optimized, it is doubtful that a healbot is even needed on standby. While fire resistance is not necessary for veterans, it's not something to scoff at due to Belhifet's infernal repertoire.
 |
| Note the traps. |
Once vanquished, a final Stiers-narrated FMV plays; the story revealed to have been told by Belhifet.
Defeated at last, the stricken demon fell with a roar that shook the walls of the underground chamber.

But the heroes' moment of victory was short-lived, for as the form of their vanquished enemy lay broken upon the floor, so too was the power of the shard broken.

The companions soon found themselves scrambling to escape as the fortress began to collapse around them.

No sooner had they emerged from the secret threshold, than the entire tower came crashing down, shattering into a million pieces.

Triumphant, the party of adventurers stood among the ruins, basking in the glory - a final victory.
And as the first rays of dawn glittered off the fragments of the crystalline tower, a light snow began to fall over the once again peaceful town of Easthaven.

And so ends the final chapter of my tale, with the forces of good triumphant over the forces of evil. It wasn't long before the destroyed town of Easthaven was rebuilt, and a new temple dedicated to Tempus was erected on the site of the buried portal. As for the demon - Belhifet - defeated on the prime, HE WAS BANISHED, BACK TO THE DEPTHS OF HELL, WHERE HE LANGUISHED FOR A PERIOD OF A HUNDRED YEARS, TORMENTED BY THE MEMORY OF HIS MISTAKES, AND WAITING FOR THE DAY HE WOULD RETURN TO FAERUN AND EXACT HIS REVENGE. MUHAHAHAHA!!! YES! YEEEESSSS!!!

So ends IWD. Party reached 13th level. I cap off my 17-part retrospective with this image, perhaps the most famous of IWD's art assets...
|
| Great Oak of Kuldahar by Kevin Llewellyn |
... and this AR: perhaps the most iconic Infinity Engine AR after Candlekeep and Durlag's Tower:
 |
| Kuldahar |
When it comes to 2d backdrops, only Troika's Temple of Elemental Evil competes with Icewind Dale. [see here]. But when it comes to spritework, both Diablo II and ToEE beat everything handsdown:

Of course, nothing beats IWD's portraits:
So concludes this walkthrough.
- Experience points: 94,000 kXP + 560,000 qXP = 654,000 total XP (6,409,296)
- Killcount: 16 (1634)
Onwards! -- To Icewind Dale 2!
***
Wonderful analysis, I must admit that I was one of those people that called IWD a boring hack'n'slash back in the day. With time I began to appreciate this title. The only thing that I wish was used more in this campaign is the opposing party encounters, I find the monster enemies a bit bland after several packs. This would make me want to re-play the game a bit more. Having the opportunity to experience IWD in multiplayer I have to say that this is the best IE game for this purpose. BG1 has a great potential as well, but I was unable to finish it in MP. BG2 has too much dialogue (people get bored), and IWD2 is unfortunately impossible to finish in MP (the loading times get longer and longer with the campaign progression until a certain point the game just fails to load).
ReplyDeleteMy two cents as to this write-up. In the beginning there's a typo:
"Hi there! My name's Lilura1 and welcome to the first part of my in-depth walkkthoug" - I would like to apologize for the joke, but it reads like you were choking ;)
Haste spell does not inflict fatigue in the original BG1 - that was added in IWD actually.
Thanks for the corrections, Tuth.
Delete"opposing party encounters" -- I recently backdated a post on rival adventuring parties:
https://lilura1.blogspot.com/2019/10/Baldurs-Gate-Retrospective-Review-Rival-Adventuring-Parties-Level-Scaling.html
However, there isn't much commentary at this point.